
Managed Texting: Setting Up and Texting Your Contacts
What is Managed Texting?
Managed Texting gives your business its own dedicated texting number, so you can text your Contacts and receive their replies right inside the Portal. The platform buys the number for you, registers your business with the phone carriers, and bills everything to your PortalBank balance. You do not need a separate texting provider, account or API keys.
Once your number is approved by the carriers, you and your team text Contacts from the SMS Inbox, and replies arrive in the same conversation.
IMPORTANT: Only the account's Super Admin can set up Managed Texting, follow its status and manage the number. Other Admins can use the SMS Inbox once the number is live, but they cannot set up or change Managed Texting.
Texting is available to US phone numbers only.
Toll-free number or local number?
During setup you choose one of two kinds of number. Both send and receive texts the same way once approved; they differ in how carriers review them and in what they cost.
- Toll-free number (Recommended): the fastest route to texting. Carriers run one verification, which typically takes a few business days, and there are no registration fees.
- Local number: a number with your local area code, best for high message volume. Carriers review it in two stages, Business identity and then Messaging purpose, so setup asks a few more questions, including two sample messages. A local number has a one-time registration fee and a monthly messaging fee on top of the number itself.
If a local number's review is taking a while, you can switch to the toll-free lane from the Managed Texting status while the review is still running. Your number and balance carry over, and you do not pay again.
Before you start
Have these ready. Carriers check them, so they must match your business exactly.
- Your legal business name, country and business registration number (for a US business, your EIN).
- Your business address and website.
- For a local number: the links to your website's privacy policy and terms and conditions pages, and a named person at your business who authorizes the registration.
- Enough in your PortalBank balance to cover the opening costs. The setup shows you the exact amount, and you can add funds on the spot.
How do I set up Managed Texting?
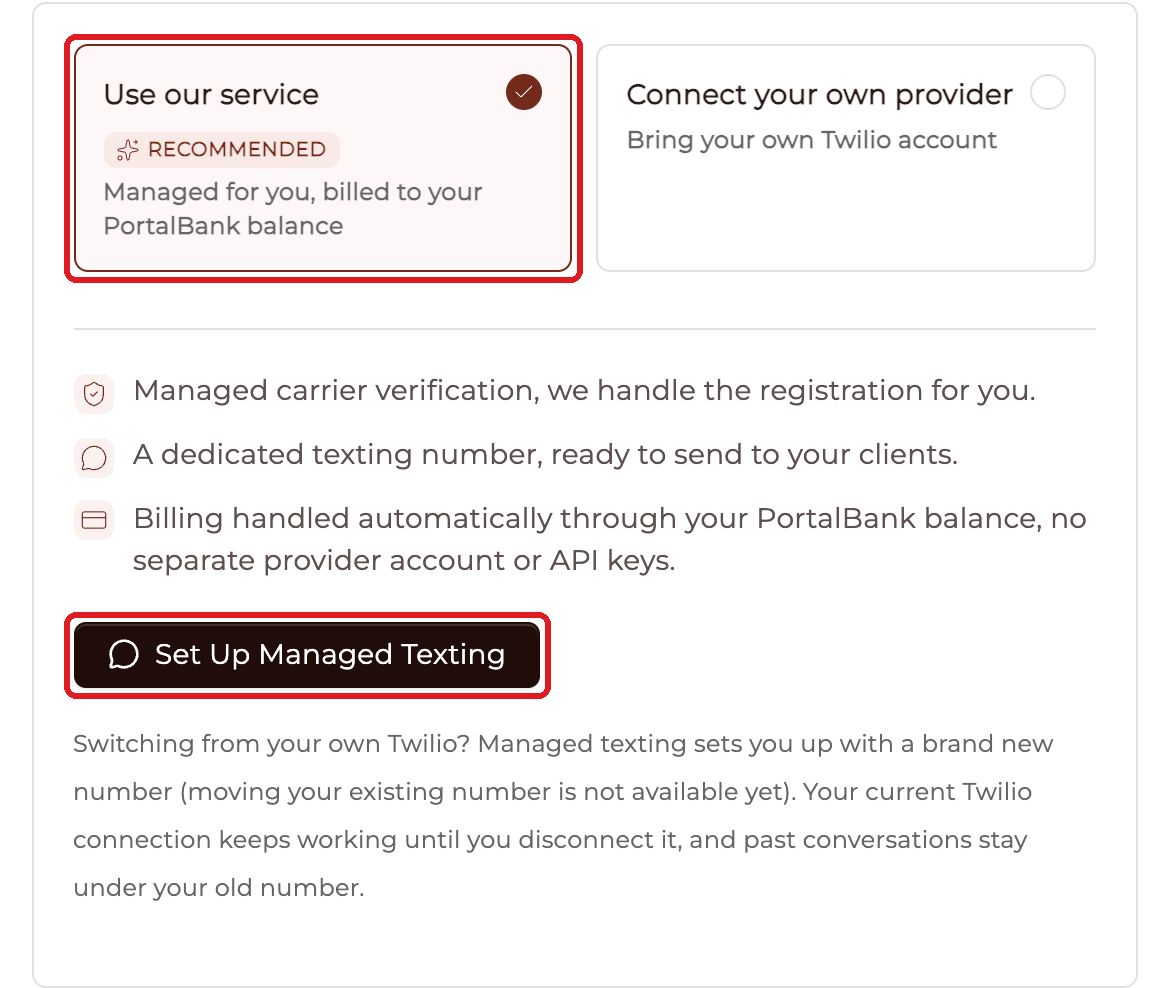
Navigate to Flyout Menu > Integrations and find the Text Messaging row. Choose Use our service, then click Set Up Managed Texting. Setup opens in a panel on the right side of the page.
Setup walks you through these steps. Use Next and Back to move between them.
1. Your Business
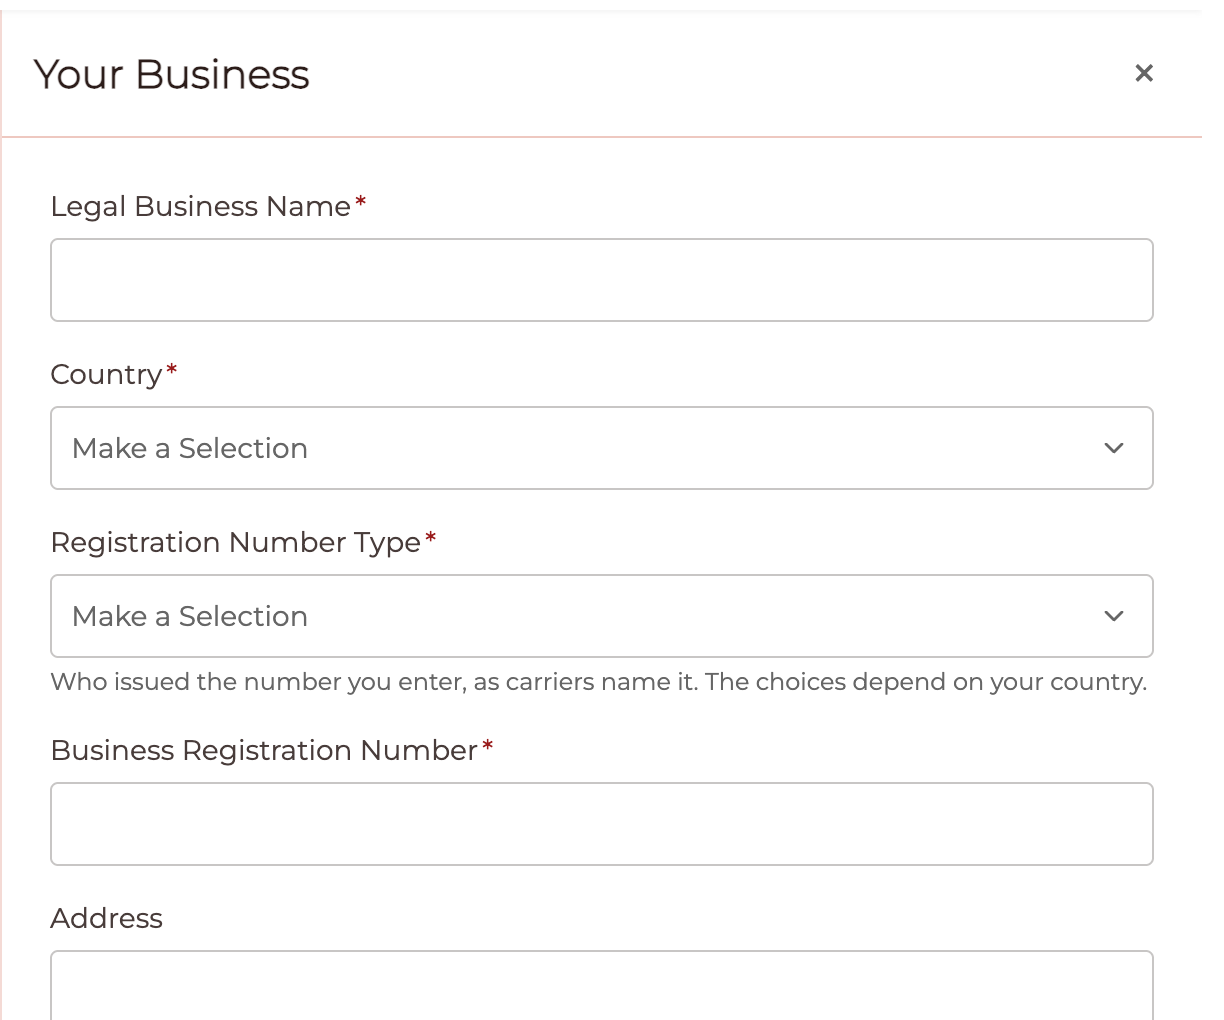
Enter your Legal Business Name, Country, Registration Number Type and Business Registration Number, then your address and the other business details. The Registration Number Type list depends on the country you chose. These answers are saved once and reused for everything that follows.
2. Your Number Type
Choose Toll-free number or Local number.
3. Your Messaging
Tell carriers what you will text about. Carriers approve what they can clearly see, so be specific.
- What will you text your contacts about? Tick every topic that applies, such as appointment reminders or billing and payments.
- What Your Contacts Agree To: the consent sentence your Contacts see when they agree to receive texts. You write only the middle of the sentence. Your business name at the start and the required lines at the end (message frequency, message and data rates, Reply HELP for help, Reply STOP to unsubscribe) are added for you.
- About how many messages will you send per day?
- In a sentence, what is this texting for?
- A sample message: an example of a real text you will send.
- How your contacts agree to be texted: for example on a form on your website, verbally, or by texting you first. Choose the way you actually collect agreement.
For a local number, this step also asks:
- A second sample message. Carriers ask for two different examples of what you will send. Write one that differs from the first, such as a reply to a customer question.
- The authorized representative: a named person at your business, their job title, role and phone number.
- Where Your Business Operates and What Your Messages Are For.
- The Content Declarations: Will Your Messages Contain Links? and Will Your Messages Contain Phone Numbers? Answer Yes if any message may include one, including your own phone number.
- The Company and Policy Pages: your industry, company type (a publicly traded company also gives its stock exchange and ticker symbol), and the full addresses of your privacy policy and terms and conditions pages, starting with https://.
For a toll-free number, this step asks for your business type instead.
4. Pick Your Number
Search the available numbers and pick yours. For a toll-free number you can search by digits or a word; for a local number, search by area code. The monthly price shown next to each number is your final price for that number.
5. Certification
Read the certification statement. It sums up what you have told carriers about your business and your messaging, and it is filed with the carriers as your own statement. Tick the box and click Certify and Continue. If anything the statement needs is missing, the panel tells you which step to go back to.
6. Fund Your Balance
This step shows the amount Required to start and your current PortalBank balance. If your balance is short, click Add funds to top it up. When your balance covers the opening costs, click Start setup.
7. Setup In Progress
The platform now secures your number and sends your filing to the carriers in the background. You can close the panel. You are notified by email when your number is live.
What happens during carrier review?
After setup, carriers review your details. A toll-free number has one verification stage; a local number has a Business identity stage and a Messaging purpose stage. Review typically takes a few business days.
- Sending is locked until carriers approve your number, and there is no way to send early. Incoming texts to your number already work.
- Follow progress from the status card on the Text Messaging row of the Integrations page. Click View Status to see each stage and the details you submitted.
- When carriers approve, the card turns green and shows your number. You can start texting.
If the carriers decline, the status shows their reason and a form to correct your details. Click Save & Resubmit. Resubmitting a toll-free filing is free. Resubmitting a declined local stage has a resubmission fee, which is shown before anything is charged.
To learn what each status means, see Managed Texting: Status on the Integrations Page.
What does "Carrier Filing On Hold" mean?
Your number is secured, but your filing with the carriers is paused because it needs answers that only you can give. This can happen, for example, when a carrier asks you to review your messaging details, or when a newer requirement was added after you started. Your number and balance are untouched while the filing is on hold.
You see an amber On Hold card on the Text Messaging row, and you receive a Carrier Filing On Hold email.
To resume the filing:
- Navigate to Flyout Menu > Integrations and click View Status on the Text Messaging row, or click the link in the email.
- The panel lists what the filing is waiting for. Answer each question. The fields open with your current details filled in.
- Click Resume Filing. Your answers are saved first.
- If your saved details changed, the panel shows the certification statement again. Read it, tick the box and certify. If your current certification still covers everything, this step is skipped.
- The filing is sent and the status moves to Verification in review.
If the panel says everything is already in place, just click Resume Filing.
How much does it cost?
Every charge comes out of your PortalBank balance, so there are no separate bills. Prices are always shown in the Portal before you commit, and the current prices can change, so check them there rather than relying on a figure from elsewhere.
- Your number, monthly: shown next to each number when you pick it. A local number and a toll-free number have different monthly prices.
- Outgoing messages: charged per segment. A short text is one segment; a longer text is split into several segments, and each one is charged. The SMS Inbox shows the character and segment count as you type.
- Incoming messages: each incoming message is charged, and an incoming message with a picture or other media has its own price.
- Local numbers only: a one-time registration fee, a monthly fee for the messaging registration, and a resubmission fee if carriers decline a stage and you resubmit.
- To get started: the Fund Your Balance step shows the opening amount, which covers your first month and any one-time fee.
Once your number is live, click View Status and then View usage & spend to see your current unit prices, your spend by day and by month, and an itemized ledger you can export.
Keep your balance topped up
In the live status panel, the Balance protection section lets you:
- Set Warn me when my balance falls below to get an email when your balance runs low. Leave it empty to use the default shown.
- Turn on Enable auto-recharge, then set When my balance falls below and Top up by to top up automatically from your saved card.
If your balance cannot cover the monthly charge for your number, sending is paused. Incoming texts still arrive. Add funds and texting restores instantly. If the charge stays unpaid, you receive reminders, and after the date in those emails the number is permanently released.
How do I text a Contact?
Once your number is live, text your Contacts from the SMS Inbox.
- Open the Contact's record in the CRM and click the Send SMS icon at the top, or open the Contact's SMS tab.
- The conversation opens in the SMS Inbox. Type your message in the box at the bottom. The character and segment count shows below it.
- Click Send.
Replies arrive in the same conversation, and Admins with access to the SMS Inbox are notified of new messages. Opening a conversation from the notification or from the Contact's timeline takes you straight to it.
When a text comes in from a number that is not on any Contact, you can Add Contact to create one, or Link to contact to attach the conversation to an existing Contact.
Who can use the SMS Inbox? The Super Admin and Admins can by default. You can give other Staff access through the SMS Inbox permission.
Which phone number does a text go to? On the Integrations page, the Text Message Recipient Number setting chooses which phone number on a Contact record your texts are addressed to. A Contact with no SMS Phone is texted at their Primary Phone. A reply inside an existing conversation always goes back to the number that conversation is with.
Why was my message not sent?
If a text cannot go out, the SMS Inbox tells you why above the message box. Common reasons:
- Sending is locked until your SMS registration is approved and active. Wait for carrier approval.
- This contact has opted out of text messages. The Contact replied STOP. You cannot text them unless they opt back in.
- Your balance can not cover this message. Add funds to your PortalBank balance.
- Only US phone numbers can receive texts.
- Your daily sending limit or daily sending capacity has been reached. Sending resumes the next day.
Can I turn texting off?
Yes. In the live status panel, click Turn off Managed SMS and confirm. Sending stops immediately. You can still receive messages, and the monthly number charge continues. The confirmation tells you the date your number would be released, or that it is kept indefinitely. Click Restore Managed SMS to turn sending back on. Once a number has been released, texting again means starting setup from the beginning.