
OFFICE: Accumulating Generator
What is an Accumulating Generator?
An Accumulating Generator is a mechanism that you can configure to generate an Invoice for your Client(s) on a regular schedule (such as every month). It is basically a "running tab" for your Client. You can add Items to the Accumulating Generator as you work. When the Generator is triggered by the configured schedule it takes all the Items that were added to the Generator and generates an Invoice. The Generator then clears all the Items that were on that Invoice and is "reset" for you to "accumulate" additional Items by adding them to the Generator as needed while you work.
The huge advantage is that you, your team, and even Freelancers can add Items to the appropriate Accumulating Generator. Then at the end of every month (or whatever time interval you set), the Invoices are automatically generated and no work gets left behind or unbilled. No one has to remember to create the Invoices and everything gets counted.
You can also create a Dynamic Accumulating Invoice Generator. Instead of having to create an Accumulating Invoice Generator for each Client, you can assign it via Automations or a Kickoff Form.
Here's an example of an Accumulating Generator in action:
Bob is a Client of yours and you are maintaining a website for them. This means that you do periodic backups, update product listings on his online store, and do other general maintenance.
Bob has requested for you to bill him every month for the work performed. Some months may be busier than others, so you need a mechanism to track this billing each month, then start over fresh for the following month.
Using an Accumulated Generator you can add any work you have completed throughout the month. It basically serves as a 'log' of their completed items. At the end of the month, the Accumulating Generator automatically generates an Invoice for the Items currently added, then wipes it clean so that it's empty and ready to go for the next month.
How do I create an Accumulating Generator?
To get started, navigate to Office > Invoices.

Then, hover your cursor over Generators in the top navigation menu bar and select Accumulating.

Click the +Add Accumulating Generator button.

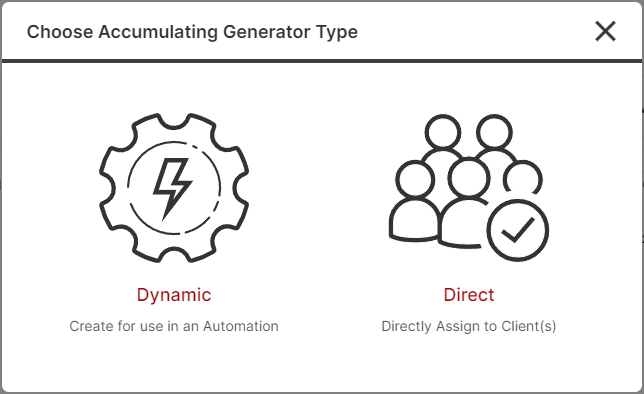
Direct Accumulating Generator
Creating a Direct Accumulating Invoice Generator is very similar to creating an Invoice with a few key differences.
CLICK HERE to learn about creating an Invoice
Assign to Client(s) and add Generator Title. If you'd like to create a duplicate for more than one Client click the box.
 Add Description / Internal Notes to Accumulating Generator Details if desired. The information in this field is for internal use only. The Client(s) will never see this information.
 Add Items, Discounts, and/or Taxes if needed. The Summary will display the information you add.

Accumulating Settings trigger the actions you need.

Generate Invoice As: Choose from the dropdown menu how the Invoice will be generated when the Generator is triggered. You can choose Open (will immediately be assigned to the Client), or Draft.
End Invoice Generation: Set your end condition for the Accumulating Generator.
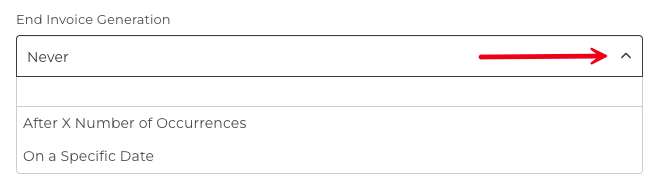
By default, an Accumulating Generator will continue producing Invoices indefinitely. You can now set an end condition so the generator automatically stops and marks itself as Completed once the condition is met. This gives you precise control over how long a billing cycle runs without needing to manually intervene.
Never: The generator runs indefinitely until manually paused or deleted.
After X Number of Occurrences: The generator will stop after producing the specified number of Invoices. Enter the total number of Invoices you want generated.
On a Specific Date: The generator will stop after the cron run on or after the date you select. The final Invoice for that date is still generated before the generator is marked Completed.
What happens when the end condition is reached?
When a generator hits its end condition - either the occurrence count is reached or the end date has passed, it is automatically set to Completed status. No further Invoices will be generated.
A Completed generator cannot be resumed. It will remain visible in your generator list but will no longer run.
IMPORTANT: Once you apply a generator to a Client and it reaches the Completed status, it cannot be reactivated. If you need it to run again, you will need to create a new instance of the generator.
Payment Settings
Payment Settings is where you can add your Currency, allow Partial Payments, disable Online Payments altogether or add a Third Party link. If you are using an integrated Gateway you do not tick the third-party link option but instead you select your gateway in the Available Gateway(s) section.

If you choose to set the Generator as Open you will also have the additional option of AutoPay.

When enabled, invoices generated by the generator will be automatically charged to the client's authorized payment method, no manual action will be required.
CLICK HERE to learn about the Authorized payments/AutoPay.
Custom Fields
Customize what appears inside the Custom Fields section. Tax numbers, addresses, phone numbers, and more can be added here.

Assign Automations: Trigger Automations for when the Invoice is Generated and/or when the Invoice is Paid.

Relative Due Date: Set a Due Date for the Invoice to be paid which will be determined based on the date it is generated.
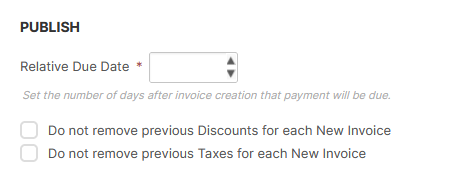
You can also choose to not remove any Discounts or Taxes that were applied to the previous Invoice. This will start the new period with the Discounts or Taxes still in place, instead of wiping everything clean. (This only applies to standalone Discounts and Taxes, and ones that were applied to individual items.)
Once you are finished creating your Accumulating Generator, you can either Activate or Save as Draft.
Active: The Accumulating Generator will be active and will generate Invoices as configured.
Save as Draft: It will save the creation process for you to complete later and will not generate Invoices.
 You can set a Minimum Amount in order for the Invoice to be generated. The Invoice will only be created if this minimum is met, otherwise, the Items will be carried over to the next generation cycle.
For example, if you set the Minimum amount to 50.00 and at the end of the generation cycle the amount is 45.00, the Invoice will not generate. Instead, the new Accumulating Generator cycle will begin with those same Items totaling 45.00.
In Communication Settings toggle the switch on to send the Client(s) an Email Notification when a generated Invoice is created as Open.

Dynamic Accumulating Generator
Creating a Dynamic Accumulating Generator is very similar to creating a Direct Accumulating Generator with two key differences.
You are creating a "framework" that can be applied to different Clients so you don't assign it to a Client. Instead, the assignment will be made via automation. More details are in the following section.
For the First Creation Date instead of specifying a specific date, you can choose between a Relative number of days or a particular day of the month.

How do I assign a Dynamic Accumulating Generator?
There are several ways you can trigger a Dynamic Accumulating Invoice Generator for a Client.
CRM Options Menu
You can assign an Accumulating Invoice Generator via a Client's CRM Options Menu.
Navigate to CRM > Contacts.

Click the Options menu button of the Contact you would like to assign the Generator to and select Accumulating Generator.

A modal will appear in which you can make your selection.

While Creating/Editing a Contact
While creating a new Contact (via manually adding or Kickoff Form), or editing a Contact you can assign them a Dynamic Accumulating Invoice Generator in the process.
For manually adding a Contact navigate to CRM > Contacts and click the +Add Contact button.

Select the Accumulating Invoice Generator you would like to assign from the dropdown menu.
This option will appear once you've set the Contact's Role as a Client.
 CLICK HERE to learn about Creating a Contact.
Via Kickoff Form
To add via a Kickoff Form navigate to Forms and click the +Create Form button. Select Kickoff Form when prompted.

Set the Role of the Contact as a Client.
You can then choose the Accumulating Invoice Generator from the dropdown menu.

CLICK HERE to learn about Kickoff Forms.
Via No-Code Automations
In most areas of the platform, you assign a Dynamic Accumulating Generator to a Client using the Accumulating Generator Automation.
 For example, while creating a Project, you can add this Automation to trigger once the Project is Complete.
CLICK HERE to learn about Automations.
How do I manage an Accumulating Invoice Generator?
Navigate to Office > Invoices > Generators > Accumulating and click the Options menu button beside the Accumulating Invoice Generator that you would like to manage.
 Edit: Change any information within the Accumulating Generator.
Manage Automations: Click the switcher to set Automations to trigger when the invoice is Generated.

Alternatively, you can also switch to set Automations to trigger when the invoice is Paid.

Duplicate: Make a copy of the Accumulating Generator.
Pause: This will stop the generation of new Invoices. You can choose to Resume it any time and will enter a Resume Date when executed.
Delete: This will remove the Accumulating Generator from the platform. This action cannot be undone. It is recommended to archive Accumulating Generator for record-keeping.
Archive: Make the Accumulating Generator Inactive. It will be relocated to Office > Payments > Archive tab. From here, you can choose to View, Restore, or Delete.
Each new generated Invoice will be visible to the Client in their Portal under Office > Invoices. They will be able to able to view and pay it just like a normal Invoice.
How do I track progress in the Accumulating Generators list?
The Accumulating Generators list shows additional information beneath each generator's status to help you track end condition progress at a glance:

After X Number of Occurrences: A counter displays how many Invoices have been generated out of the total, for example 4 out of 10. This updates with each invoice that is generated.
On a Specific Date: The list shows Until [date] so you can see when the generator is scheduled to stop.
Never: No secondary label is shown, it will only show as Active or Completed.
Generators that have reached their end condition display a Completed status and show --- in the Next Creation Date column.
You can filter the list by status Draft/Active/Activated/Completed
Best Practices
Setting end conditions on your Accumulating Generators keeps your billing clean and predictable.
- Use After X Occurrences for fixed-term billing arrangements such as payment plans or service packages with a set number of instalments
- Use On a Specific Date when a contract or subscription has a known expiry date, regardless of how many Invoices are generated in that time
- Use Never only for truly ongoing billing with no planned end, such as monthly retainers with no fixed term
- Review the Accumulating Generators list regularly and filter by Completed to keep your list tidy and confirm expected generators have stopped as planned
- If you anticipate needing to restart a generator, go to the three dots option menu and select Duplicate. You can then edit your new generator and make the appropriate changed before setting as Active.
TIP: Not sure which option to use? If your Client is on a 12-month payment plan, use After 12 Occurrences. If their contract ends on a specific calendar date, use On a Specific Date. Both approaches ensure billing stops automatically with no manual follow-up required.
