
MARKETING: Creating Audiences
What is an Audience?
An Audience is a collection of names and emails that your Email Campaigns will be sent to. You can add these Contacts manually, import them from a CRM or CSV file, or you can have them added automatically either by automation functionality or self-subscription.
CLICK HERE to learn more about Email Marketing
How do I create an Audience?
Navigate to Marketing > Audiences, and click the +Add New Audience button.
 Give the Audience a Name. This is for your reference only; no recipients will see this name.
 Once the Audience has been created, click the Options menu button (3 dots) and select View.

The Subscribers card
The top of every Audience page shows how many people the Audience has and how that number is moving. The numbers are counted live each time you open the page, so they always match the list of Subscribers below.
- Subscribers Now: everyone subscribed to this Audience today.
- Added: people who joined this Audience in the chosen period, from any source. The line under it shows how many of them came from a CSV import.
- Unsubscribed: people who unsubscribed in the chosen period.
- Net Growth: Added minus Unsubscribed for the chosen period. The percentage compares it with the Subscribers this Audience had when the period began.
Hover over the ? next to Added or Net Growth to see this explanation on the page.

Choose the period with 7d, 30d, 90d, 12M or All. An Audience less than 90 days old opens on Since created, and an older one opens on 12M. No period starts before the date the Audience was created, which is shown at the top of the card.
The chart is drawn in your Portal's chart color, day by day for short periods and month by month for longer ones, and always ends on Today. Each CSV import is marked on the chart with its day and how many people it added. The card updates on its own when an import finishes and when you change or remove Subscribers in the list below it. The note under the chart, History reflects the people in this Audience today, is a reminder that the card counts the Audience as it is now.
A brand new Audience shows No Subscribers Yet until its first people are added.
You can quickly edit the Name of your Audience by clicking the Edit button at the upper right-hand corner of the screen. The top navigation bar gives you several options for adding Subscribers to your Audience.
CLICK HERE to learn how to create an Audience while adding a Circle
Create a Circle
While creating a Circle you will see a check box with an option to Create & Sync an Associated Marketing Audience.

By checking the box you will automatically create an Audience. When Contacts are added/removed to or from this Circle those changes will be automatically reflected in the Marketing Audience as well. If you set the Circle as Inactive the Marketing Audience will be removed.
Keep in mind that the standard method of adding & removing Subscribers to & from an Audience will not be available on the Marketing side - the members of the Audience are automatically kept in sync with the members of the Circle. This is why you can't make manual changes to the Audience. If a Subscriber unsubscribes from the Audience, they will still remain in the Circle, but won't receive any further Messages sent to that Audience.
CLICK HERE for more info on Circles
Add Subscribers Form
Use this form to manually add the Subscriber emails (or both names and emails) via a simple text field. Choose either Name & Email or Only Email from the dropdown menu, then input the names accordingly. In both cases, each Subscriber's information should be on a separate line. In the case of Name & Email, separate them with a comma as shown below.

CSV Import
Bring in a list you already have, such as a membership directory, an export from another system or an event sign-up sheet. Your file can have any columns; only the email address and the names are used, and nothing is added until you confirm.
On the Audience page, open Manage Subscribers and choose CSV Import. The import opens in a panel over the Audience and stays on that Audience from start to finish.

1. Upload Your Data. Drop your CSV file into the box, or click to browse. If you want to see a simple example first, click Download a Sample File. A file that can't be read, is empty, or has headers but no rows is stopped here with a message saying what is wrong.

2. Match Your Columns. The import guesses which of your columns hold the Email, First Name, Last Name and Preferred Name. Check each guess and change it from its dropdown if needed. Email is required. Every other column is listed under Not Used and is ignored.
If your file has a Preferred Name column, tick Use Preferred Name instead of First Name when it is filled in to greet people by the name they actually use. The line under it shows how many rows have one.

3. Review Before Importing. Before anything is saved, you see what will happen to every row of your file:
- Will Be Added: people with a valid email who are not in this Audience yet.
- Already in This Audience: left exactly as they are. Anyone who has unsubscribed stays unsubscribed.
- Skipped, No Email: rows without an email address, such as children in a family directory.
- Skipped, Email Not Valid: addresses that can't receive email.
- Duplicates Combined: an email that appears more than once becomes one Subscriber, named from its first row.
Click Show Rows under a count to see exactly which rows it covers. Use Back to change your column choices, or click Import to add the people.

4. Import. A small file is imported straight away and the panel shows the final counts. A large file is imported in the background with a progress bar: you can close the panel or leave the page, and you get one notification with the result when it is done. You can import up to 10,000 rows at a time, and clicking Import twice never imports the same file twice. When the import finishes, the Subscribers card at the top of the page updates and marks the import on its chart.
Note: An Audience that takes its members from a Circle can't import a CSV file, because its members always match the Circle. Add the people to the Circle instead.
Import from CRM
You can add existing Contacts from the platform to the Audience. This will bring you to a table of all of your existing Contacts. You can then use the checkboxes to select whom you would like to import. Use the dropdown menu to choose whether you are importing the selected Contacts if you are importing all of them.

Import Staff
You can add Staff Members to your Audiences too! This will bring you to a screen similar to Contact selection, in which you can use the checkboxes to select whom you would like to import.

Export All Subscribers
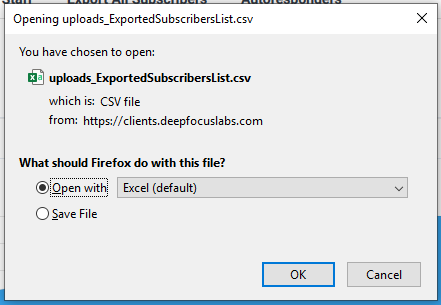
Clicking this option will download a CSV file containing all of the Subscribers from the Audience. It is formatted in the same way as for importing, so you can directly import this CSV into another Audience if desired.
 Drip Sequence
 Drip Sequence
Setting up a Drip Sequence allows you to send multiple messages automatically to new Audience Subscribers on a predetermined schedule. You will be directed to a dashboard in which you can manage the Drip Sequence for this Audience, or create a new one by clicking the +Drip Sequence button.
CLICK HERE to learn about Drip Sequences

How do I Unsubscribe a user from an Audience?
To manage the Subscribers from an Audience, navigate to Marketing > Audiences and click the Audience you would like to manage. You can then click the Options menu button (3 dots) to either Unsubscribe them from the Audience or Delete them from the Audience entirely.
