
PAGES: Creating a Landing Page
What is a Landing Page?
A Landing Page is a page that can be created, filled with information and resources (images, useful links, etc.), and can be accessed by anyone with the URL link. You can use Landing Pages to share information, display announcements, videos, charts, and much more!
Landing Pages are available on all Plans.
How do I create a Landing Page?
To create a Landing Pages, navigate to Content >Public Pages.
You will note that there are already two Landing Pages created. These are the Error Pages used to display error messages to your Users. You can edit and customize these pages to fit with your branding.

To create a new Landing Page, click the + Public Page button and select Landing Page.


Page Options
Page Title: Add a Title for the page. This is the full title that your Contacts will see while viewing the Page.
Direct Link: This link will appear automatically. This is the link you will use when providing access to the Page.
Copy to your Clipboard: Clicking this button will copy the link so you can paste it elsewhere.
Display QR Code: Click this button to download a PNF or SVG option of the QR Code.

Tip: You can customize your QR code styling in Platform Branding
CLICK HERE to learn about the Platform Branding.
Friendly URL: This is the name of the element that will appear in your URL. Please note that this option will only be available if you have added a Custom URL in Flyout Menu>Custom URL & Login Page.
CLICK HERE to learn about your Custom URL.
SEO Options
Title Tag: Add a Title that contains your target keyword to help with Search Engines.
Meta description: Add a short summary of what the page is about so searchers can see the relevance of the page.
Open Graphic Image: Add an image for the Landing Page. Choose a banner image for SEO cards and social media previews (a size of 1200x630px is recommended). Essentially, the image is a preview that social media platforms like Facebook, LinkedIn, and Twitter will display when a user shares a link to your landing page.
Once you have added your Page Options, click the Save button to start creating your page content.
Edit Page Content
On the Page we give you a Text Block as a starting point. Click in the middle of the text block to reveal the text block options.

To edit the text block click the Pencil icon or you can delete the block by clicking X.
With the Block Editor you are capable of creating rich HTML pages that include images, formatted text, etc. You can even switch to the HTML source and embed code from other sources such as YouTube, Vimeo or Google Docs.
CLICK HERE to learn about the Content Block Editor
There are different block types available. To add another block type click the Circle icon and choose from the list of available block types.

CLICK HERE to learn about the Block Editor Types
To add more columns, click the square icon

You can click the icon shown below to Save the Page at any time.
 You must save the page prior to coming out of your landing page in order to prevent losing your content or changes.
How do I preview the Page?

To see a preview of the Page, click the icon shown above.
A preview of the Page will appear in a modal. You can switch between how the content will appear on a desktop, tablet, or mobile phone.

How do I configure Styling Options?
Click the palette icon shown below to configure styling options for the Page.

Change/Hide the Content Card

Change/Hide the Content Card
Enabling this setting will allow you to choose one of two options for the Content Card. The Content Card is the background behind the content (default white).
Completely Hide the Content Card: This will remove the border around the content you see.
Change the colors of the Content Card: This will display the Content Card but will give you the ability to customize the color of the text and background. You can choose the color from a Color Picker for each field.
 Change the Color/Pattern of the Primary Background
 Change the Color/Pattern of the Primary Background
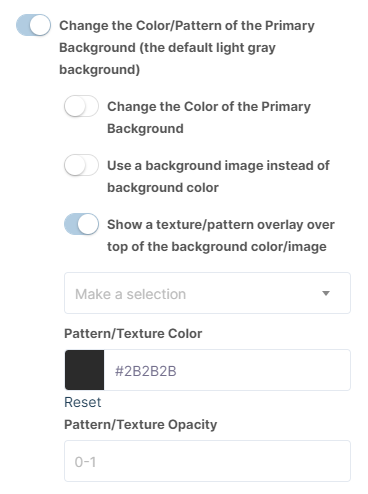
Enabling this setting will allow you to choose one of three options for the Primary Background. The Primary Background is the main background (default light gray).
Change the Color of the Primary Background: If enabled, you'll be able to choose a color with a Color Picker. You can also use the texture/pattern overlay option in addition to this one if desired.
Use a background image instead of a background color: If enabled, you'll be able to choose an image to display with a File Uploader.
Show a texture/pattern overlay over top of the background color/image: If enabled, you'll be able to choose from a selection of patterns along with the pattern color and opacity. You can still set the Primary Background color to be used in conjunction with this option.
Custom CSS/JS
 Advanced users can input their own Custom CSS or Custom JS into this section to further customize your Page.
IMPORTANT: Any configurations you set in Styling Options will NOT be visible in the editor. To see the changes, you should use Preview Mode.
How do I apply a Landing Page Template?
While creating or editing a Landing Page, you can apply a Landing Page Template with preloaded content, so that you don't have to build the Page from scratch.

Click the icon shown above to select a Landing Page Template to load.
A modal will appear with a preview screen, in which you can choose your Landing Page Template from the dropdown menu at the top.
Once applied, you will be able to continue to edit the Landing Page as normal.
How do I create a Landing Page Template?
To create or edit a Landing Page Template, navigate to Content > Landing Pages > Manage Templates.

To create a new Template, click the + Add New Button, and create the template as you would a standard Landing Page.

You can Edit, Preview, Delete and Contribute the template to the Template Library by clicking the 3 dots to reveal the options;

How do I switch between my Landing Pages?
While working on a landing Page you can easily switch to a different Page by clicking on the dropdown and selecting one from the list. You will see this dropdown on the top right and it will be titled the name of the current Page you are working on. If you are working on a brand new unnamed page the dropdown will be blank.

How do I manage my Landing Pages?
Once you have Pages created, navigate to Content > Landing Pages.
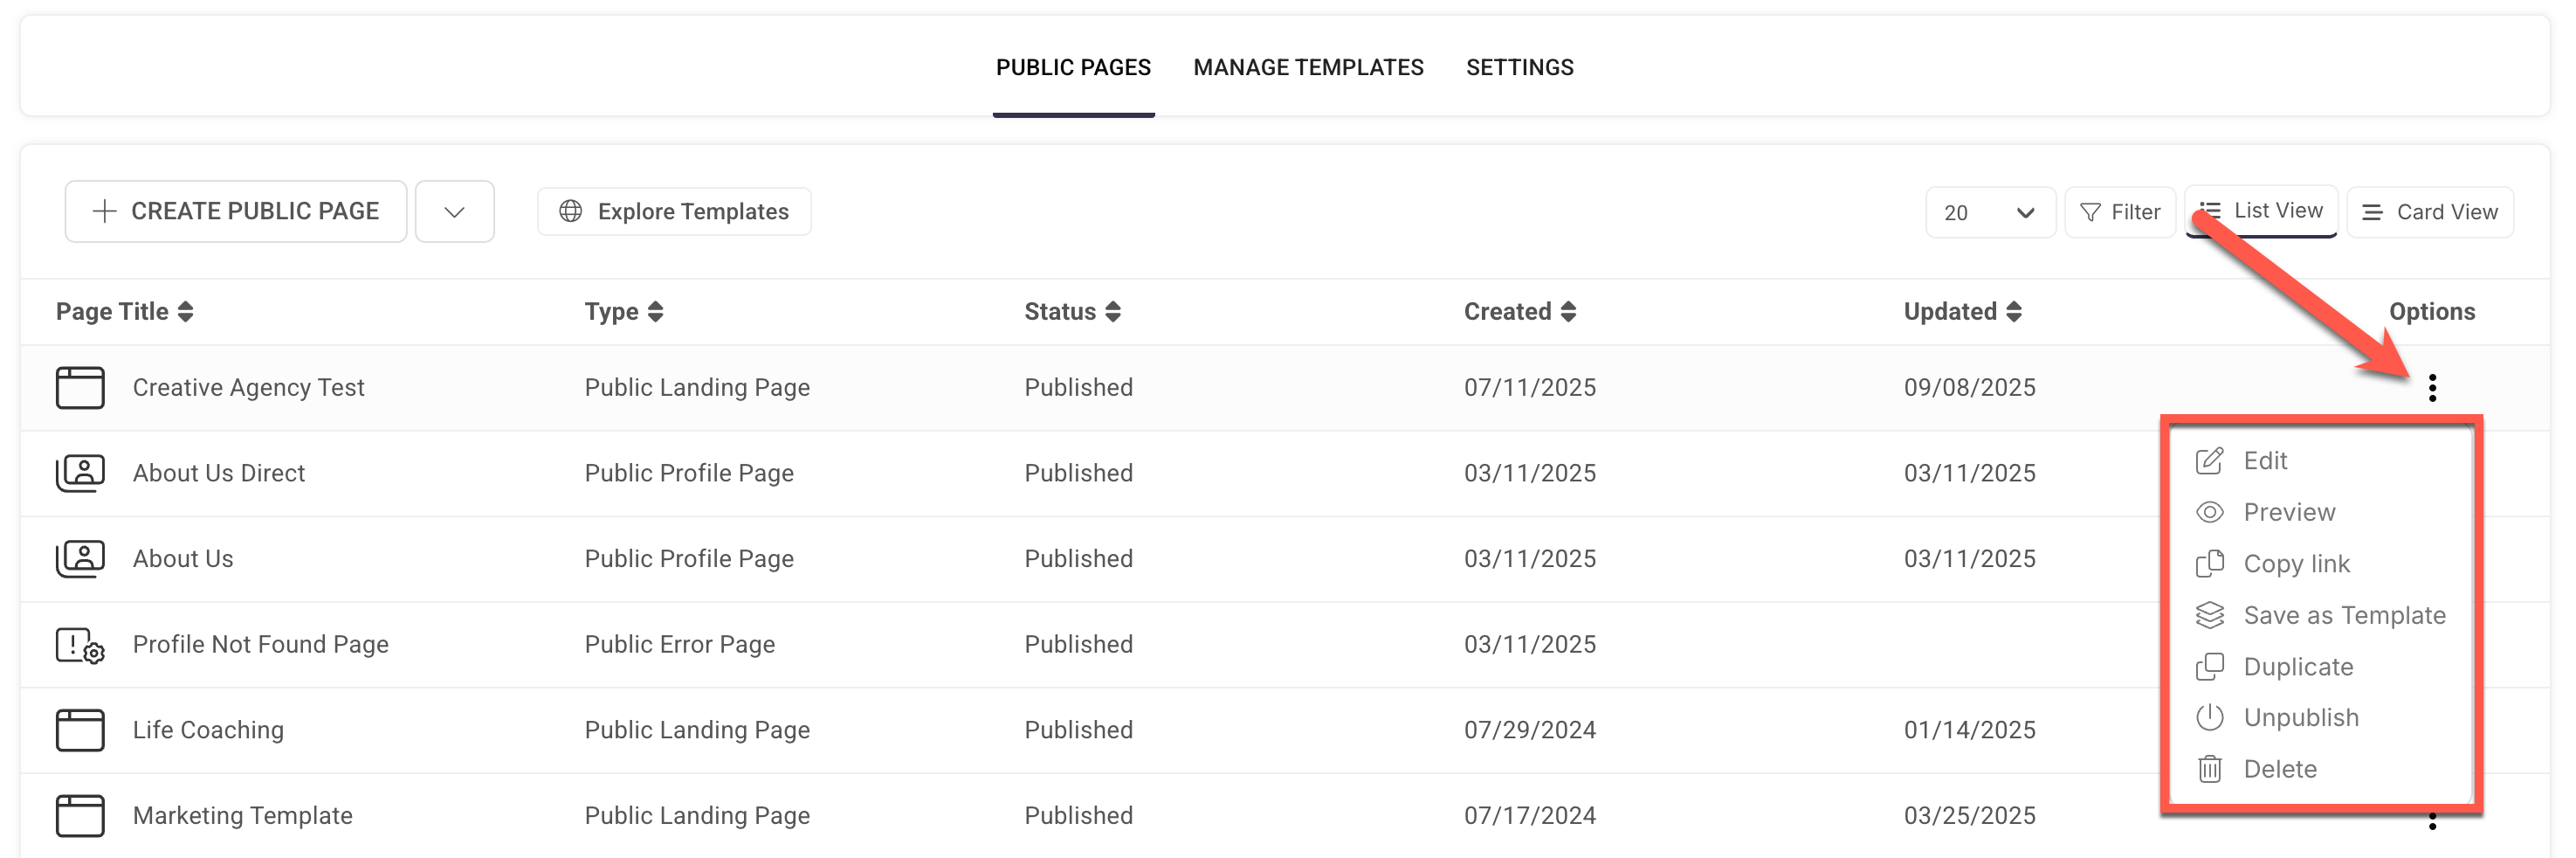
Click the Options menu button beside a Landing Page you would like to manage.
Edit: Opens the Landing Page to edit the Content and Settings for the Page.
Preview: Opens a preview window of the Page. You can select specific Targets to view the page as if you have dynamic private (requires login) content on the Page.
Copy Link: Copies the Public Link to the page so that you can share with your viewers.
Save as Template: Saves the Landing Page as a Template to be used on other Landing Pages in the future.
Duplicate: Makes a copy of the Landing Page.
Publish: Makes the page live and possible for anyone with the link to access.
Unpublish: Makes the page no longer active and no one can view the page.
Delete: Deletes the page. This action is undoable.
Who can manage/create Landing Pages?
To set which Roles have full access to manage your Landing Pages go to Content > Landing Pages > Settings

You can designate by Role or add individual Staff Members or Teams. This will give the chosen Users full access to Landing Pages.