
BLOCKS: Project Block
Projects Block
The Projects Block enables you to automatically display the Projects assigned to the logged-in user directly on a Dashboard or Portal Page. It provides a powerful and convenient way to consolidate Project access in one place, with direct links to key Project areas such as Files, Kanban Board, Notes, Timers, and the Calendar, without needing to navigate away from the page.
What This Block Is Used For
Use this block to give Clients or Staff a clear, organised view of their active Projects directly within the portal experience. It removes the need to navigate to a separate Projects area and keeps work visible and accessible at all times.
- Display all Projects assigned to a Client on their portal dashboard so they can track progress at a glance
- Give Staff members a consolidated view of all their assigned Projects across the business in one block
- Provide direct links to key Project areas including Files, Kanban Board, Notes, Timers, and the Calendar from within the block
- Show completion percentage, status, due dates, and Client details for each Project based on the Data Options you configure
- Allow users to filter and sort Projects to find what they need quickly without opening each Project individually
What Users Will See
When users access a page containing a Projects Block, they will see a list of their assigned Projects displayed according to the settings you have configured. The experience differs slightly depending on whether the viewer is a Client or a Staff member.
- A list of assigned Projects displayed with the data fields you have enabled, such as Client Name, Project Leader, Business Sector, Due Date, Completion Percentage, and Status
- Quick access icons linking directly to key areas of each Project such as Tasks, Timers, Calendar, Notes, Kanban Board, and Files
- Sort and filter icons within the block that allow users to customise their view at any time
- A View All Projects button at the bottom of the block for quick access to the full Project list
- For Clients, visibility of Project data is controlled by the settings within each individual Project, allowing you to fine-tune exactly what each Client can see
How to Add This Block
1. Open the Content Block Editor on the Dashboard or Portal Page you wish to edit.
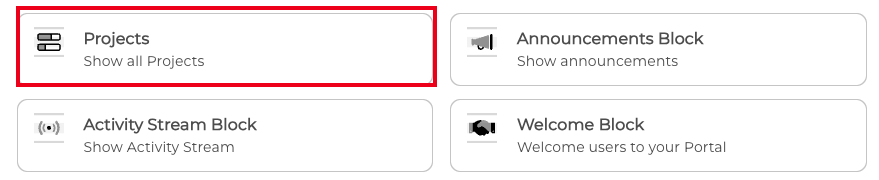
2. Click the Add Block (+) button to open the block selection menu.
 3. Select Projects from the list.
Once added, the block will appear in your layout and is ready to be configured.
How to Configure the Block
After adding the block, you will be able to add your Project Block settings, alternatively, click the pencil (edit) icon in the block toolbar at anytime to open the block options.
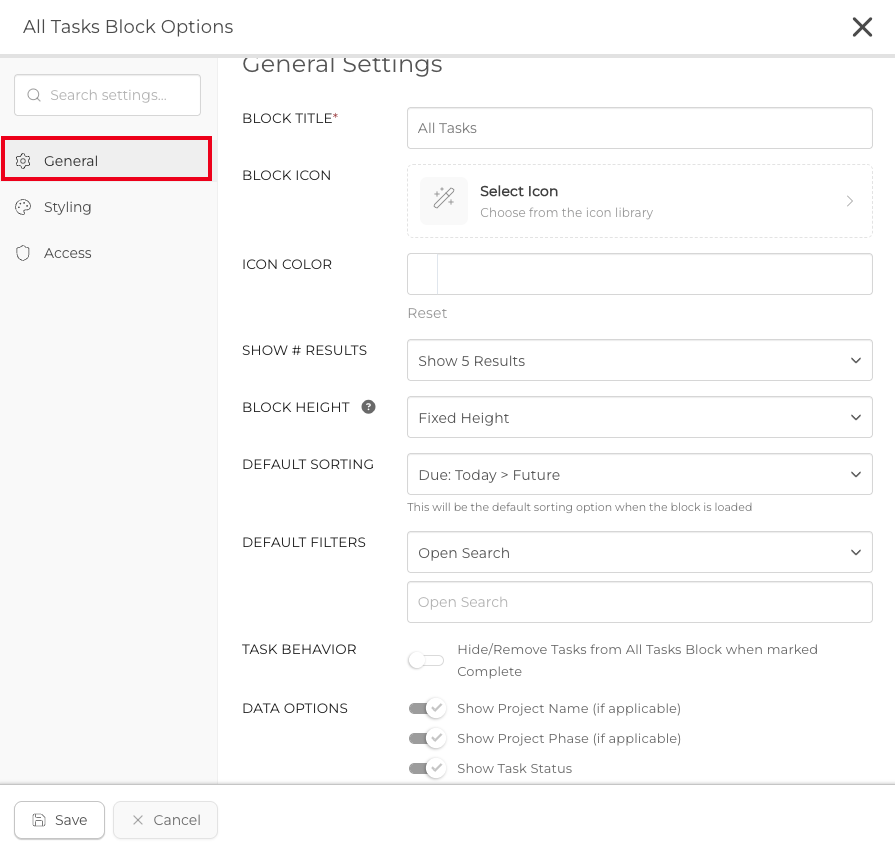
Block Title: Give the block a unique title. This title will appear as a header on the Target's side and helps users identify the purpose of the block at a glance.
Block Icon: Add an icon if required.
Icon Color: If you are using an icon you can choose a color from the color picker or you can add your preferred HEX code.
Show # Results: Set the number of Projects to display in the block at one time. You can choose to show 5, 10, 15, or 20 results.
Block Height: Choose how the block height is handled:
- Fixed Height — The block displays at a standard fixed size regardless of the number of results shown.
- Auto Height — The block will resize automatically to fit the number of results you have selected.
- Custom Height — Enter a specific pixel height for the block.
Default Sorting: Set the default sort order for Projects when the block first loads. Users can change the sort order at any time by clicking the sort icon within the block. Available options include Due: Past to Future, Due: Future to Past, Due: Today to Future, Due: Today to Past, Status (Pending to Completed), Status (Completed to Pending), Project Name (A to Z), Project Name (Z to A), Project's Client Name (A to Z), Project's Client Name (Z to A), Project's Leader Name (A to Z), and Project's Leader Name (Z to A).
Project Behaviour: Enable the Hide/Remove Projects from Projects Block when marked Complete option to automatically remove completed Projects from the view. When this option is disabled, completed Projects remain visible in the block and are displayed with a Completed status.
Data Options for Staff: Choose which data points appear in the block for Staff members. Available options include:
- Show Primary Contact — Displays the Primary Contact for the Project.
- Show Project Leader — Displays the name of the Project Leader.
- Show Business Sector — Displays the Business Sector associated with the Project.
- Show Due Date (if applicable) — Displays the Project due date when one has been set.
- Show Completion Data — Displays the percentage of completion for the Project.
- Show Status — Displays the current Project Status.
- Show Tasks Icon — Displays a quick-link icon to the Project Tasks area.
- Show Timers Icon — Displays a quick-link icon to the Project Timers area.
- Show Calendar Icon — Displays a quick-link icon to the Project Calendar.
- Show Notes Icon — Displays a quick-link icon to the Project Notes area.
- Show Kanban Icon — Displays a quick-link icon to the Project Kanban Board.
Data Options for Clients: Visibility for Clients is controlled by the settings within each individual Project rather than within the block itself.
- Show Primary Contact — Displays the Primary Contact for the Project.
- Show Project Leader — Displays the name of the Project Leader.
- Show Business Sector — Displays the Business Sector associated with the Project.
- Show Due Date (if applicable) — Displays the Project due date when one has been set.
- Show Calendar Icon — Displays the Calendar Icon.
This allows you to fine-tune exactly what each Client sees in their Projects Block, ensuring information is displayed in a way that aligns with your workflow and communication strategy.
TIP: When configuring Data Options for Staff, you can hide Client details such as Primary Contact and Client Name if you are working with freelancers or contractors who do not need visibility of Client information. This keeps the view focused and professional without exposing details that are not relevant to their role.
Best Practices
A well-configured Projects Block gives your team and Clients a clear, up-to-date view of all active work without requiring them to navigate through menus or individual Project pages.
- Enable the Hide/Remove Projects when marked Complete option to keep the block focused on active work and prevent the list from becoming cluttered over time
- Set the Default Sorting to Due: Today to Future so the most time-sensitive Projects always appear at the top of the list
- Enable the quick-link icons for Tasks, Kanban, and Files so Staff members can jump directly to the most commonly used areas of each Project with a single click
- Use the Default Filters to pre-filter by Status or Client when building dashboards for specific audiences, so the block loads with the most relevant view immediately
- Use the Access Options tab to restrict the block to the appropriate roles, ensuring Clients only see their own Projects and Staff see only what is relevant to their role
- Review the Data Options for Clients within each individual Project to ensure the right level of detail is visible to each Client without exposing internal information
TIP: The Projects Block works especially well on Client portal pages as a central hub for all active work. Pair it with the My Tasks Block and My Invoices Block to give Clients a complete view of their Projects, outstanding Tasks, and billing all from a single dashboard page.
RELATED ARTICLES
CLICK HERE to learn about the Content Block Editor.
CLICK HERE to learn about all Block Editor Block Types.
CLICK HERE to learn about Projects.