
PROJECTS: Project Dashboard
What is the Project Dashboard?
The Project Dashboard is an interface that provides at-a-glance information about a Project. It's a nice way to present the progress and updates of the Project to your Client, while also displaying their logo and a welcome message.
Every company and organization will have slightly different needs and preferences about how they work with Clients: how much they want them to be involved and how much they want the Client to see. You can choose which elements to show to your Client or you can disable the Dashboard altogether.
How do I enable the Project Dashboard?
To enable the Project Dashboard settings for all Projects, you'll need to configure the Default Settings.
Navigate to Projects > Settings and click the Project Dashboard Settings side bar tab.
The Settings you configure here will be applied to any newly-created Project and will not affect already existing Projects.
 Toggle the Enable the Project Dashboard page switch to ON.
 You can choose to display a Welcome Message that will appear on your Client's Project Dashboard, as well as an additional message.

How do I configure the Project Dashboard for each Project?
In order to configure the details for the Project Dashboard, you'll need to do it via the Individual Project Settings.
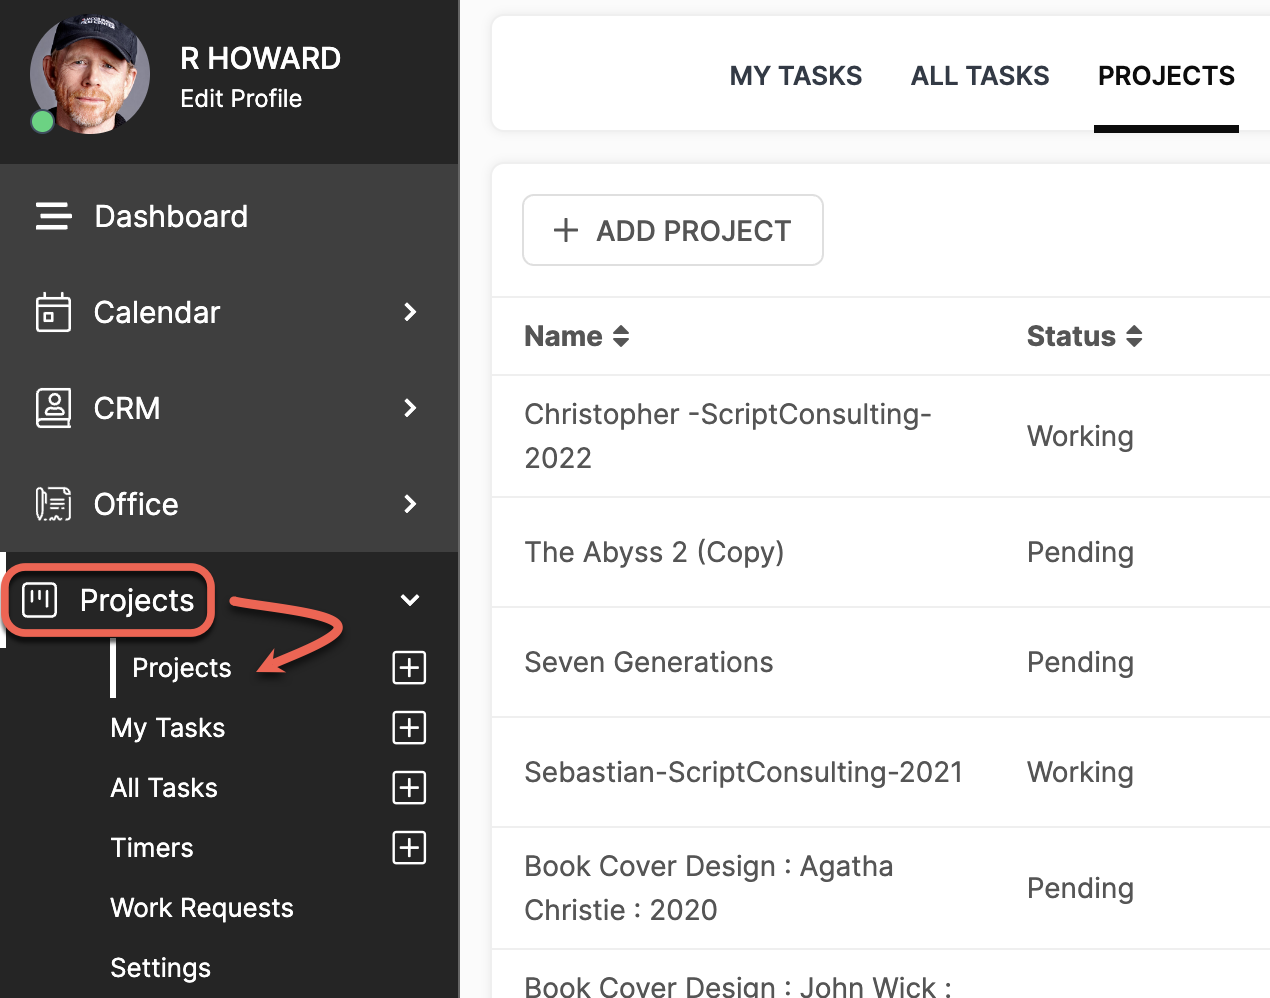
Navigate to Projects > Projects, and click on the Project you would like to configure the Dashboard for.
 Click the Settings tab in the top navigation menu bar.

Project Settings
In this section, you can configure user visibility and File access.
 Allow assigned Project users to see all Tasks: Enable this option if you'd like for assigned Staff Members to be able to see all Tasks related to the Project, including ones that are not assigned to them.
Manage Client Talk Access: When enabled, a field will appear in which you can add Secondary Clients to access Client Talk. If disabled, no Clients will be able to use Client Talk.
Allow Client to see Project if it is Archived: If disabled, the Project will no longer be accessible to the Client when Archived.
CLICK HERE to learn about Archived Projects
Display the Project Progress to Client: If enabled, a Progress Arc showing a completion percentage will appear on their Project Dashboard. More information in the section below.
Display the Project Status to Client: If enabled, a Project Status column will be visible to the Client on their Project page.
Hide Kanban View for Clients: Disable this option if you don't want your Client to be able to view their assigned Project in Kanban style.
CLICK HERE to learn about Kanban View.
 Allow Client(s) access to the Project's Files: You can enable/disable various actions your Client will be able to do regarding Project Files. Or, you can disable access altogether.
CLICK HERE to learn about Project Files
Allow Freelancer(s) access to the Project's Files: Enabling this setting will allow an assigned user with a Freelancer Role to access the Project's Files.
Project Progress
If you choose to display Project Progress to the Client, a Progress Arc showing a completion percentage will appear on their Project Dashboard.

You can configure the value of this Progress Arc to automatically calculate the progress using the percentage of Tasks marked "Complete" or by Project Phases or you can set it manually using a slider.
Project Automations
You can use settings to automatically mark the Project Status to complete when all Task within the Project have been Marked as Complete.
Equally, you can toggle the option to automatically mark All Tasks to complete when the Project is manually marked as Complete.

You can also opt to allow Teammates and/or Freelancers to see Task Automations.
Project Dashboard
You can individually enable this particular Project's Dashboard. When enabled, the assigned Client(s) will be able to view the Project Dashboard page.
 You can also choose to set the Project Dashboard as the Start Page. Choose from a list of assigned Clients (the Primary Client as well as Secondary Clients).
When the selected Client(s) log in, they will automatically be directed to the Project Dashboard of this Project.
CLICK HERE to learn about assigning a Start Page
Personalize to your Client
Here you can upload a Client's Logo, display a Welcome Message, or Display Project Updates.
 If you upload a logo, it will be displayed on the Project Dashboard at the top right of the screen.
 You can choose to display a message at the top of the Project Dashboard screen. This can be welcoming text, the title of the Project, etc.
You can also include an additional paragraph underneath this message.

To show additional information to your Client, you can include Project Updates. These are time-stamped updates that display in a "log" format.
You can also have the Client receive an email notification that the Project has been updated, and can enable the Client to leave comments on the Project Update.
What does the Client See?
 If you have enabled Project Dashboard, a Dashboard tab will appear in your Client's top navigation bar when they navigate to their Project Page. This is is the default page they will be directed to when they click on their Project.
The Project Status will appear in the upper right-hand corner of the screen if you have enabled it.

If you have opted to display a Welcome Message, it will appear at the top of the screen. The additional message will be placed underneath. If enabled, the uploaded Client's Logo and Progress Arc will appear to the left of the screen underneath the Welcome Message. The Progress Arc is dynamic and will change depending on what you have set it to calculate automatically, or to what you have set for it manually.
If you have enabled Project Updates, they will appear to the right on the screen. The Client will be able to cycle through each Update by clicking on the corresponding date. The Progress Arc progression is tied to each Project Update - so they will be able to see the progress change depending on which update they click.
If you have enabled the Client to comment on Project Updates, they will see a text box in which they can type a message underneath the text.
 Enabling Project Updates also displays an Update History to provide a quick overview of Updates.
