
PROJECTS: Project Generators
What is a Project Generator?
Project Generators are used when you want to generate a preconfigured Project using an Automation or on a Schedule.
When you set up a Project Generator, you are basically "pre-creating" a Project with customized variables and settings. You will tell the platform how to title the Project, who will be assigned, what information will be visible to your Clients and your Staff, etc. In addition, if you pair a Task Template with a Project Generator, you are designating which Tasks/Phases will be generated inside the Project when the Automation or Schedule is triggered. When triggered, the Project will automatically be assigned to the correct Client.
You can also create a Scheduled or Recurring Project Generator! More details are in the sections below.
CLICK HERE to learn about Projects
CLICK HERE to learn about Task Templates
Many businesses have several different 'types' of Projects, and Project Generators let you pre-configure a specific type of Project and automatically generate it whenever needed. Creating a Project Generator is very similar to creating a Project, with a few key differences. Once created, you will be able to select a Project Generator to generate a Project during the onboarding process, as well as with Automations.
How do I create a Project Generator?
To get started, navigate to Projects > Projects.
Click the Generators tab in the top navigation menu bar, and click the +Add Project Generator button.

Name your Project Generator. This is the name of the actual Project Generator for reference and not what will be generated when applied.

Next, you'll see an Apply Scheduling Details toggle switch in the Scheduled / Recurring Details section. Toggling this option to ON will allow you to configure customized options for the Project Generator.
 For these options, you'll need to specify at least one Client or Circle to assign the Project Generator to.
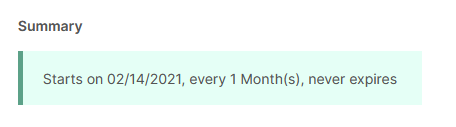
You'll see a Summary at the bottom of the section detailing your current scheduling configuration.
IMPORTANT: Typically you wouldn't need to assign a Client to a Project Generator, since it is normally applied to a Project to get this information. With Scheduled Options, however, the Project Generator will automatically generate a Project on the specified dates, so at least one Client or a Circle is required.
If you are wanting to add a Recurring Project Generator through Automation, create a new circle for the recurring project. Add the Circle to the Recurring/Scheduling options and then make sure the Circle is added to the Contact/Company prior to, or at the time the Project Generator is assigned.
Recurring Options
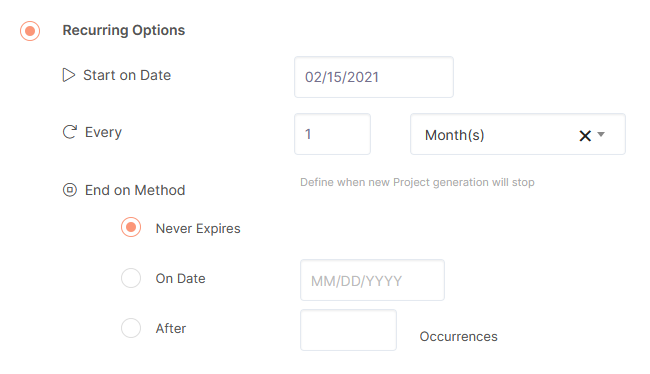
Choose Recurring Options if you would like to generate a Project on a regular basis. Set the Start Date, as well as how often it will recur. You can choose from a number of Days, Weeks, Months, or Years.
You can then choose whether this will be a continual generation with no expiration, it ends on a specific date, or after a set number of occurrences.
On Specific Dates
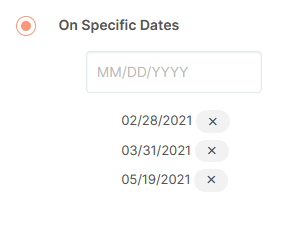
Choose On Specific Dates if you would like to generate a Project on specific dates, rather than a regular schedule.
Click the date field and choose a date from the Date Picker. You can add as many dates as you'd like.
Custom Field
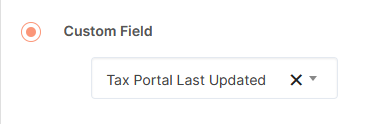 If you have a Date Custom Field created, you can choose to pull from the date that is supplied in that field.
This way, you can assign multiple Contacts to a Scheduled Project Generator, but with dates that are unique to them.
CLICK HERE to learn about Custom Fields
Under Project Name, input the name of the Project that will be generated when applied.

Click the {x} icon to load the available Placeholders for Project Name.

TIP: The Placeholders available for the Project Name field help make sure you will have unique and descriptive Project Names, as they are auto-generated for the Client.
CLICK HERE to learn about Dynamic Data Placeholders
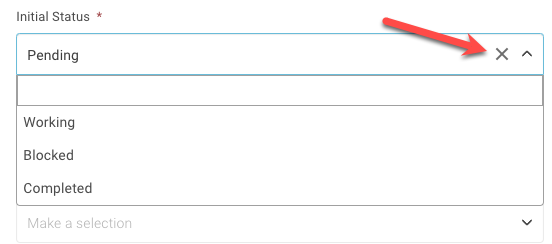
Preset the initial Status of the Project (required field)
Configure the 'Based on Date' for the Project Completion.
 Based on Generation Day: You can enter positive values to shift this date after the date of Generation.
Based on Custom Field: Select the relevant Custom Field (Date Type) from the dropdown.
Target Time: Optionally you can also specify the exact time the Project is due on the Based on Date.
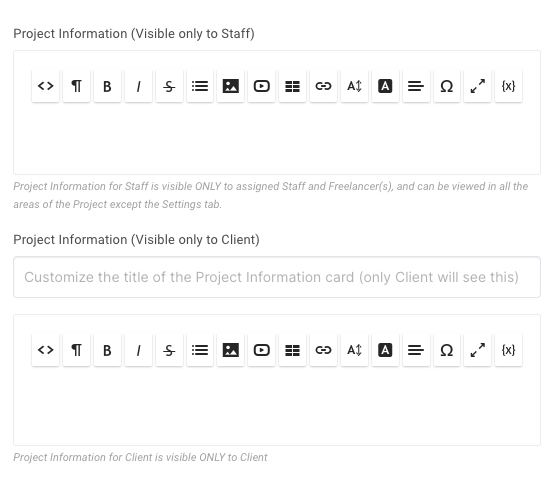
Project Information (Visible only to staff): A description of the Project which will NOT be visible to the Client.
Project Information (Visible only to Client): Information for the Client to see, and NOT your Staff.
You can also add an initial Note to the Project Generator and set the 'Based On Date' for the Note.
 You can also set your Client Project Note permissions by allowing the Clients to View or View/Create Project Notes.
IMPORTANT: By giving Clients permission to view Project Notes, the Client/s will be able to see Public Project Notes relating to their Project. You can create notes as Private Project Notes if you do not wish the clients to see the Note.
Another difference from creating a standard Project is that you do not assign a Client. The generated Project will be assigned to the correct Client once the Project Generator is triggered.
However, you can assign Staff members to the Project via Teammates, Team/s and the Project Leader. Project Leader will default to the Project author.
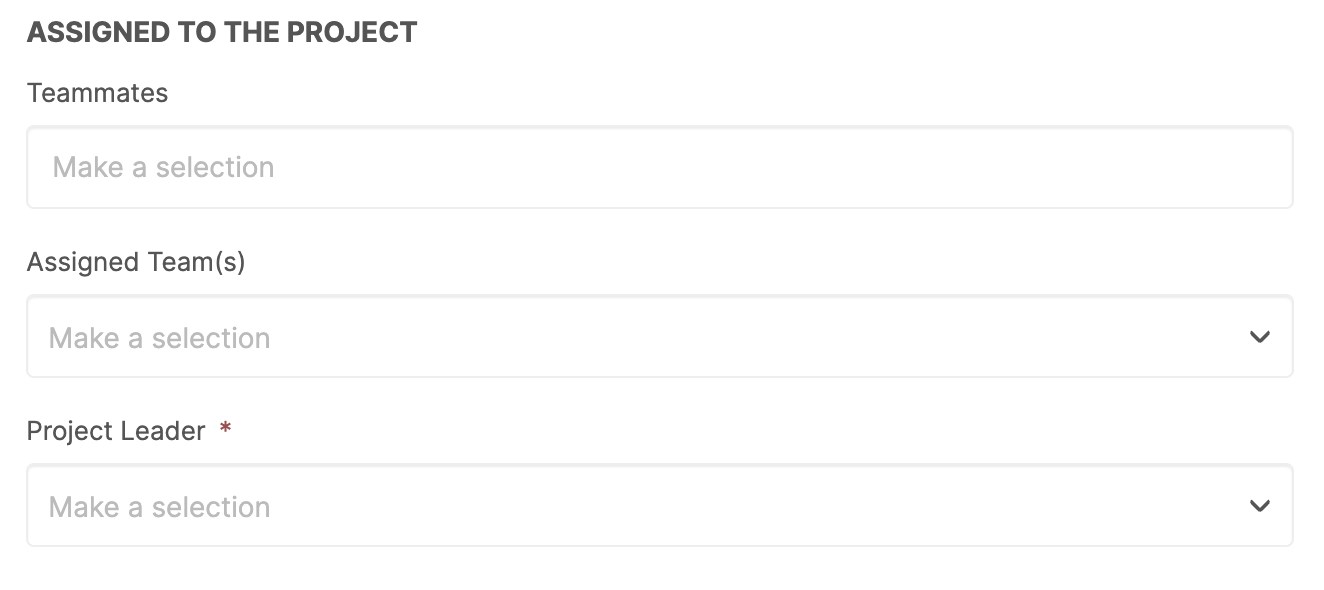 In addition to this, you can also toggle the options to automatically add the Target's Coordinator and Salesperson.

In Task/Phase Settings you can select a Task Template and designate details on how the Tasks/Phases are generated when this Project Generator is executed by setting the 'Based on Date'.
 If you have a Folder Generator you can select it from the dropdown list and have the Folder Generator apply to the Project Files.

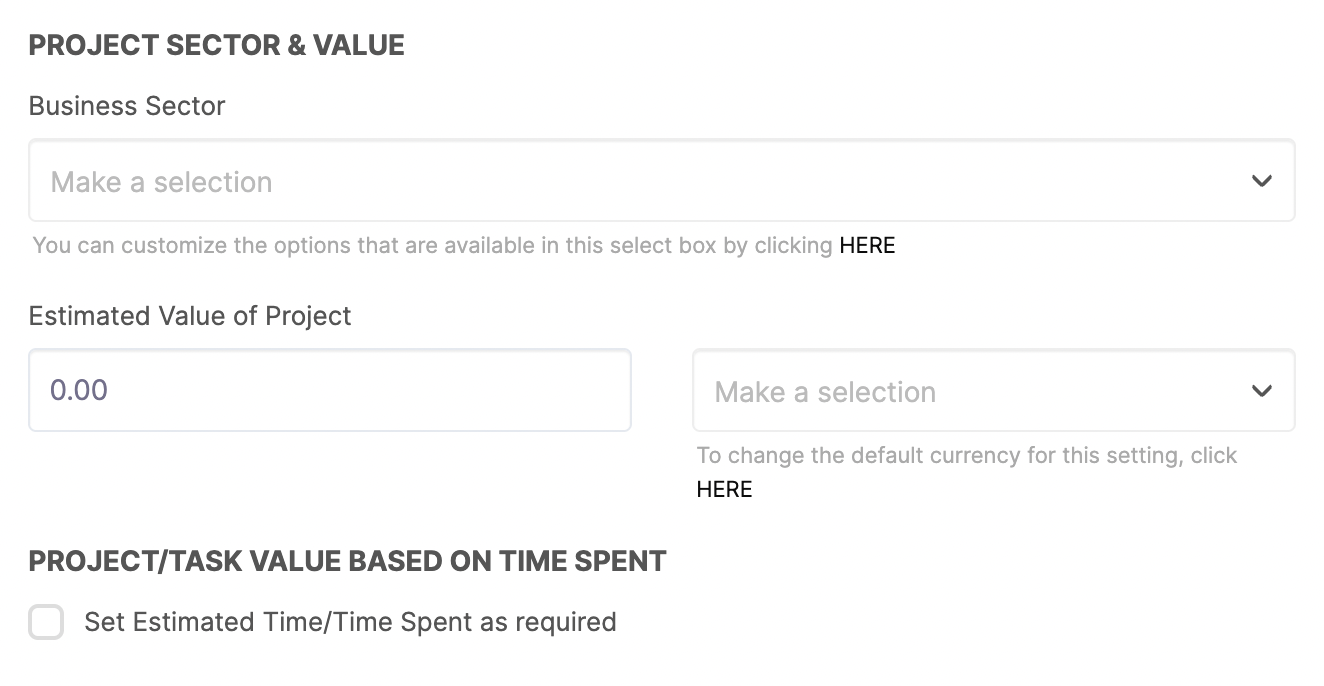
The next section is settings relating to the value of this Project or how the value will be calculated.
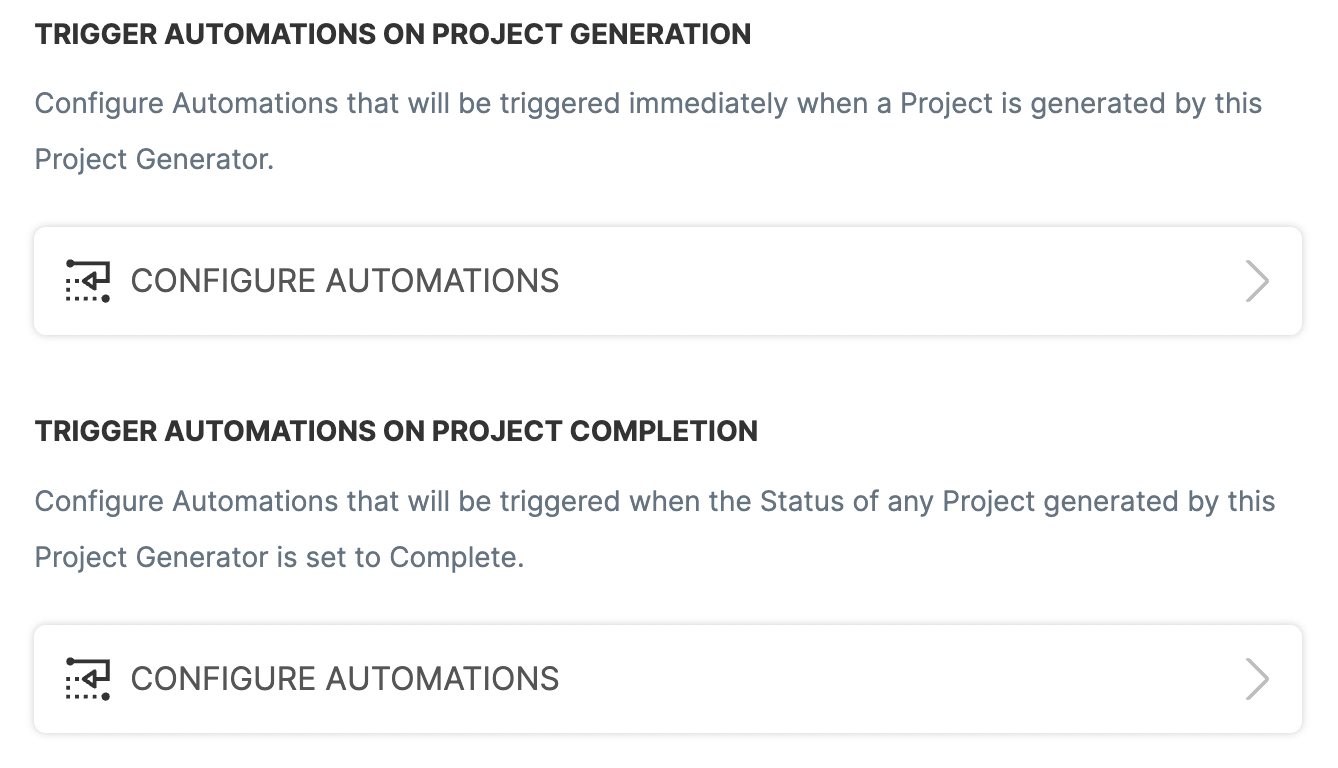
 You will not be able to configure Automations while creating your Project Generator.
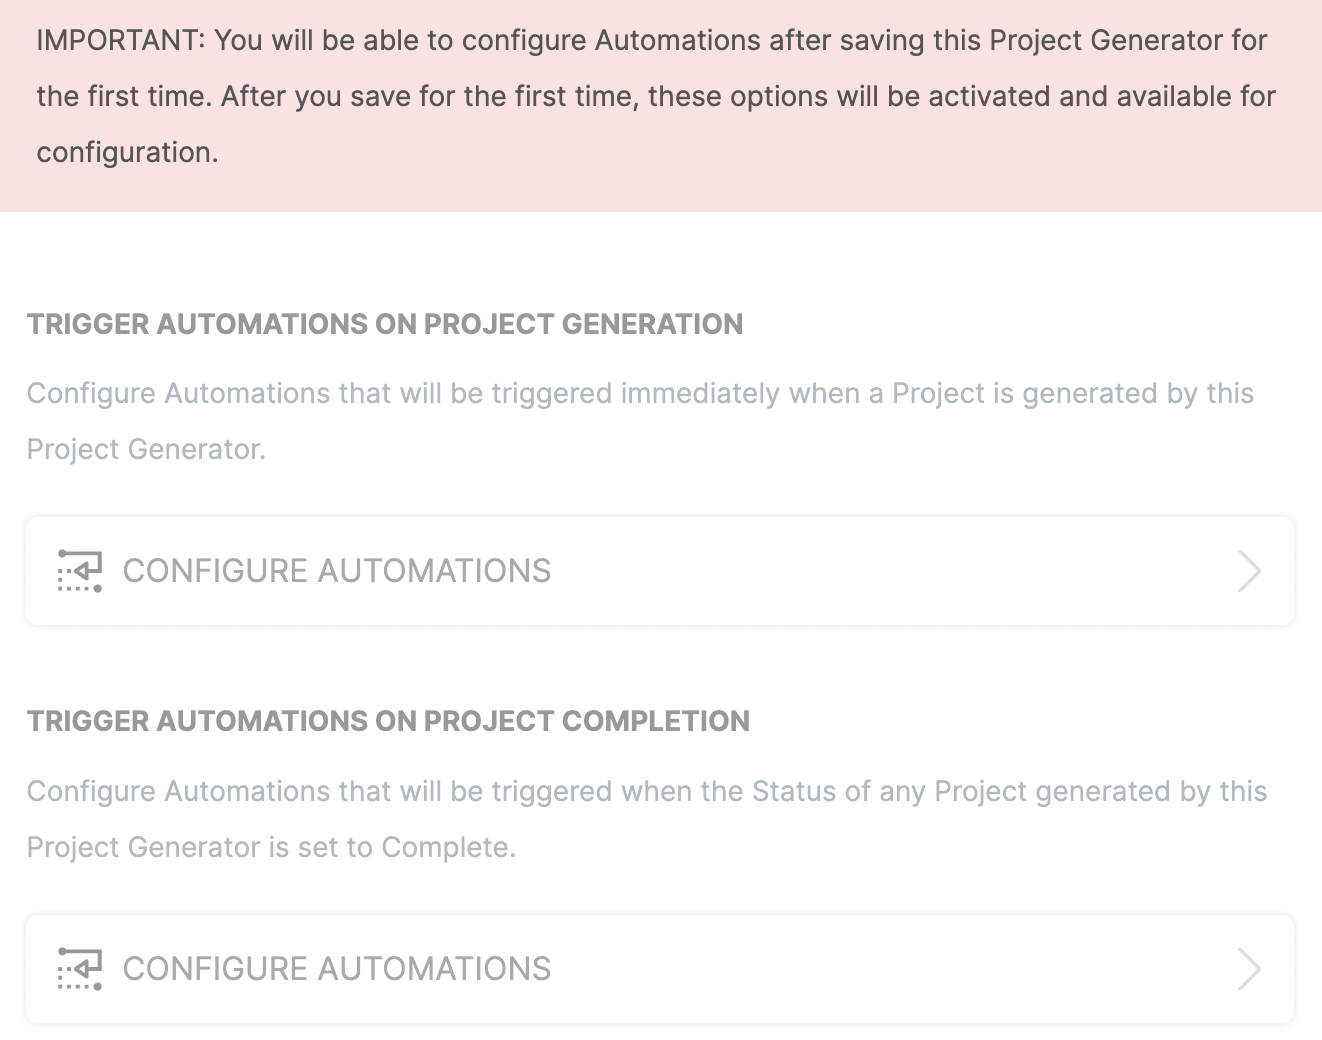 After saving your Project Generator you can go back to it and add your Automations. You can configure the Automations that will be triggered at the moment when the Project is generated and you can pre-create the Automations that will be triggered when the Status of any Project generated by this Project Generator is set to Complete.
 Next, you can adjust the settings related to the Status of the Projects and/or its Tasks.
 Lastly, you can fill in any Project Custom Fields you would like associated with this Project Generator. You can add additional Custom Fields in this step too. If you do not have any Project Custom Fields already set up you may not see this section.
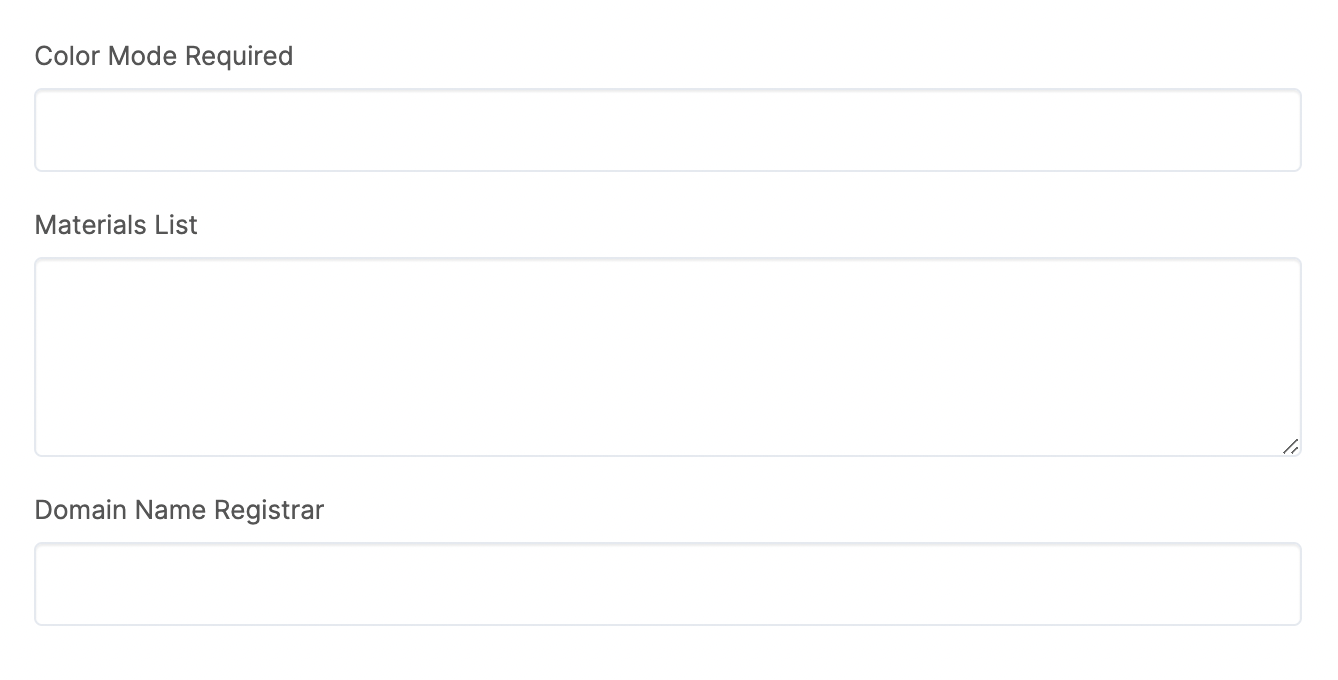
Please note that the above Custom Fields are examples from a test account. You will not see these specific fields in your account.
Where can I apply a Project Generator?
A Project Generator can be applied during onboarding for Clients, as well as with Automations.
Manually adding a new Contact
Navigate to CRM > Contacts, and click +Add Contact.
CLICK HERE to learn about Adding a Contact
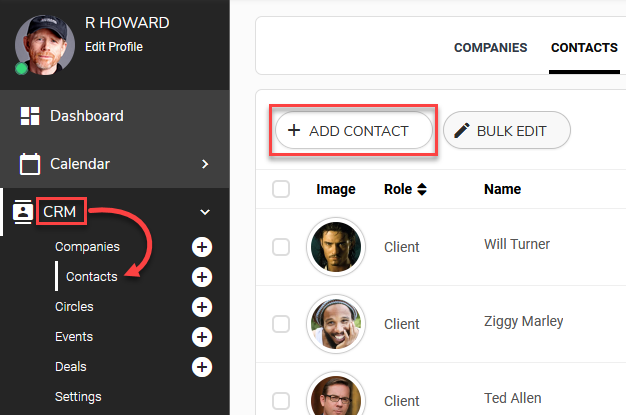
In the Project Generator section, you will be able to choose a Project Generator from the dropdown menu.

TIP: This section will only appear when selecting the Client Role.
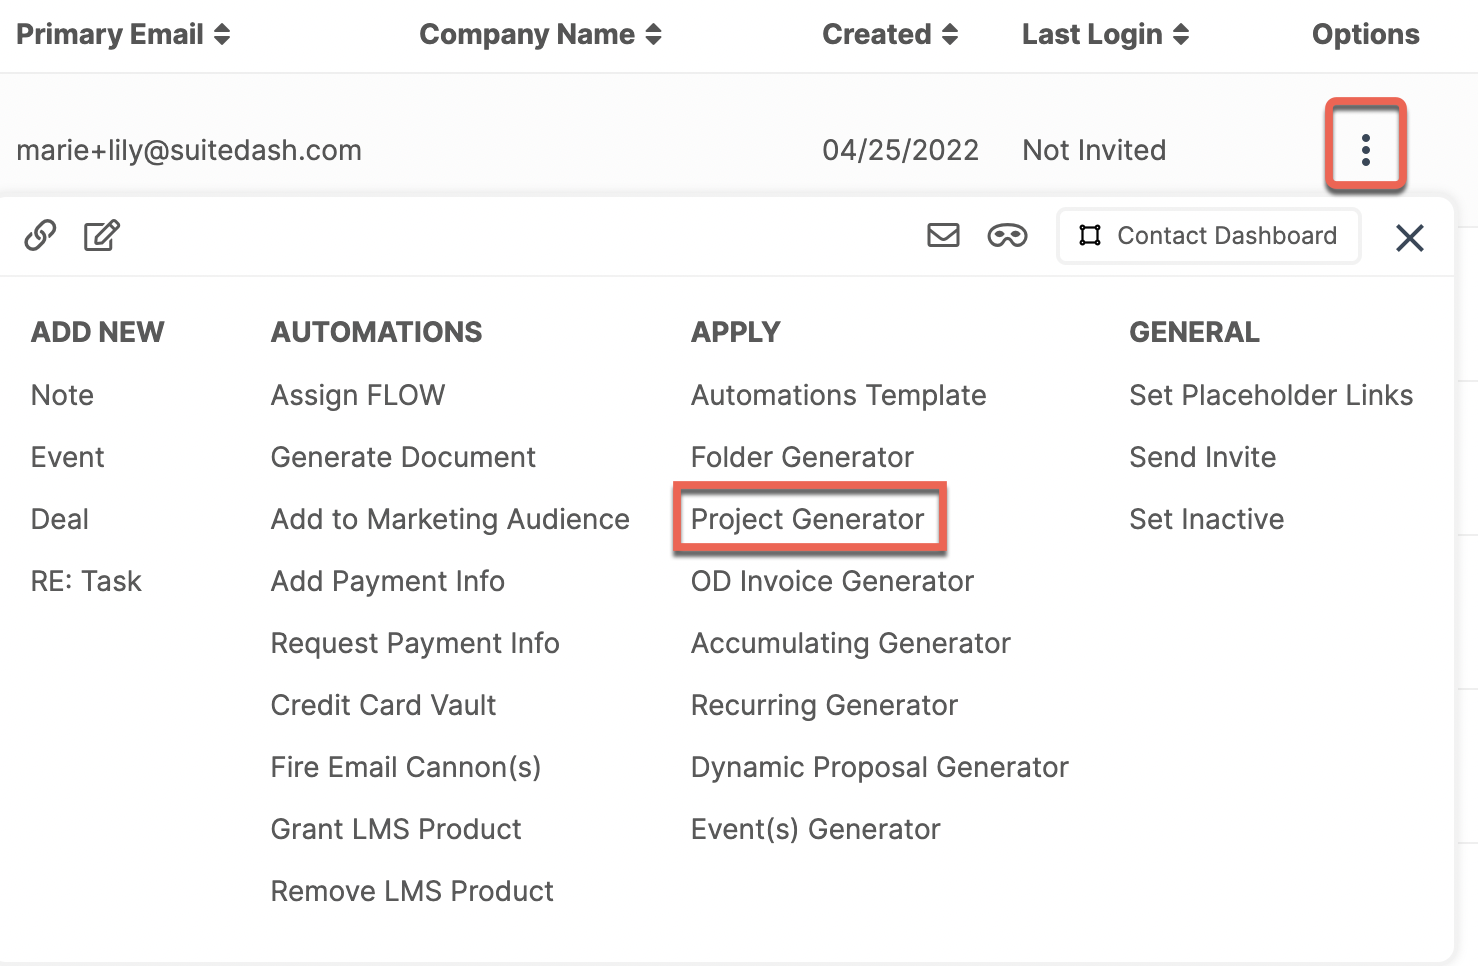
Adding to an existing Contact
Navigate to CRM > Contacts. Click the Options (3 dots) menu button of the Contact and select Apply Project Generator.
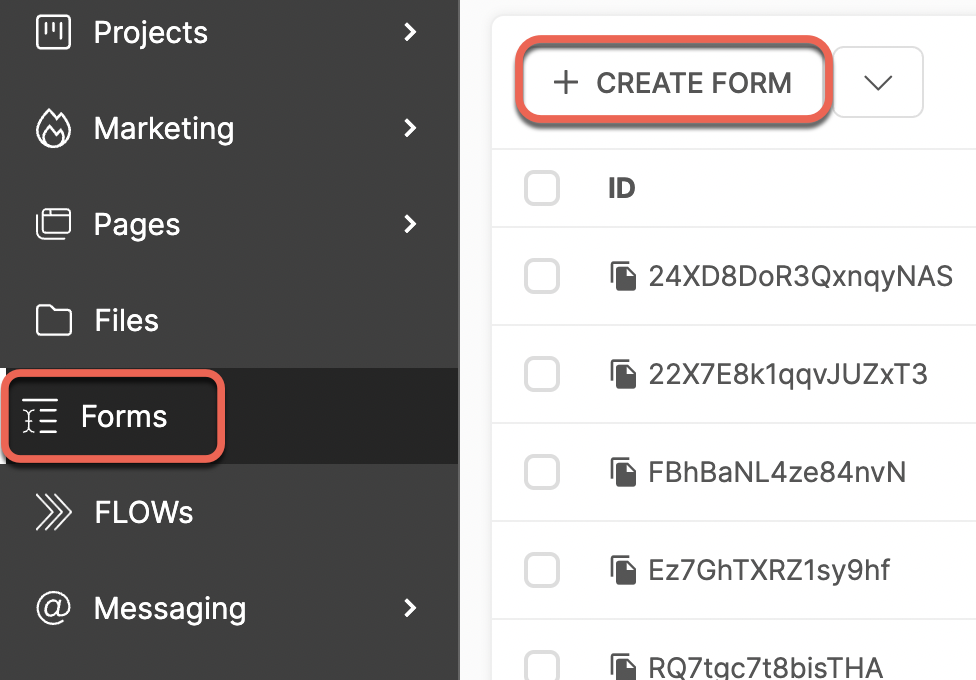
Kickoff Form
Navigate to Forms, and click +Add Form. When prompted, choose Kickoff Form.
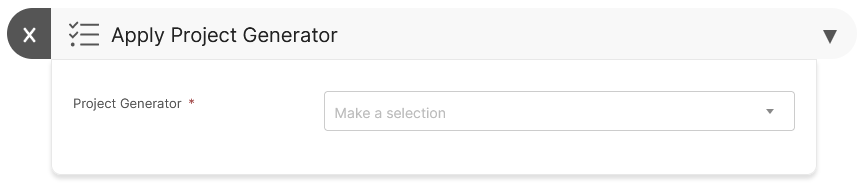
 The dropdown menu will appear when you select the Role as a Client.

No-Code Automations
In many areas of the platform, you can set an "Apply Project Generator" Automation to trigger.
CLICK HERE to learn about Automations
How do I manage a Project Generator?
Navigate to Projects > Projects > Generators, and click the Options menu button beside the Project Generator you would like to manage.
 Edit: Modify the details of the Project Generator
View: View the information for the Project Generator
Duplicate: Make a copy of the Project Generator
Apply Folder Generator: You can apply a pre-created Folder Generator to the Project
Delete: Remove the Project Generator from the platform. Note: This cannot be undone.