
OFFICE: Payment Gateways
What is a Payment Gateway?
A Payment Gateway is an eCommerce service that processes payments for online and traditional brick and mortar stores. Payment Gateways facilitate these transactions by transferring key information between payment portals such as the platform and the front-end processor/bank.
You can configure a Payment Gateway to accept credit cards or, if eligible, you can also utilize ACH (bank transfer) via Stripe.
How do I connect my account to a Payment Gateway?
Navigate to Office > Gateways.

You'll see a selection of Payment Gateways to choose from to link. Click the Configure button of the Gateway of your choice to get started.
You can link as many Payment Gateways to your account as you'd like.
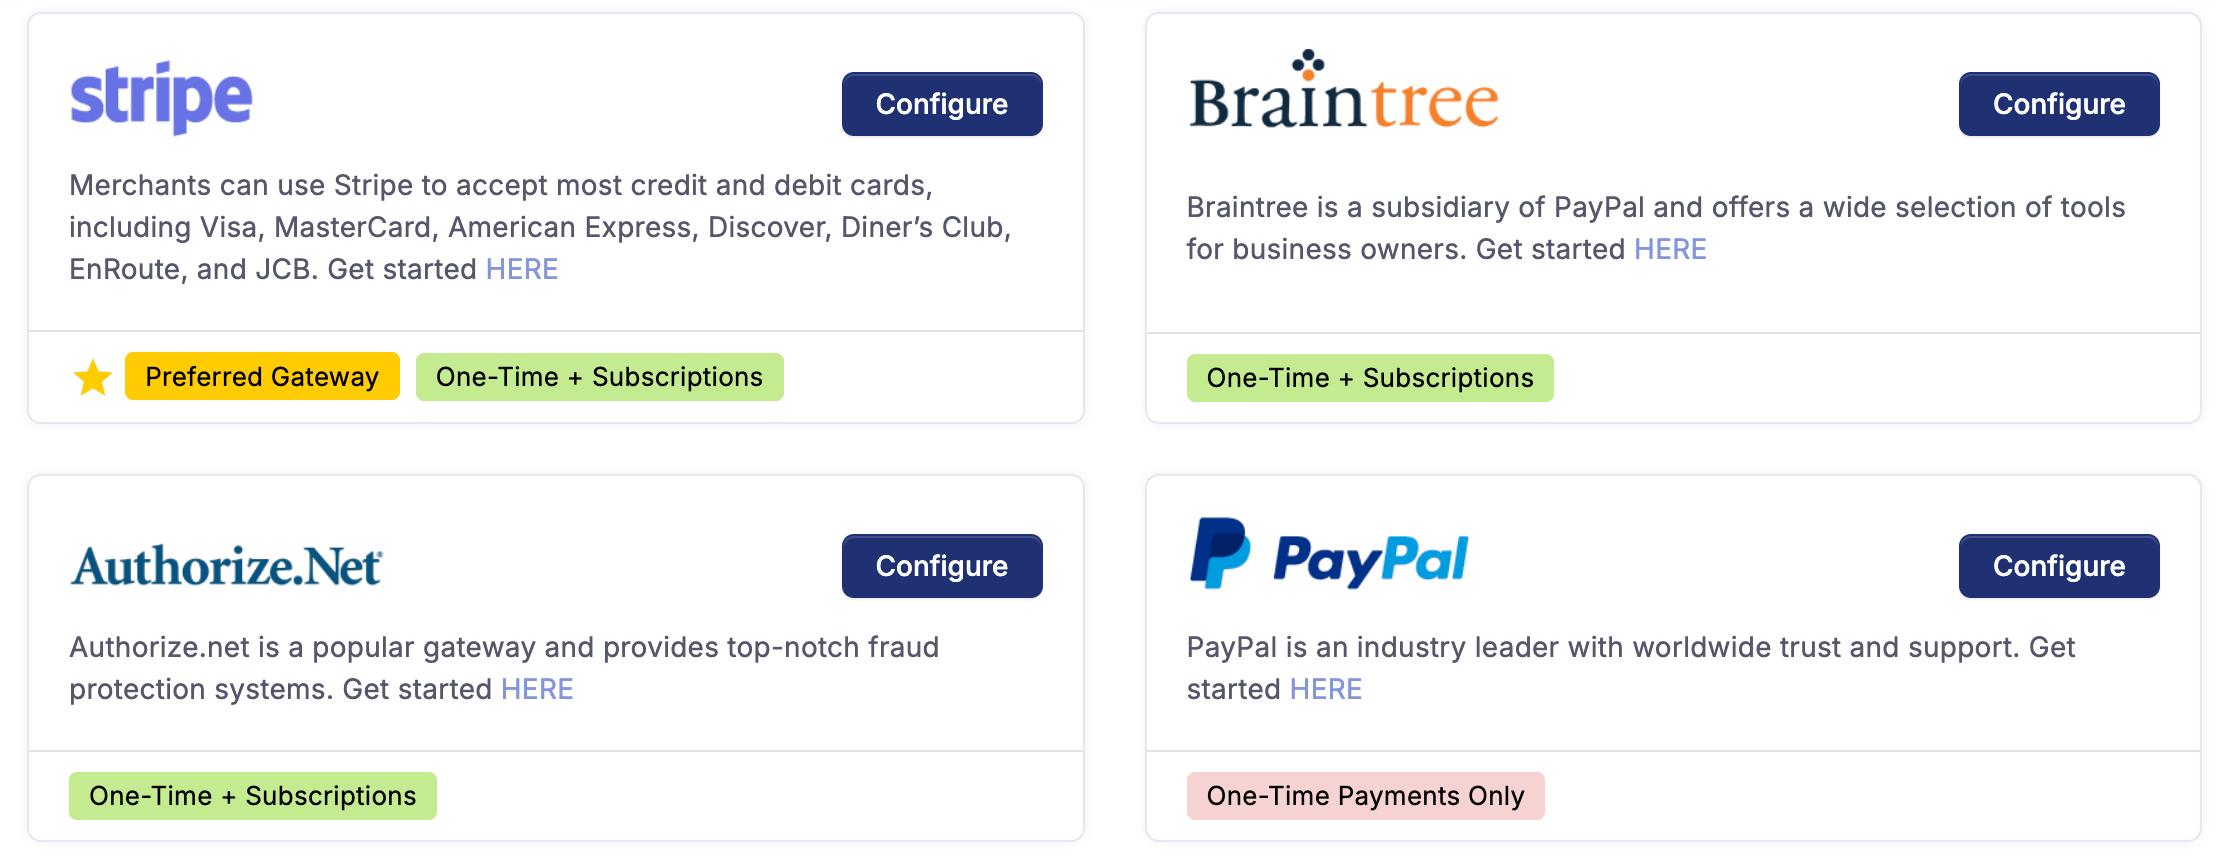
Since some Payment Gateways do not have the ability to handle Subscription Payments you'll be able to filter the Gateways that are shown. We plan to add additional Gateways so a search field is also available to use.

CLICK HERE to learn about Subscription Payments
While setting up a Gateway you can set it as a Preferred Gateway.

This will add an icon on a Payment Gateway card.
 Setting a Preferred Gateway ensures that there is never a scenario in which your Clients have to choose a Gateway while adding a Stored Payment Method in their My Office Dashboard.
CLICK HERE to learn about Stored Payment Information
CLICK HERE to learn about My Office Dashboard
TIP: You are required to have a Preferred Gateway. The first Payment Gateway that you configure will automatically be set as your Preferred Gateway.
How do I choose my Gateways?
Firstly, if you are interested in setting up Subscription Payments, you will need to use either Stripe, Braintree, or Authorize.net. The PayPal gateway cannot be used with Subscription Payments.
We have no special or promotional relationship with any of these Payment Gateways. We don't make money when you choose one or the other and we don't take any cut of the payments that your Clients make through our platform. We simply act as the tool for payment while the Payment Gateway handles all the actual processing and payouts.
Stripe & Stripe ACH
This is probably the best choice for most people. The application and setup are as easy or easier than anything else out there. It's easy to understand, the rates are industry standard, and it's trusted by some of the biggest companies on the planet.
Stripe can be used for both standard Invoice payments and Subscription Payments.
Braintree
Braintree is also a very good choice for a Payment Gateway. The application setup is fairly straightforward but can take a bit longer than Stripe. The rates are industry standard and it's also trusted by some of the biggest companies on the planet.
Braintree can be used for both standard Invoice payments and Subscription Payments.
Get Started with Braintree HERE
Authorize.net
PayPal
PayPal is an industry leader and most people already have a PayPal account. Depending on the region of the Client, a PayPal account may not be required and payment can be completed as a guest.
PayPal can ONLY be used for standard Invoice payments. PayPal cannot be used for Subscription Payments.
How do I set up Stripe as my Payment Gateway?
After you have your Stripe account created, set up, and verified to accept live payments, ensure you are logged in to your platform account and your Stripe account.
In your platform account, click the Configure button for Stripe.

You'll need to input the values for the Publishable Key and the Secret Key from your Stripe account.

After copying and pasting these values into each respective field, click the Save button.
In your Stripe dashboard look for the Developers menu item and then select API keys to locate the required information.
Please Note: When in stripe you will need to tick the option for 'Building your own integration' not 'providing this key to another website'.

You can use the same account (and the same keys) for both the Stripe and Stripe ACH Gateways. These will be treated as separate Gateways.
How do I set up Braintree as my Payment Gateway?
After you have your Braintree account created, set up, and verified to accept live payments, ensure you are logged into both your platform account and your Braintree account.
In your platform account, click the Configure button for Braintree.
 You'll need to input the values for the Merchant ID, Public Key, and Private Key.

After copying and pasting these values into each respective field, click the Save button.
To find your credentials in your Braintree dashboard, click the "Cog" icon and select API.
 You'll find the necessary values in the Keys tab.

How do I set up Authorize.net as my Payment Gateway?
Ensure that you are logged into your Authorize.net account. Then, be sure you are set up in LIVE mode

Then, you'll need to access your API Credentials & Keys through your Account tab.

You'll then want to copy the values

In your platform account, click the Configure button for Braintree.

You'll need to input the values for the API Login ID and Transaction Key, and you will need to set your Currency.
CLICK HERE to learn about Currencies

After copying and pasting these values into each respective field, click the Save button.
Before use, you will also need to change some of the options in your Authorize.net account. In the menu on your homepage, click Fraud Detection Suite listed under Tools.
 Scroll down to Transaction Settings, and click on Enhance AVS Handling Filter.

Change every option under General AVS Responses and Address and ZIP Code Responses to "Allow". If these restrictions are left in place, the Client can encounter errors while attempting to pay an Invoice.

How do I set up PayPal as my Payment Gateway?
After you have your PayPal account created, set up, and verified to accept live payments, ensure you are logged in to your platform account and your PayPal account.
In your platform account, click the Configure button for PayPal.

You'll need to input the values for the API Username, API Password, and API Signature.

After copying and pasting these values into each respective field, click the Save button.
To find these values in your PayPal account, follow these screenshots to access the API credential. You are looking for the NVP/Soap/Classic API integration.


