
Scheduling an Appointment
Scheduling an Appointment
Both the Staff and Contacts have the ability to schedule an Appointment as long as there is an available Appointment Generator to choose from.
CLICK HERE to learn about Appointment Generators and Scheduling
CLICK HERE to learn about Rescheduling an Appointment
TIP: The Time Slots both the appointer and appointee sees are based on their respective Time Zone. For example, if a Contact with a Time Zone of GMT-07:00 creates an appointment at 11am and the Staff Member has a Time Zone of GMT-04:00 the Appointment will convert to 2pm when viewed by that Staff Member.
You can enable or disable scheduling in Calendar Settings.
CLICK HERE to learn about Appointment Calendar Settings
How do I schedule an Appointment as a Staff Member?
If a Staff Member has an Appointment Generator assigned and configured they have the ability to create an Appointment for a Contact.
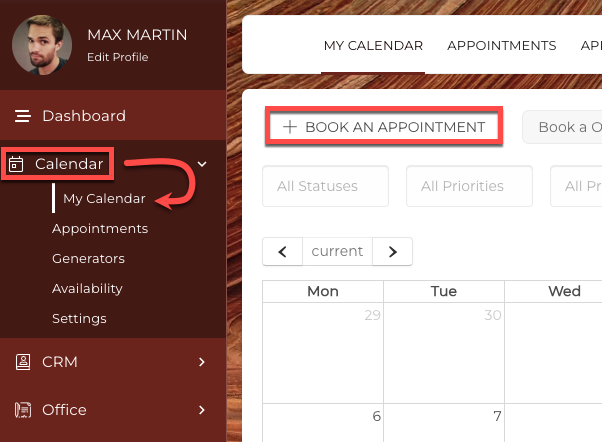
Navigate to Calendar > My Calendar and click the +Add Appointment button.
A modal will appear in which you can select the Appointment Generator you would like to use for the Appointment. The list will populate in alphabetical order.
 Click on the desired Appointment Generator to expand the options.
Select a Contact from the dropdown menu. Then select your Time Zone. When you change your Time Zone from the dropdown the available slots will be refreshed to reflect the new Time Zone.

You will also be able to select from a Time Slot. Selecting a Time Slot will show the confirmation details of the Appointment. You will then be able to configure Reminder Notifications for this Appointment.
 You can send a reminder notification to yourself. Choose the type of notification and time before the scheduled Appointment. You can also choose to send a reminder notification to the assigned Target in the same way. For both options, you can add additional notifications if you'd like alternate delivery methods or additional times.
In addition you can add notes to the Appointment. Please be aware that the notes are public and the Contact can also see the notes in their own calendars.
Once the Book It! button is clicked the scheduled Appointment will appear on the Appointer's calendar with an icon indicating its current status.

Clicking the Appointment on the Calendar will bring up a modal with the confirmation details.
 You can configure any Reminder Notification settings here for both you and the assigned Contact.
In addition you can add notes to the Appointment. Please be aware that the notes are public and the Contact can also see the notes in their own calendars.
You can also choose to Reschedule or Cancel the Appointment. Canceling an Appointment will remove it from both users' calendars and a Notification email will be sent to both users.
How do I schedule an Appointment as a Contact?
If scheduling is enabled, and at least one Appointment Generator is available, a Contact can create an Appointment themselves.
Navigate to Calendar > My Calendar and click the +Add Appointment button.
 A modal will appear in which a Time Slot can be selected. If multiple Appointment Generators are available a dropdown menu will be available to choose from them.

Selecting a Time Slot will show the confirmation details of the Appointment. Click Book Now to schedule the Appointment.

The scheduled Appointment will appear on the Contact's Calendar with an icon indicating its current status. It will also appear on the assigned Staff Member's Calendar.

Clicking the Appointment on the Calendar will bring up a modal with the confirmation details as well as the option to Reschedule and Cancel the Appointment.
 Rescheduling the appointment will move the Appointment in both calendars and send both parties an email of the changes and canceling an Appointment will remove it from both calendars and a notification email will be sent to both parties.
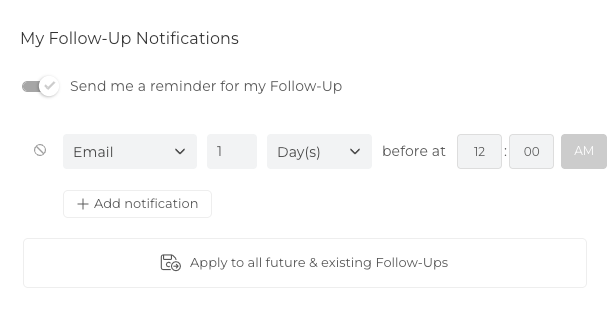
How do I manage my Reminder Notifications for Appointments?
To configure additional Reminder Notifications for your Appointments, or to override all existing settings you have configured for your individual Appointments, click the icon located on the right side of your screen while viewing My Calendar.

CLICK HERE to learn about the Twilio Integration

CLICK HERE to learn about Follow-Ups
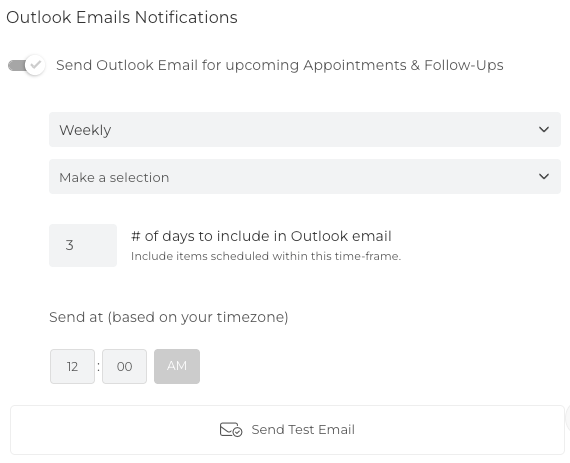
Email Notifications to Users
When an Appointment is created, an email notification will be sent to the assigned Contact and Staff Member. You can customize these templates in Email Templates.
CLICK HERE to learn about Email Templates

These Email Notifications have a special feature - they allow you to quickly add the Appointment to your external calendar.
The receiver of the notification can click an icon to add the Appointment to their Google Calendar, Yahoo Calendar, Outlook Calendar, or iCal Calendar.

The user can also click Add to Other Calendar to download an ICS file enabling them to manually add the Appointment to a different external calendar.
You'll need to add the [add-to-calendar] Placeholder to the Email Templates in order for the user to have these options.
 Or, if you are using the default Email Template, you can simply click the Reset to Default button. The new Default Template has already been updated to include these Placeholders.
