
PARTNER: SU1TE Partner Program
I've officially joined the SU1TE Partner Program! What next?
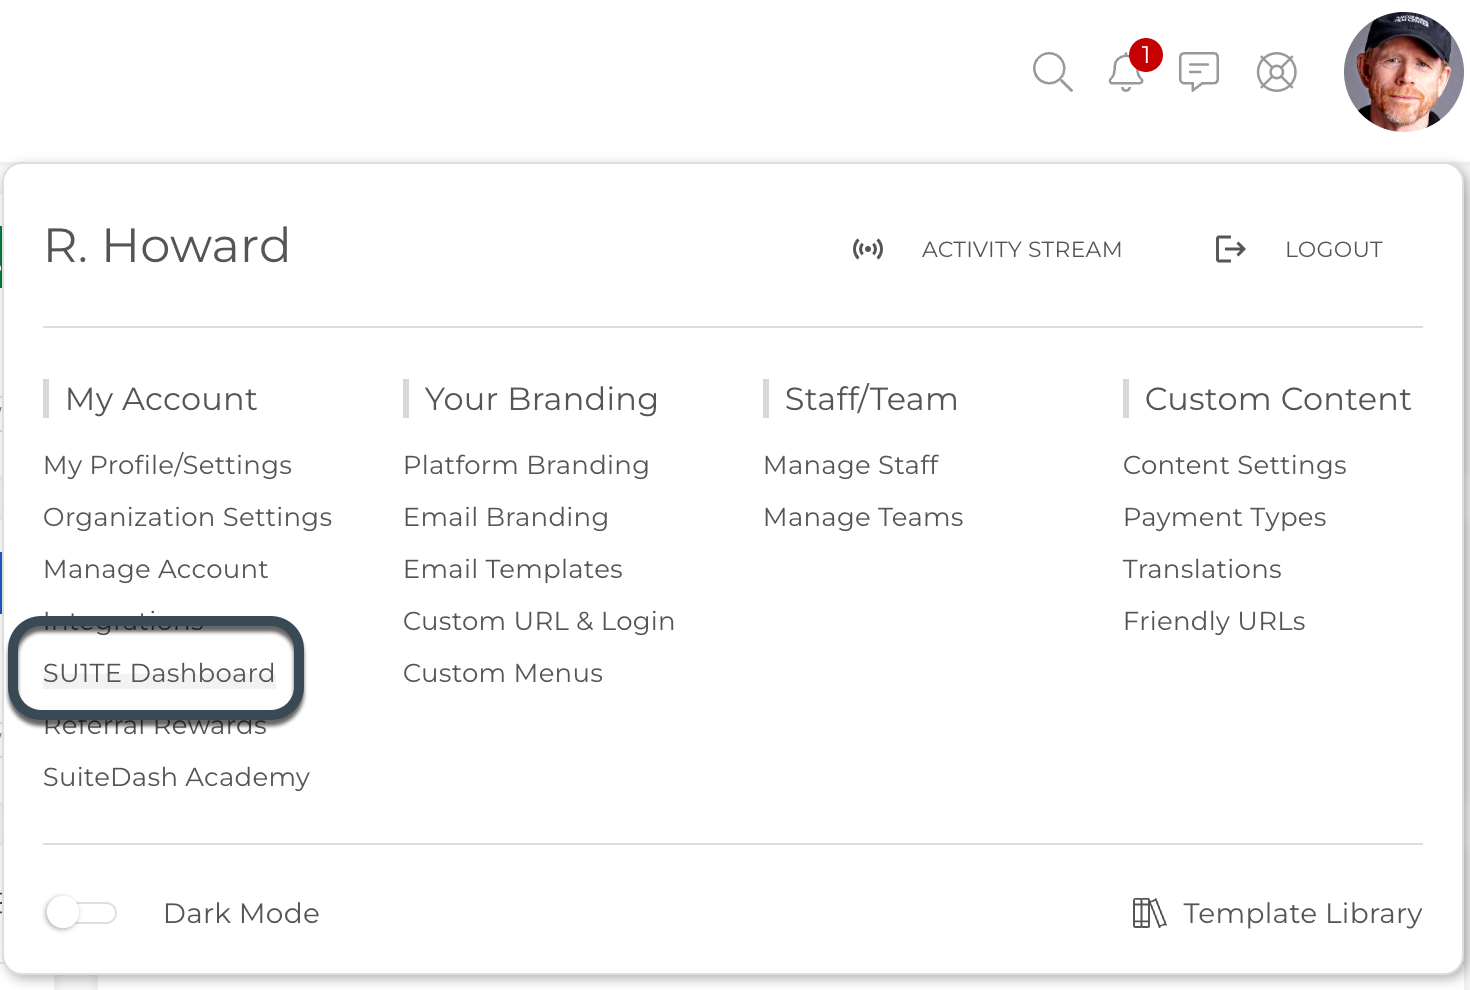
After you've completed the SU1TE (previously Reseller) application process, there will be a new navigation item in your Flyout Menu titled SU1TE Dashboard. This is where you will manage your SU1TE "Child" Accounts.
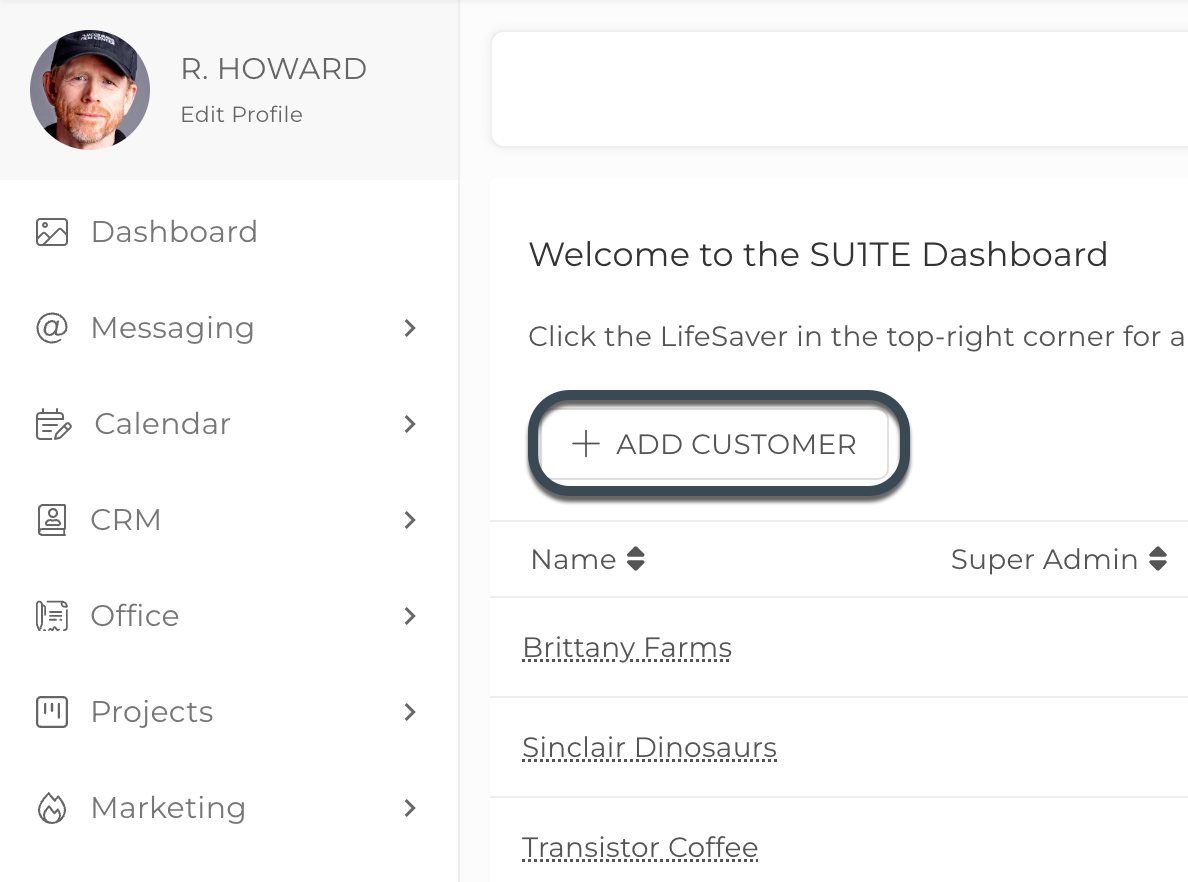
To add a new "Child" Customer Account, simply click the +Add Customer button.
A modal will appear in which you can enter the required information related to the Child account. This is for your reference and cannot be seen by the customer. It can be changed at any time.
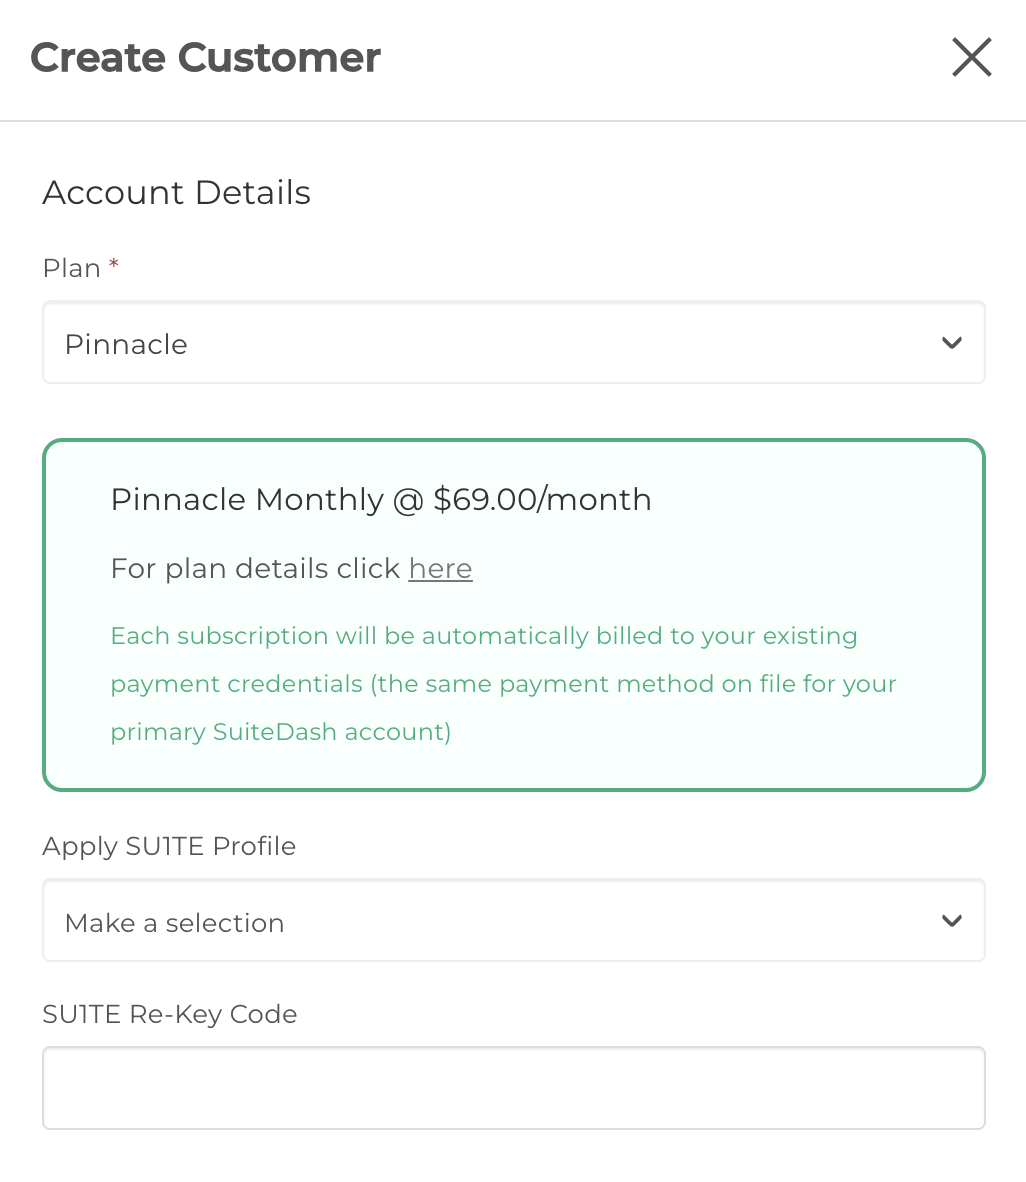
Plan: First you will choose the plan you would like.
This can be one of the following;
Free Trial: Create an account at no charge. After 30 days it will automatically be deactivated (you can then choose to upgrade to a Paid Plan.)
Pinnacle: This is the highest tier plan. You will be charged $69 immediately upon creation and will be charged this same subscription fee each month.
Thrive: This is the mid-tier plan. You will be charged $34 immediately upon creation and will be charged this same subscription fee each month.
Start: This is the lowest tier plan. You will be charged $14 immediately upon creation and will be charged this same subscription fee each month.
CLICK HERE to learn about Plans
IMPORTANT: If the Start & Thrive Plan options are not available in your Dashboard, you are currently only authorized to resell Pinnacle @ $69/month. To unlock Start & Thrive, you will need to sign a new SU1TE Partner Agreement. Please contact us at help@suitedash.com for more details.
You can also choose to apply a SU1TE Profile to apply to the Child account as it's being created.
CLICK HERE to learn about SU1TE Profiles
SU1TE Re-Key Code: If you have purchased a lifetime licence (SU1TE Re-Key Code), you can add the Code into the Re-Key Code box instead of choosing a plan.
 SU1TE Child Account Details: You will be required to provide the following;
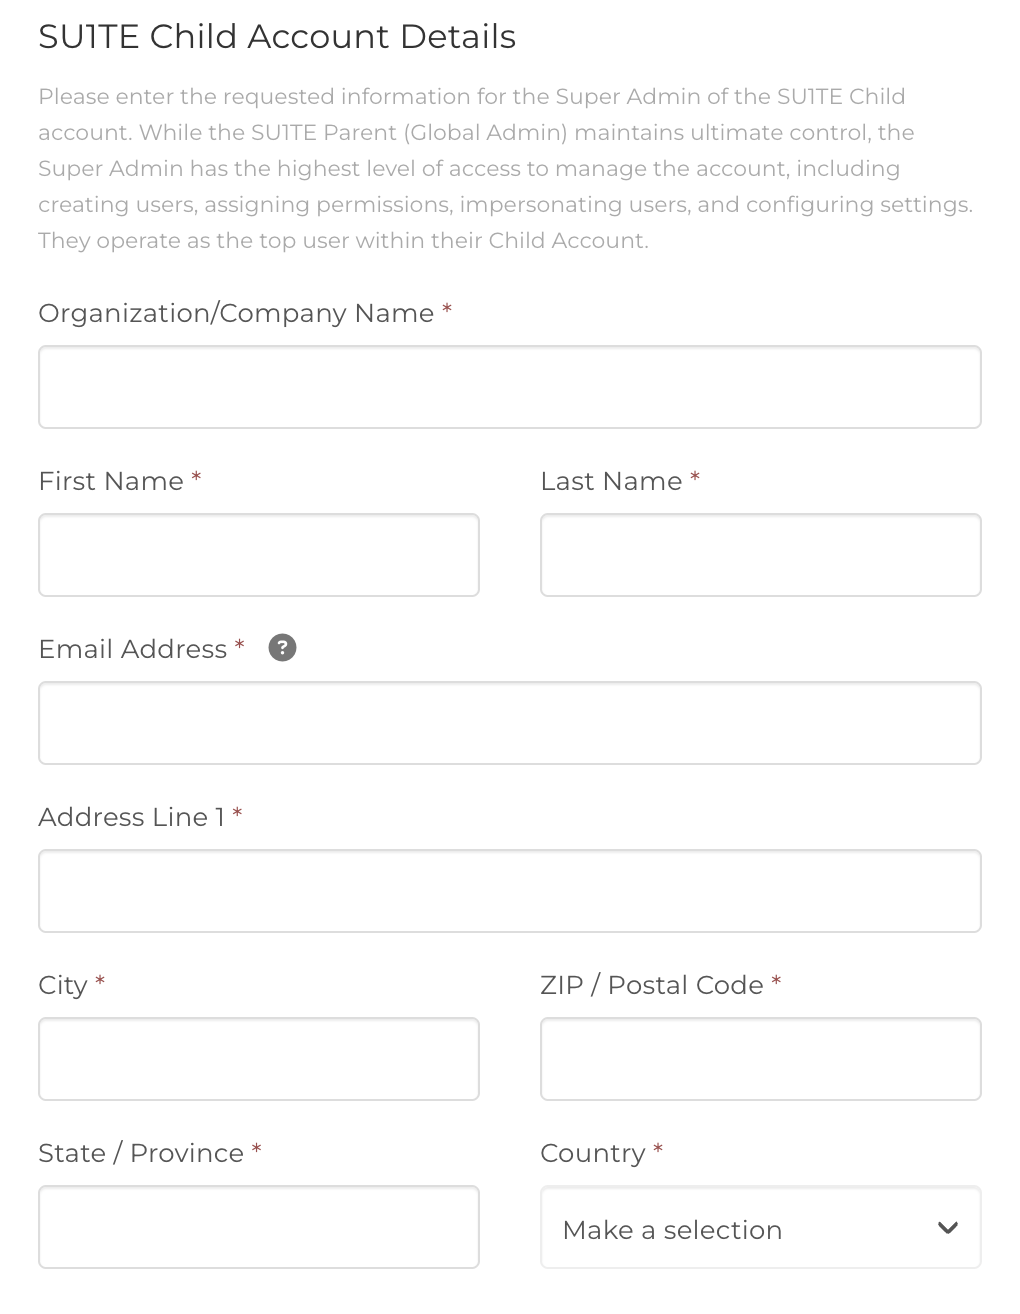
- Organization/Company Name: This will be the "Organization Name" of the Child account.
- First Name: The First Name of the Super Admin (your Client).
- Last Name: The Last Name of the Super Admin (your Client).
- Email: This will be the email address for the Super Admin.
- Address Line 1: This will be used in the Company Settings of the Child account. If this is not known, the SU1TE Partner's information should be used.
- City: This will be used in the Company Settings of the Child account. If this is not known, the SU1TE Partner's information should be used.
- State/Province: This will be used in the Company Settings of the Child account. If this is not known, the SU1TE Partner's information should be used.
- ZIP / Postal Code: This will be used in the Company Settings of the Child account. If this is not known, the SU1TE Partner's information should be used.
- Country: This will be used in the Company Settings of the Child account. If this is not known, the SU1TE Pa information should be used.
You can also choose to send the Portal Access Invitation Immediately however this can be un-toggled if you are not ready to send them the invitation.
 Super Admin Access: The Contact added at this stage will be the Super Admin. Super Admins will have high-level permissions however you also have the option to customize. Permission options include White Label Access and viewing Integrations and/or API and Webhooks.
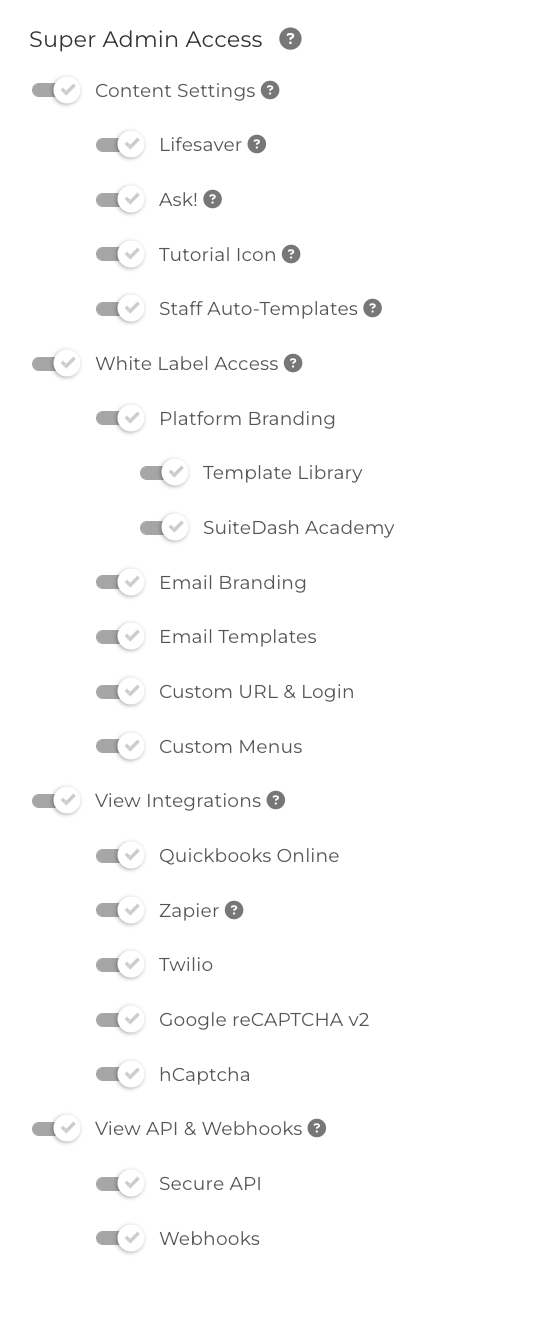
You can customize their permissions by un-toggling any of the options and this can also be edited at anytime.
When you are ready, click the Create Customer button. The new Child Account will now be listed in your SU1TE Dashboard.
How do I customize my Customer's account?
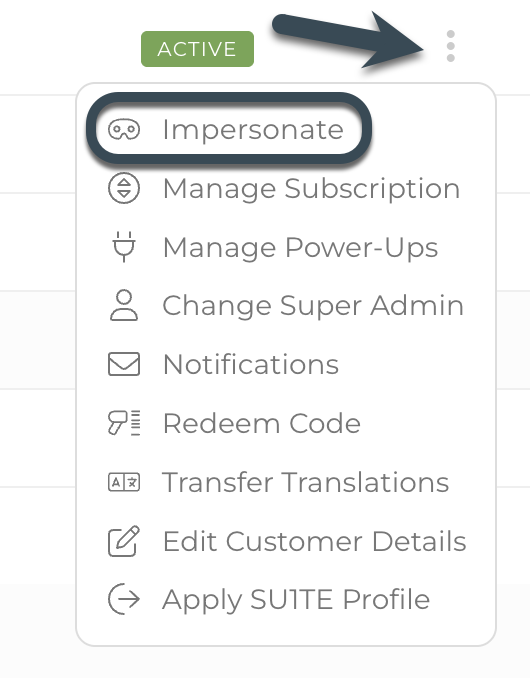
You will be the Global Admin of any Customer account you set up. This is the highest level of access and is invisible to your customers. Your customers, as Super Admins, will not see a 'Manage Account' page and they cannot see the Subscription you have with SuiteDash.To access the Customer's account for setup, click the Options menu button and select Impersonate.
While in the Impersonate mode, you are acting as the Global Admin of the Child Account. This gives you full access to all areas of the platform, including all branding and customization controls that may be hidden from your customer's Super Admin role.

With these branding options, you can fully brand the platform either to your product brand, or if you are acting in the capacity of a design shop, to your customer's brand. If you haven't provided the Super Admin with white label permissions they will not see these options however if you have chosen to give them white label permissions they will be able to see and edit white label options.
CLICK HERE to learn about Branding.
How do I give my Customer access to the account?
IMPORTANT: Before inviting any users to the Child Account portal, it is essential that you complete setup of your Custom URL. Any Portal Access Invitation emails sent before setup will NOT generate correctly.
CLICK HERE to learn about setting up your Custom URL.
When you're ready to provide access to your customer, you can invite them via the three dots option menu on the SU1TE Dashboard.
 Alternatively, you can use the Impersonate feature to enter as the Global Admin and navigate to Flyout Menu > Manage Staff and select Send Invite from the three dot options menu.
Adding additional staff users to the Child Account
You can add additional staff users when you are impersonating the account by clicking Flyout > Manage Staff. You have the option of adding staff as an Admin Manager, Admin, Project Manger, Office Manager, Teammate, Salesperson or Freelancer.
CLICK HERE to learn about Internal Roles and Permission.
Click the +Add Staff Member button.

During creation, you can choose to immediately send the Portal Access Invitation to grant them access to the platform.

You can choose to send them an invitation to the Portal later by clicking the Options menu button and selecting Send Invite.

CLICK HERE to learn about creating Staff Members.
From the Manage Staff page you will be able to see all the staff you have added. The Admin Role will have an additional icon to identify Admin Managers and Super Admins.
Admin Manager
 Super Admin

How do I manage my Child Accounts?
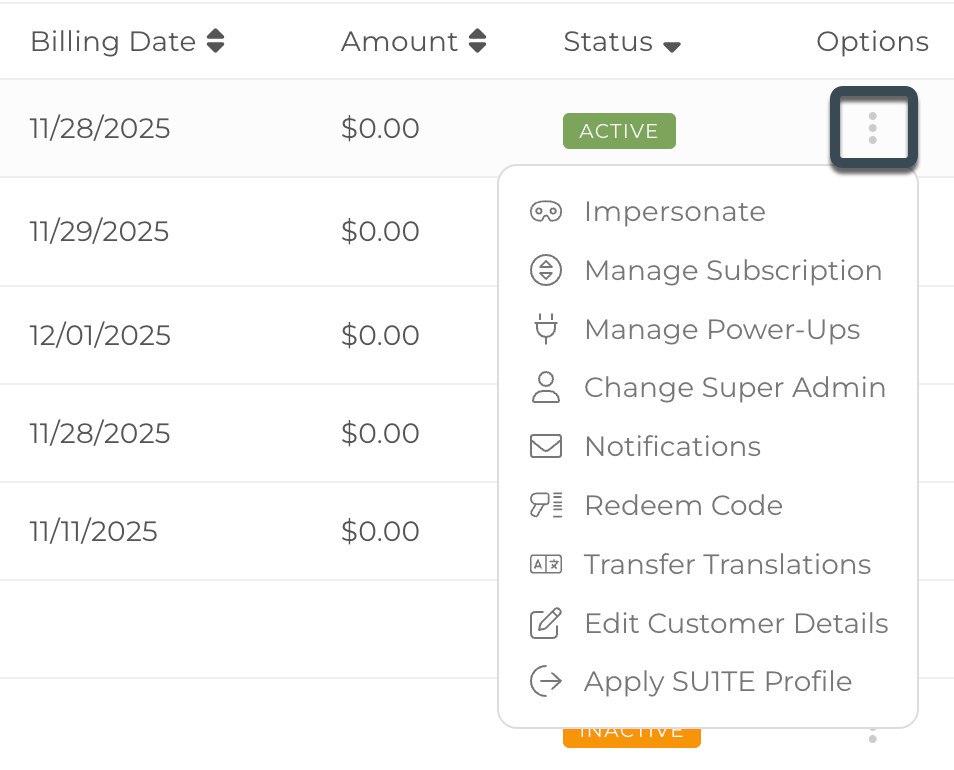
In your SU1TE Dashboard, click the Options menu button to manage your Child Account.
Manage Subscription
You can upgrade/downgrade the Plan for your Child account. You can also click Cancel Subscription to render the Child Account Inactive.

An Inactive Child Account cannot be accessed by any user. However, you can choose to reactivate the account at any time.
Add Power-Ups
You can choose to activate a Power-Up in the Child account to unlock additional features.
Currently, you can activate the PRIME and PLUS Bundle Power-Up's and clicking the Community Bundle will lock in pre-launch pricing.
Once added, you can deactivate it from this same screen.
 CLICK HERE to learn about Power-Ups.
Change Super Admin
You have the option to change the Admin Manager at anytime.
Notifications
You can customize the Super Admin Notification. There are different Notification templates depending on the login status.

Redeem Code
If you have purchased a Lifetime SU1TE Code, you can add it to the account.
Renaming Child Accounts
If you've updated your configured Translations, or forgot to configure a SU1TE Profile to include this option, you can still transfer over your configured Translations.
CLICK HERE to learn about Translations.
IMPORTANT: Transferring your Translations will overwrite any existing configurations you already have. This cannot be undone.
Edit SU1TE Child Customer Details
You can change the Organization/Company Name, address and/or email from this option. Please note that if you are wanting to also change the Super Admin you will do so from the Change Super Admin option as detailed above.
Renaming Child Accounts
If you are just wanting to rename your Child Account you can simply clicking on the name of the Company, and edit it accordingly.

Click anywhere on the screen to save the change.