
Email Cannons
What is an Email Cannon?
An Email Cannon is an email sent out to a single recipient. Email Cannons are not just email notifications, but richly-formatted emails, similar to what you can create in an Email Campaign. You can fire an Email Cannon to Prospects and Clients, in either "Invited" or "Uninvited" Status.
This can be triggered via a Kickoff Form / Update Form, No-Code Automation, CRM Import, or manually adding a Contact.
*Email Cannons are only available with the PLUS Bundle Power-Up
CLICK HERE to learn about Email Campaigns
How do I create an Email Cannon?
IMPORTANT: You may need to manually enable visibility for both the Main Menu Item & Sub Menu Item for Automations in Custom Menus.
CLICK HERE to learn about Custom Menus
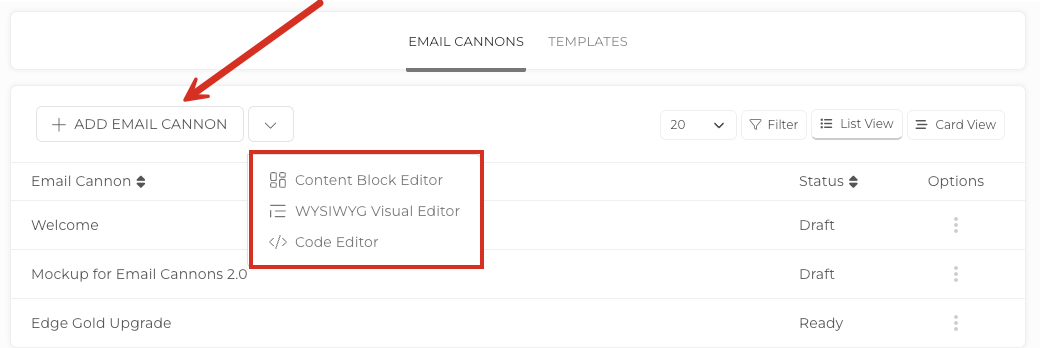
Navigate to Automations > Email Cannons, and click the +Add Email Cannon button.

First, click the button to + Email Cannon and select the type of Editor you would like to use. You'll be able to select between the Content Block Editor, WYSIWYG Editor or an Advanced Code Editor.
Start by adding your preferred settings for the email cannon.
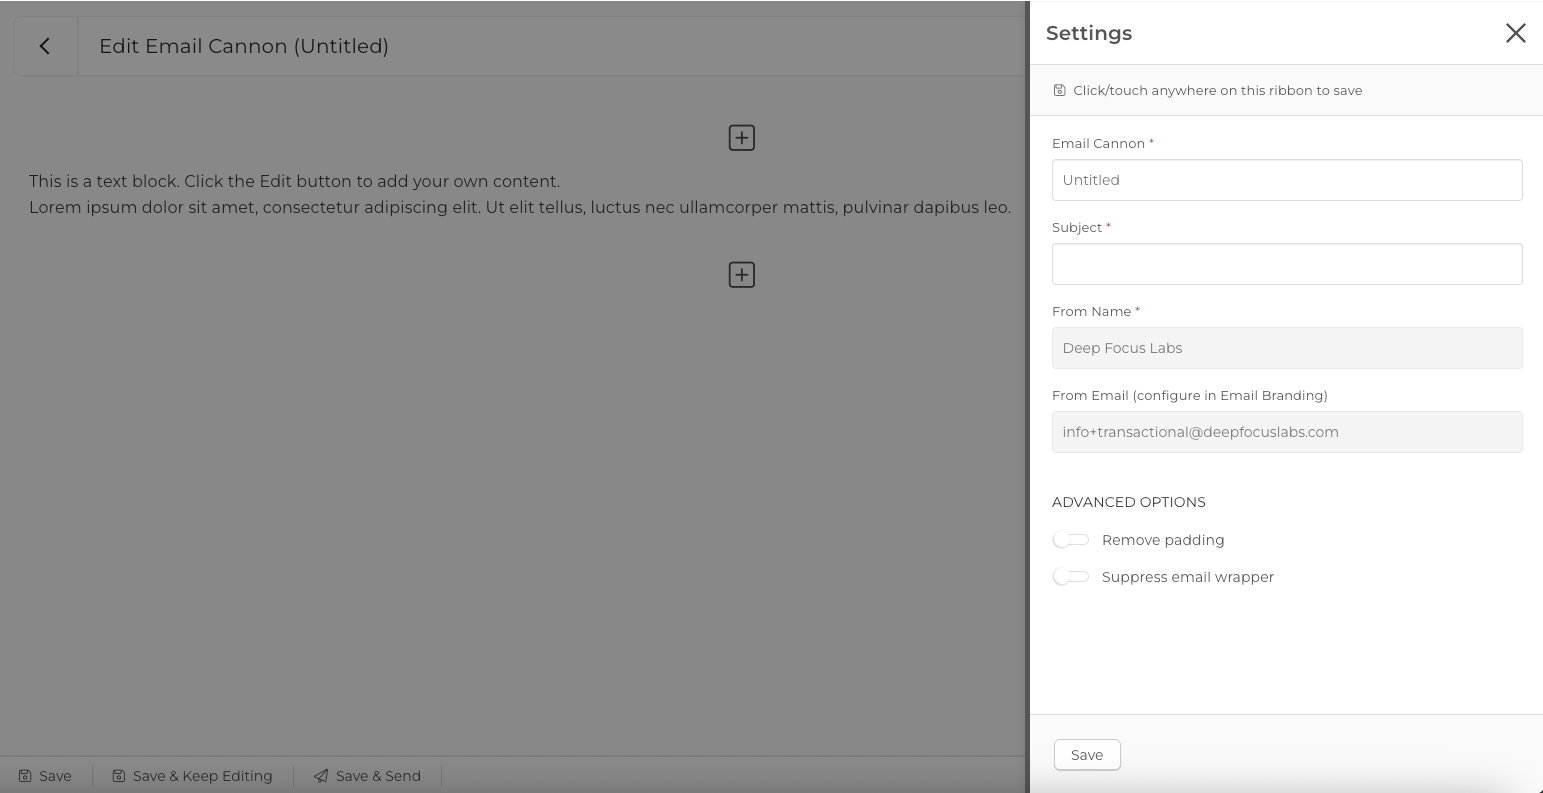
Email Cannon: The name of the Cannon for your reference. Recipients will not be able to see this name.
Subject: The subject line that will appear in the sent email.
From Name: The "from" name that will appear in the sent email.
The From Email will automatically be populated from your Marketing Settings.
Remove padding: Remove the margin spacing automatically added around the text of the email.
Suppress email wrapper: Send the email without the branding customizations (color, logo) you have set in your platform.
CLICK HERE to learn about Email Send Settings
When you're ready to continue, click the Save button.

Use the body of the editor to create your email content. Since Email Cannons can only be received by Contacts, Placeholders are already enabled.
CLICK HERE to learn about DDPs.
You can also add an Email Cannon Template by clicking the library icon on the right side depicted with books.
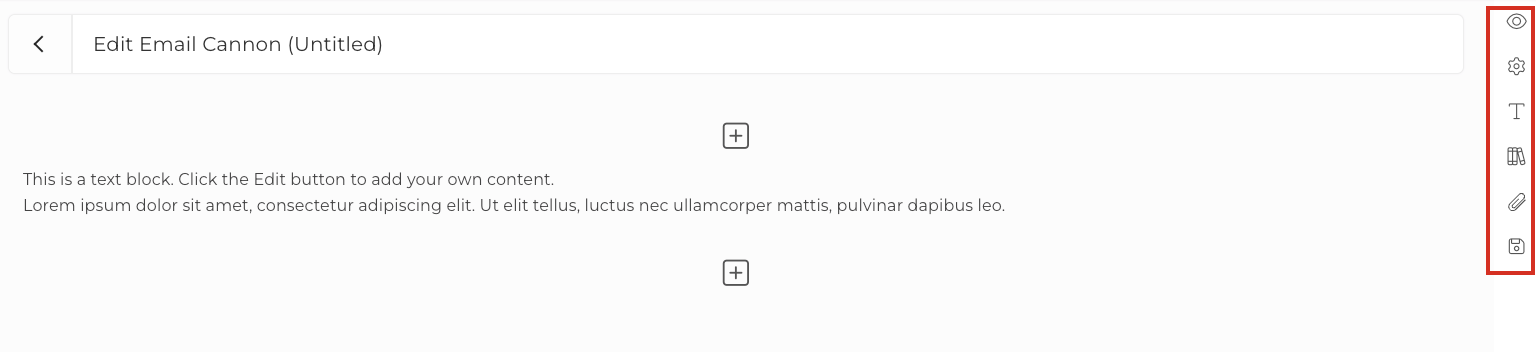
You can click the Preview 'eye' icon to see an example of how your email will appear to the user while building and making changes. Click the desktop computer, tablet or mobile phone icons at the top to see how it will appear for each device.
You can additionally use the File Attachment 'paperclip' icon to attach files by dragging and dropping or you can click Select Files.
When you are ready to continue, click the Save, Save & Keep Editing or Save & Send..

You will see a preview of the final email. You can enter an email address to test the Email Cannon. Please note that any Placeholders used will not populate in a test email.

Once you are ready to save, click the Save Email Cannon button or you can also choose save it as a Draft instead.
How do I send an Email Cannon?
You can fire an Email Cannon by triggering it in several different ways.
Manually
To manually trigger an Email Cannon, navigate to CRM > Contacts or CRM > Companies.
 Click the Options menu button (3 dots) beside the Contact/Company you would like to fire an Email Cannon to and select Fire Email Cannon(s).

Select an Email Cannon from the dropdown menu. You can select multiple Cannons to send.

Forms
An Email Cannon can be triggered when your Contact completes a Kickoff, Checkout or an Update Form.
CLICK HERE to learn about Kickoff Forms
CLICK HERE to learn about Checkout Forms
CLICK HERE to learn about Update Forms
Navigate to Forms and click the +Create Form button.

When prompted choose either Kickoff Form, Checkout Form or Update Form.
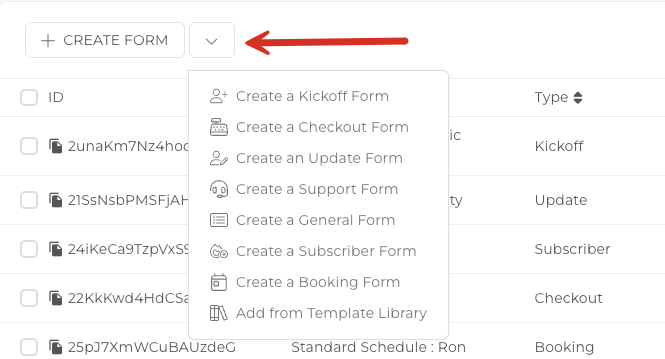
You'll be able to choose an Email Cannon from the dropdown menu. You can select multiple Cannons to send.
TIP: In Kickoff Forms and Checkout Forms, this option will not appear until you select either a Prospect or Client as the Role.

No-Code Automation
An Email Cannon can be fired via the "Fire Email Cannon(s)" Automation. This Automation is available in most areas of the platform.
CLICK HERE to learn about Automations

Select the Email Cannon from the dropdown menu that you would like to be triggered as part of this Automation set. You can select multiple Cannons.
Adding a Contact
While manually adding a Contact to your CRM, you can set off an Email Cannon.
CLICK HERE to learn about adding Contacts
Navigate to CRM > Contacts, and click the +Add Contact button.
 Ensure that you select either Prospect or Client as the Role.
 Select an Email Cannon from the dropdown menu. You can choose multiple Cannons to send.

CRM Import
While importing Contacts into your CRM, you can trigger an Email Cannon to fire.
CLICK HERE to learn about Importing Contacts.
Navigate to CRM > Contacts.
 Select Import Contacts from the three dots options menu on the top of the CRM page.

Ensure that you select Client or Prospect as the Role.

You'll be able to select an Email Cannon from the dropdown menu. You can select multiple Cannons to send.

How do I manage Email Cannons?
Navigate to Automations > Email Cannons.
 Click the Options menu button for the Email Cannon you would like to manage, and you will be presented with several options.

Preview: See a preview of how the email will appear to recipients.
Attached Files: View files that are currently attached, download the attached files, and/or attach additional files.
Edit: Edit the details and contents of the Email Cannon.
Delete: Remove the Email Cannon from the platform. It will NOT be sent if already assigned and triggered via Form or Automation. Note: This cannot be undone.
Duplicate: Create a copy of the Email Cannon.
How do I create an Email Cannon Template?
An Email Cannon Template is a pre-formatted email that you can use as a starting point to create Cannons. It allows you to create the base framework of the Email so that you don't need to keep creating the same one over and over again.
To get started, navigate to Automations > Email Cannons.
Select Templates in the top navigation menu bar, then click the +Add Template button.

Choose which Editor you would like to work in. Choosing the WYSIWYG Editor will allow you to switch to HTML at any time.

Give your template a Title, then use the body of the editor to create your email content, just as you would while creating an Email Cannon.
You can select a previously-created Cannon Template from the Select Template dropdown menu, or start from scratch.
Click the Save button once you are ready to save your Template.
While creating an Email Cannon or Email Cannon Template, you can select the Template from the dropdown menu to populate its content. You can then tweak the content however you'd like.

How do I manage Email Cannon Templates?
Navigate to Automations > Email Cannons > Templates.
Click the Options menu button (3 dots) beside the Email Cannon Template you would like to manage.

Edit: Edit the details and contents of the Email Cannon Template
Preview: See a preview of how the template email will appear to recipients.
Contribute Template: If you have the Template Library enabled, you can contribute this Template to the community.
CLICK HERE to learn about the Template Library
Delete: Remove the Template from the platform. Note: This cannot be undone.