
CRM: Importing & Exporting Contacts and Companies
What is a CSV Import?

Instead of adding your Contacts and Companies manually or having them self-register, you can choose to bulk-add them via a CSV file import. CSV stands for "Comma Separated Values" and it's a very common method for importing/exporting data. It can be easily viewed as a standard spreadsheet. A CSV can be easily created using Microsoft Excel or Google Sheets as they both have built-in methods to export a CSV.
Before you're ready to import your Contacts/Companies, you will need to do some thinking about how your data will be configured. Will you be using Custom Fields?
CLICK HERE to learn about Custom Fields.
You have three ways to bring this data in, and you choose the one that matches what you are importing:
- Import Contacts to add people on their own.
- Import Companies to add organisations on their own. You can still set a Primary Contact for each Company as part of this.
- CRM Target Import to add Companies and Contacts together from a single file, where each row pairs a Company with a Contact and you choose which of the two your automations should target.
All three are reached from the same CRM menu and share the CSV concepts described below, so most of this article applies whichever method you choose. The parts that are specific to CRM Target Import are called out as you go.
Contact Import
 Currently, you can import the following:
- First Name
- Middle Name
- Last Name
- Primary Email
- Individual Address Items
- All default extra information fields (Work Email, Home Email, etc.)
- Tags
- Contact Custom Fields
- Company Custom Fields (Private and Public)
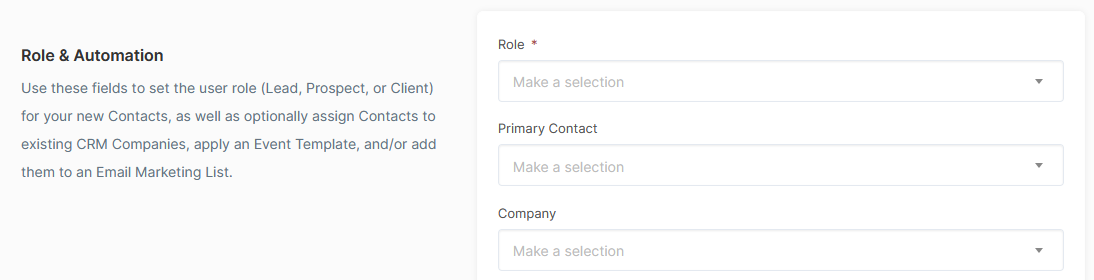
Then you can assign the following to each individual Contact:
- Role (Please note the Role you choose will affect which of the following actions are available)
- Company
- Company Category
- Primary Contact status (if applicable)
- Circle(s)
- Email Marketing Audience
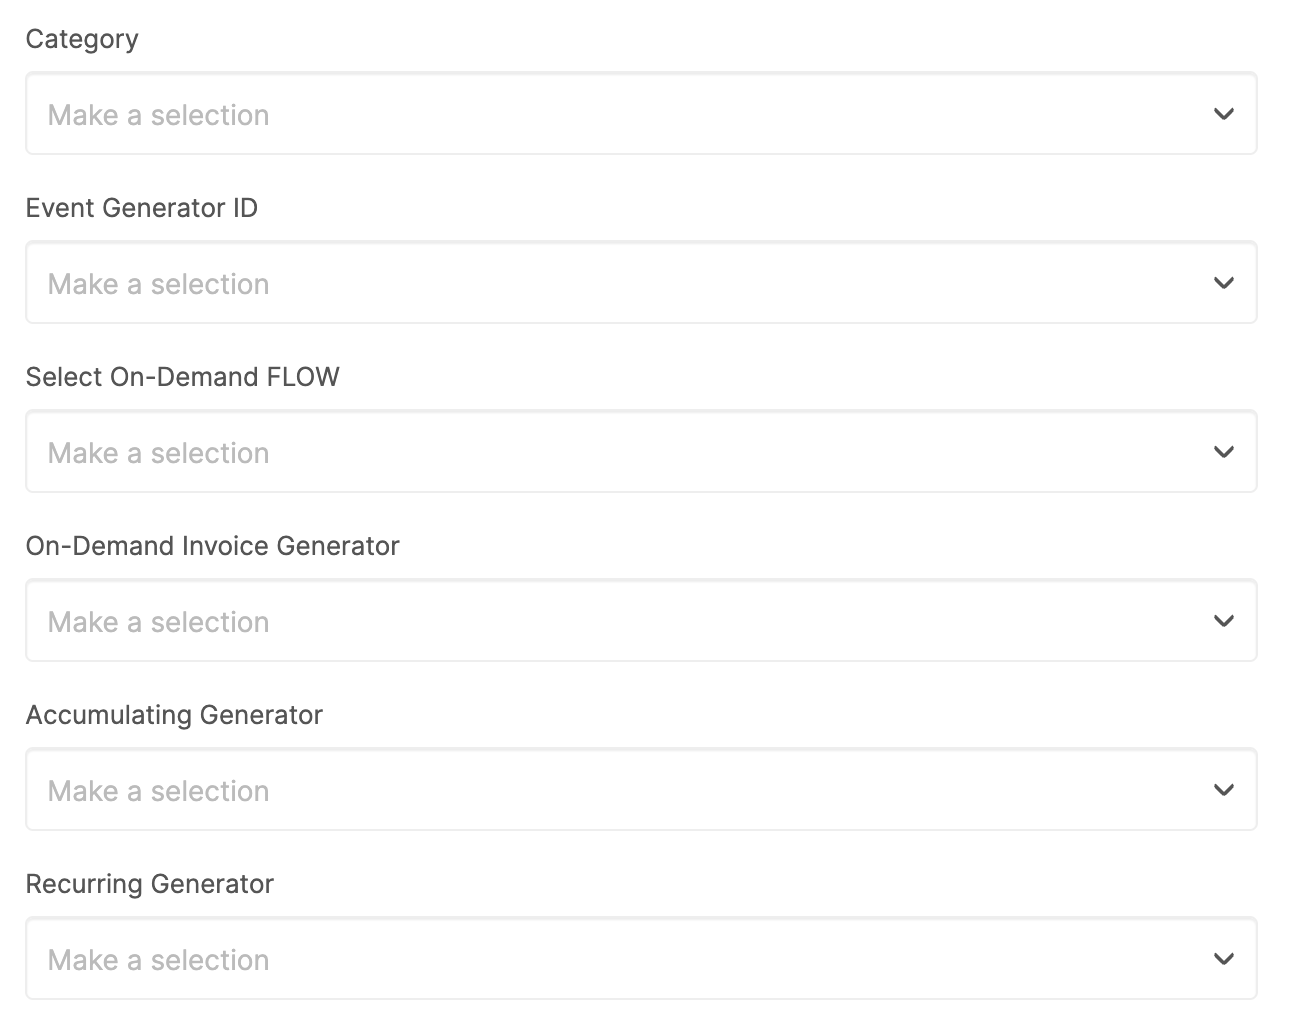
- Follow-up Generators
- On-Demand FLOW
- On-Demand Invoice Generator
- Accumulating Generator
- Recurring Generator
- Proposal Generator
- On-boarding FLOW
- Email/Form Cannons (if you have the PLUS Bundle Power-Up)
- Community/Space (if you have the COMMUNITY Power-Up)
- Coordinator
- Assign Salesperson
Company Import

If you are working with Companies you can import through the Company Import. This will still enable you to add the Primary Contact however the automation you add for the import will be aimed at the Company not the individual.
When you import your Company CSV you can either create new companies or update existing Companies.
Then you can assign the following to the company:
- Role (or you can choose to import all Contacts in the list as one particular Role)
- Primary Contact Email
- Primary Contact First Name
- Primary Contact Last Name
- Existing Primary Contact (from your existing Contacts)
You can also toggle to 'Prevent the Primary Contact from switching into individual mode'.
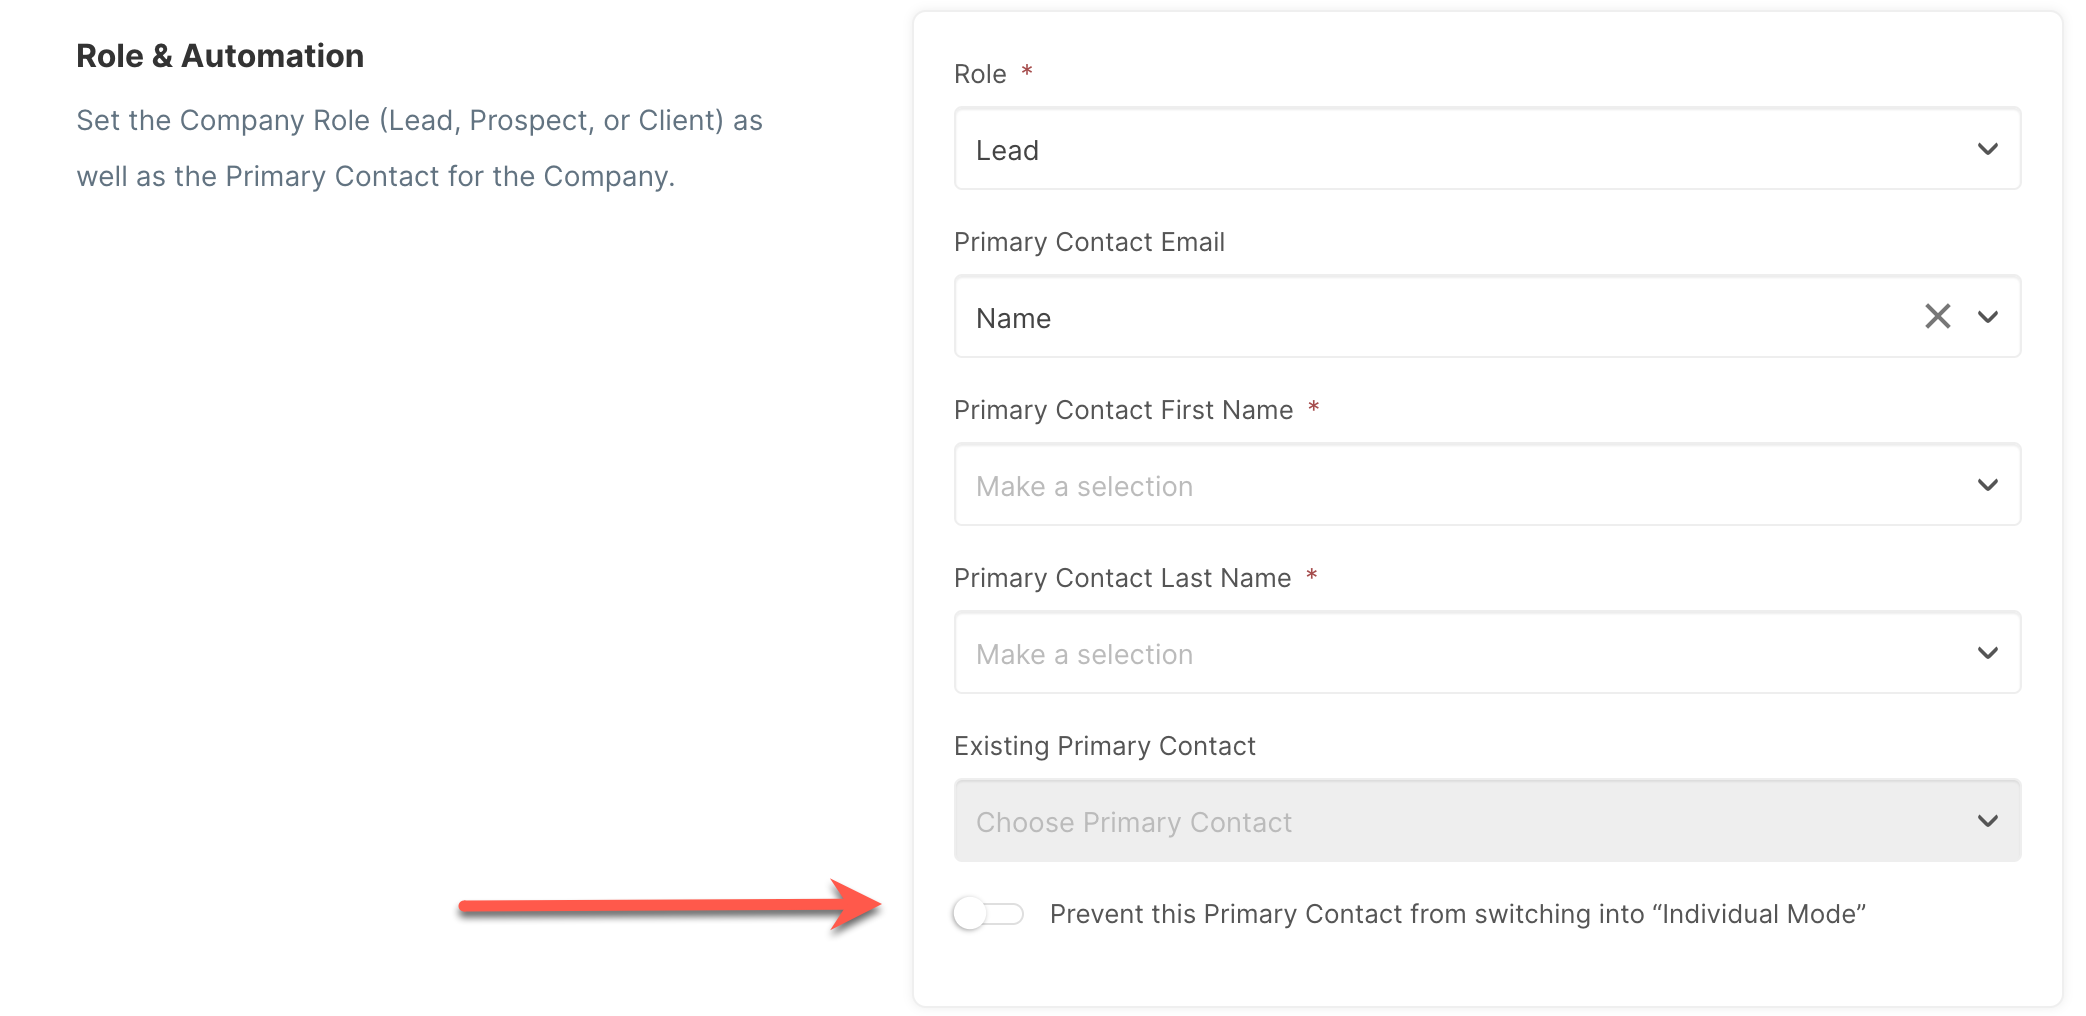
CLICK HERE to learn about preventing a Primary Contact from switching into 'Individual Mode'.
Currently, you can import the following:
- Company Name
- Category
- Company Phone
- All default extra information fields (Work Email, Home Email, etc.)
- SMS Phone
- Website
- Full Address
- Individual Address Items
- Background info
- Tags
- Company Public Custom Fields
- Company Private Custom Fields
- Target Custom Fields
- Community/Space (if you have the COMMUNITY Power-Up)
Target Import

If you want to bring Companies and Contacts in together, rather than running two separate imports, you can use CRM Target Import. Each row of your CSV can carry both a Company and a Contact, and for every row you choose the target, the Company or the Contact that your CRM automations and Target Custom Field values should attach to.
This import is built for speed of entry, so it maps only the essentials, Company name plus Contact first name, last name, and email, along with your Target Custom Fields. Detailed entity level Custom Fields (public Company info, private data, and so on) are still handled afterward by the dedicated Import Contacts and Import Companies tools above.
Currently, you can import the following:
- Company Name
- First Name
- Last Name
- Tags
- Role (Lead, Prospect, or Client)
- Target Type (the value company or contact)
- Target Custom Fields
The full walkthrough for running this import is in How do I execute a CRM Target Import? further down this article.
How do I Prepare to Import my Contacts/Companies?
Before pulling the trigger on your Import, we highly encourage you to take some time to read through the sections below.
Column Header & Mapping
You can create a CSV file from scratch, or you can start with the sample CSV and then modify it as needed. When you're viewing the CSV in a spreadsheet viewer (Microsoft Excel, Google Sheets, Open Office, etc.), each row of the CSV (except Row 1) will be a Contact to be imported, and each column will be a data point associated with that Contact.
DOWNLOAD: Sample CSV Import File
IMPORTANT: Currently only CSV files encoded in UTF-8 are supported. You can convert your CSV to UTF-8 through your choice of spreadsheet viewer.
Row 1 will serve as the Column Header where you will put the label for the data contained in that column. The values in Row 1 are not imported. Row 1 is used exclusively for identifying and mapping the columns.
How is a Role assigned?
You have two options on how you will assign the Role to each of your imported Contacts.
Option 1
You can assign every imported Contact a specific role by choosing Lead, Prospect or Client from the first set of values in the Role selector.
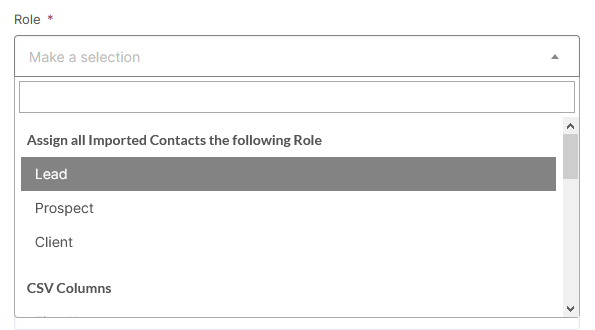
In the example above, every Contact imported during this operation would be imported as a Lead, regardless of how the CSV is configured.
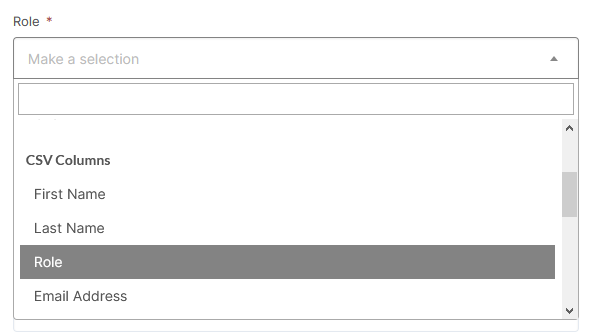
Option 2
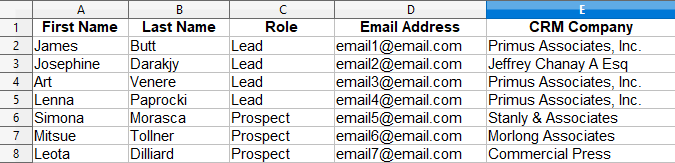
Or, you can include a Role column in your CSV and select that column using the Role selector. In this case, each Contact will have the Role assigned based on the value assigned to their row in the Role column.
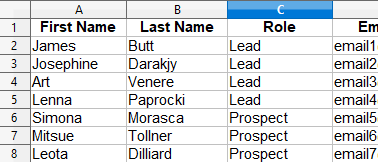
In this example, Art Venere will be given the role of Lead, while Simona Morasca will be given the role of Client.
CRM Target Import works the same two ways. You can set a single Role for every row, or map a Role column so each row carries its own value. It adds one more setting alongside Role, the Target Type, which decides whether the automation target is the Company or the Contact. You can set the Target Type once for all rows or map it to a column in exactly the same way.
How to Import Primary Contacts?
You can either Import through the Company CSV and assign your Primary Contact or you can create a Companies column in your Contact CSV along with a Primary Contact Column. The Deciding factor will be dependent on who you are wanting to aim the Automation/Actions to when you do import, the Individual or the Company?
Existing Companies
If you want to assign Contacts to an existing Company during import, the Company will need to already exist in your account.
IMPORTANT: The Company name in the CSV will need to be an EXACT match the existing Company name in your account. That means if the Company name has capitalization, punctuation, or spacing, that should be carried over precisely to your "Company" column of your CSV.
New Companies
If you want to import a new Company and assign Contacts to that Company during the import, select the option to create new Companies if no exact match is found.
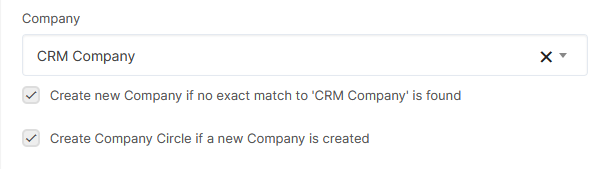
The import will look for Companies in the CRM Company column, and associate each Contact with the Company that exists in that column. So, in the below example, James Butt, Art Venere and Lenna Paprocki will all be imported and associated with "Primus Associates, Inc".
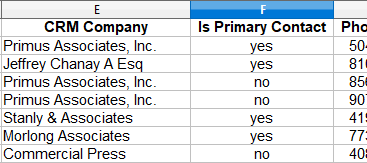
In your CSV file, set a column with a header like Is Primary Contact. You can input the accepted values yes or no, or you can leave the cell empty.
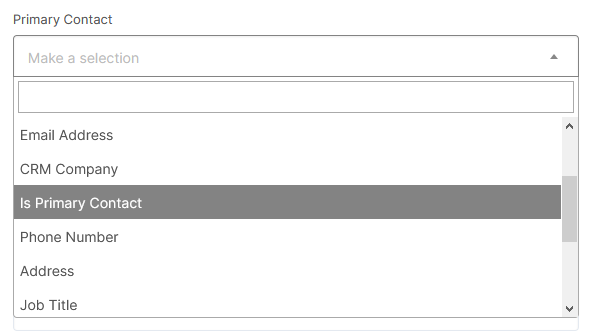
After uploading your CSV file you will see a mapping selector for designating the Primary Contact.
If the row is read as yes, then that Contact will be set as the Primary Contact for the associated Company. If the row is read as no, then nothing will be set. If the row is empty, then nothing will be set.
In CRM Target Import, the Primary Contact is handled for you. When a brand new Company is created during the run, its first imported Contact automatically becomes that Company's Primary Contact, and any later Contacts on the same Company are added as non primary. The same Contact can be the Primary Contact for several different Companies at once.
How do I Import Custom Fields with my Contacts or Companies?
If you will be using Custom Fields with your Contacts, ensure that those Custom Fields have already been created in the platform before Importing. You will then configure your CSV with a column for each Custom Field.
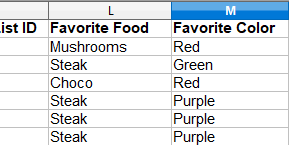
During the Import steps, you'll map the columns in your CSV to the Custom Fields you've already created in your account.
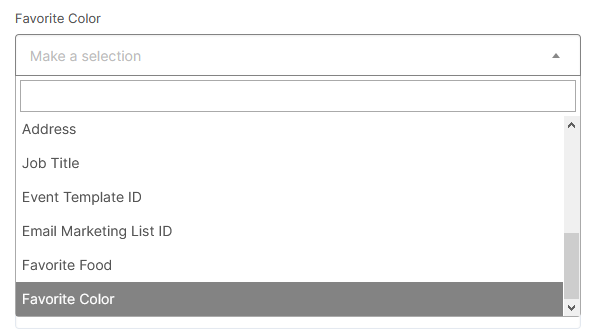
Certain Custom Field Types need to be mapped in a specific way to ensure that the import goes smoothly:
- Checkbox Type: Use checked / unchecked or 1 / 0. This is not case-sensitive.
- Date Type: Once you select your date format, you will need to make sure they all follow that same format.
- Radio Single Selection with multiselection disabled: The value from the uploaded file column should match with one of the options added to the custom field. This is not case-sensitive.
- Radio with Multiple Selections enabled: If the value from the uploaded file column contains a comma (delimiter) then the value will be split into multiple values, and each value will be validated if it matches one of the options of the custom field. All values which match will be added to the contact custom field. The delimiter: "," (comma). For example: apple,pear,plum.
- Dropdown Type with multiselection disabled: The value from the uploaded file column should match with one of the options added to the custom field. This is not case-sensitive.
- Dropdown Type with multiselection enabled: If the value from the uploaded file column contains a comma (delimiter), then the value will be split into multiple values, and each value will be validated if it matches one of the options of the custom field. All values which match will be added to the contact custom field. The delimiter: "," (comma). For example: apple,pear,plum.
If you hadn't added your Custom Fields beforehand, you have the option of adding them on the fly during the mapping phase of the Import.
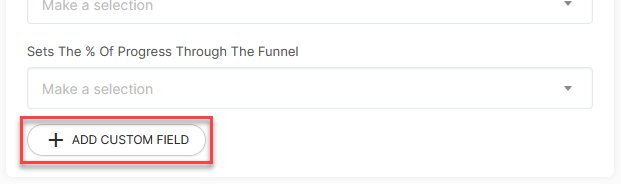
Once you add a new Custom Field, you will be provided with a new field so that you can map it to the respective column in your CSV file.
DOWNLOAD: Sample CSV Import File
TIP: If you want to do an Import that includes data for Custom Fields already created in your account, the best way to get started is to Export data from your CRM Contacts or Company list. That CSV will already have the appropriate column headers for all of your existing Custom Fields, so you can use it as a template to build your Import CSV.
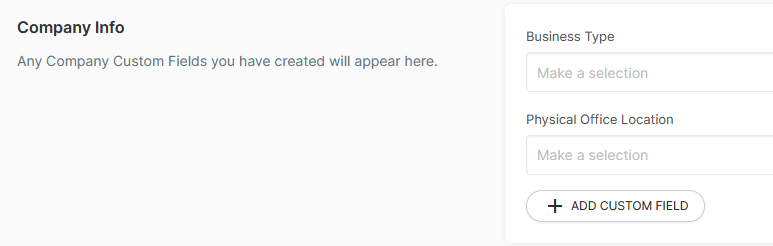
You can also import Company Custom Fields. While importing contacts, if you choose to map the Company field, a section will automatically appear displaying any Company Custom Fields you have created.
CRM Target Import maps Target Custom Fields specifically. Entity level Contact and Company Custom Fields are not shown in the Target mapping wizard, you continue to import those through the dedicated Import Contacts and Import Companies tools.
How do I execute the Import?
Importing is a three-step process, choose the correct Import type (Companies or Contacts), upload your CSV, then map the columns.
Step One
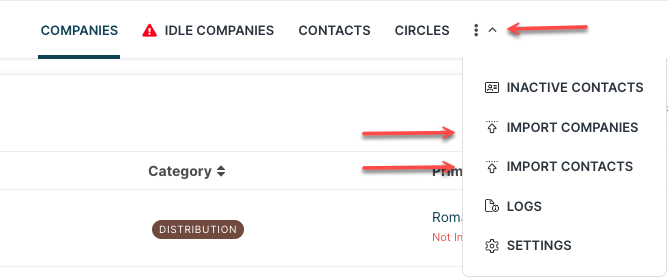
Go to CRM > Companies or CRM > Contacts and use the three dots to locate and choose your Import.
Step Two
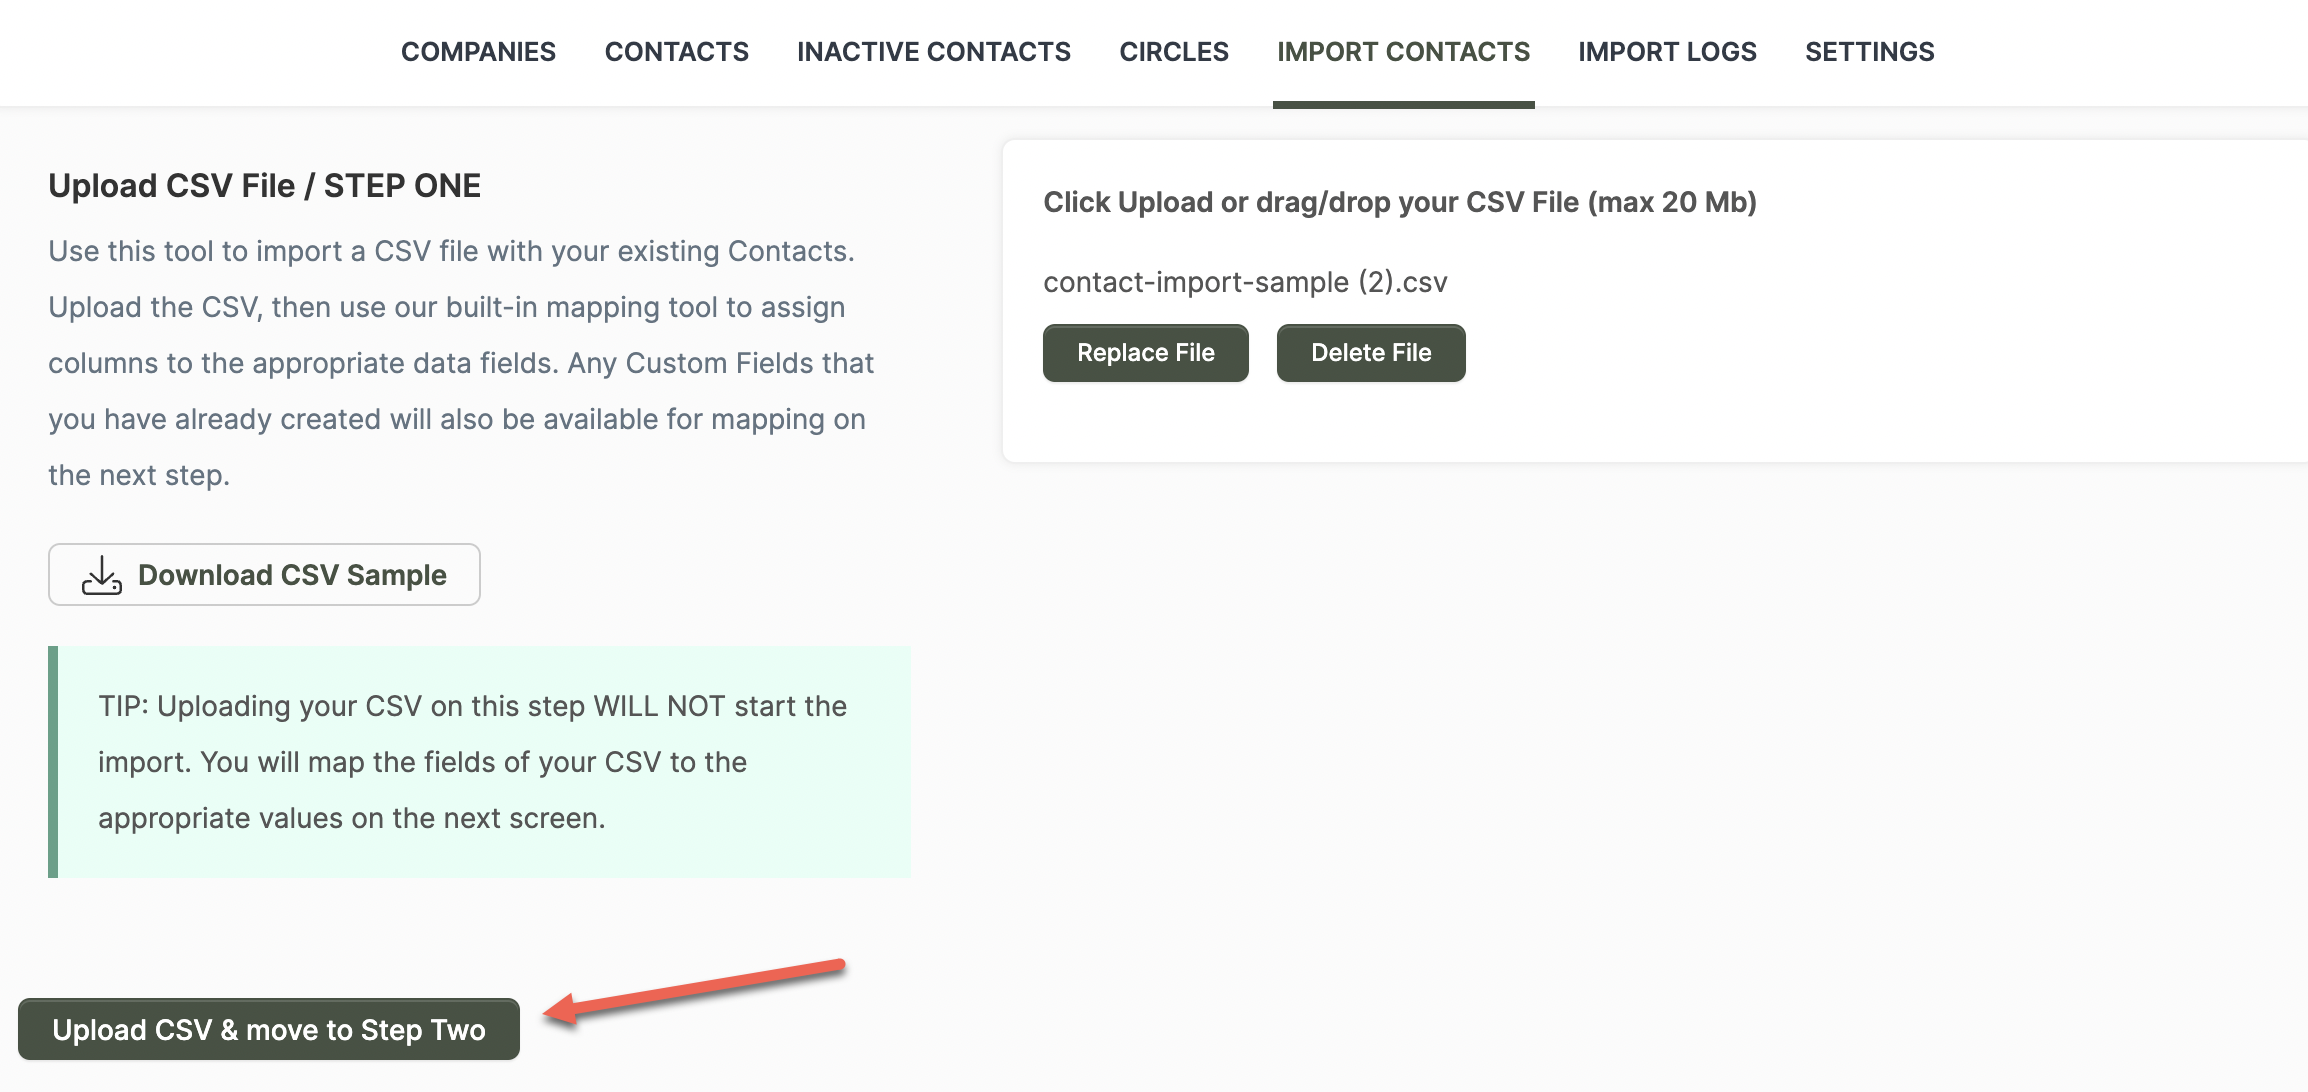
Get started by uploading your CSV. Please note that there is no commitment after this step, nothing will be Imported until after finishing Step Three.
Step Three
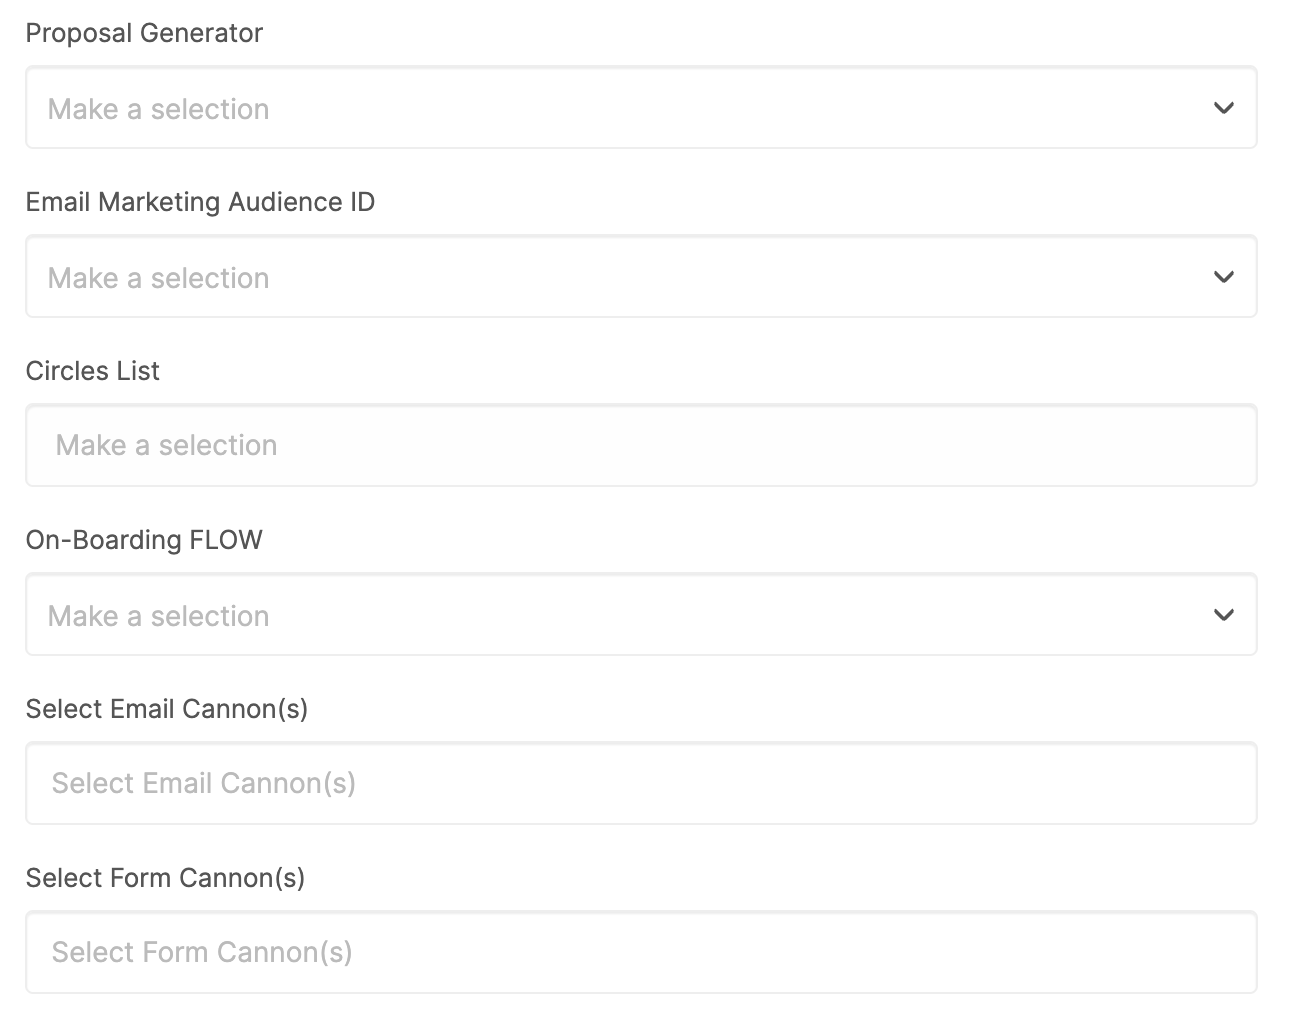
After your CSV is uploaded, you will be directed to a page where you can associate the various columns in your CSV with the standard fields in your account, as well as any Custom Fields.
On this page, the existing fields in your account will be listed in the dropdown menus. Use the dropdowns to select the desired column headers that match up with the corresponding existing fields.
CLICK HERE to learn about Company Categories
CLICK HERE to learn about Follow-up Generators
CLICK HERE to learn about FLOWs
CLICK HERE to learn about Invoice Generators
CLICK HERE to learn about Accumulating Generators
CLICK HERE to learn about Recurring Generators
CLICK HERE to learn about Proposal Generators
CLICK HERE to learn about Marketing Audiences
CLICK HERE to learn about Circles
CLICK HERE to learn about Cannons
IMPORTANT: This list will change depending on the Role selection. Do not be alarmed to see very few options when selecting Lead. This is expected as that Role does not have access to everything listed here.
You will also have a few additional Import Options presented to you before you initiate the action by clicking Import.
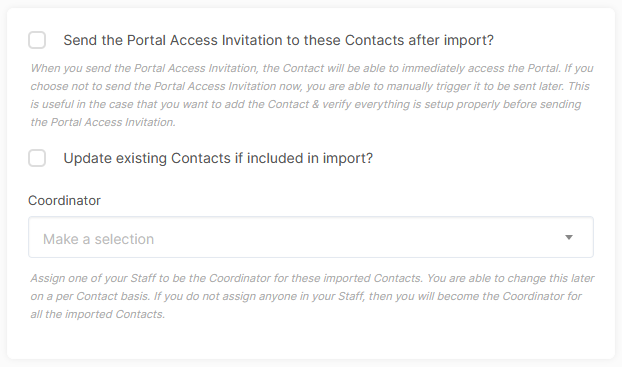
Portal Access Invitation: If checked, all Prospects/Clients that are imported will immediately be invited to the Portal. If left unchecked, then they will all be given a "Not Invited" status, which means they will not receive this email until it is manually triggered by you.
Update existing Contacts: If checked, any rows in the CSV that match with existing Contacts in your CRM (by having the same email address) will automatically be marked as "existing", and they will not be imported as new Contacts. Instead, the existing Contact's data will be overwritten by the data provided from the CSV file.
This feature is useful if you would like to update your existing Contacts' data in bulk, rather than having to update each one individually.
IMPORTANT: If you are Updating existing Contacts and you leave a field blank for a data point where existing data was present, that existing data will be overwritten and the existing data will be lost.
Coordinator: By default, the user Importing the Contacts will automatically be assigned as the Coordinator for all Imported Contacts. You can choose a different user from the dropdown menu instead.
How do I execute a CRM Target Import?
CRM Target Import follows the same pattern you have just seen, choose the import, upload your CSV, then map the columns, but it has its own menu entry and a single mapping page that handles Companies and Contacts together.
Access and upload your CSV
From the CRM area, open the "..." (more options) dropdown in the CRM menu and choose Import CRM Targets. This is a separate entry from Import Contacts and Import Companies, so you can pick it by name. Access uses the same permissions as Import Contacts, so if you can already run a Contact import, you can run a Target import.

On the upload screen, download the provided Sample CSV first and use it as your template. The sample includes a header row and a few example rows so you can see exactly how the columns line up. A typical Target Import CSV has columns for Company Name, First Name, Last Name, Email, Role, Target Type (the value company or contact), and any additional columns you want to map to Target Custom Fields.
Your file must be a CSV, must start with a header row, must have at least 3 columns and at least one data row, and must be 20 MB or smaller, the same limit as the other imports. Click Upload (or drag and drop your file) to continue. If anything is wrong with the file, you stay on the upload screen and see a specific message describing what to fix.
TIP: Uploading your CSV does NOT start the import. It only reads your column headers so you can map them on the next screen. Take your time and run a test with a small CSV of just a few rows first to confirm the mapping behaves the way you expect.
Map your columns
The mapping page walks through every field in order. For most settings you have the same choice you saw in How is a Role assigned? above, pick one value that applies to every row, or map a CSV column so the value is read per row.

Import Settings. Choose a single Role for the whole file (Lead, Prospect, Client, and so on) or map a Role column. Choose whether the Target Type is the Company or the Contact for all rows, or map a column so each row carries its own value. Both Role and Target Type are required. The Update existing entities if included in import? option, when on, updates the mapped fields on any row that matches an existing Contact or Company. When it is off, existing records are left untouched and reported as skipped.
Company Basic Info. Map the column that holds the Company Name. This is required when the Target Type creates Companies, and optional when you are importing Contacts only.
Contact Basic Info. Map the columns for First Name, Last Name, and Email. First and last name are required when the Target Type is contact. Email is required when the Target Type creates Contacts and the Role is anything other than Lead.
Target Custom Fields. Map columns to your Target Custom Fields. Only Target Custom Fields appear here. Any Target Custom Field your account has marked as required must be mapped before you can proceed.
Automations and Apply. Pick the items you want attached to the target entity of every imported row. These are global selections, they are not mapped to CSV columns. They cover the full CRM automation set, including Schedules, Follow-Up Generators, Deal Generators, Checklists, Quizzes, Worlds, Communities, Marketing Lists, Cannons, Flows, LMS Products, Folder Profiles, Project Profiles, Invoice Profiles, Recurring and Accumulating Profiles, Estimate and Proposal Generators, and Action Templates.

Each CSV column can be mapped to only one field across the mapping sections. If you try to map the same column twice, or leave a required mapping empty, the page keeps you on the step with a clear message for every problem to fix.
TIP: When you map the Role per column, the email requirement is checked later, per row, as the import runs. A row whose Role is not Lead and has no email is skipped and logged, while the rest of the import continues.
What happens to your Companies and Contacts
Every row falls into one of four outcomes, decided by what the row contains and its Target Type:
- Company only: A row with Company data but no Contact creates the Company in an idle state, with no target designation. Target Custom Field values are not saved on these rows.
- Company and Contact, target = company: Both entities are created (or updated), linked together, and the Company is designated as the target. Target Custom Field values save against the Company.
- Company and Contact, target = contact: Both entities are created (or updated), linked together, and the Contact is designated as the target. Target Custom Field values save against the Contact.
- Contact only: A target = contact row with no Company Name value creates only the Contact, with no Company and no association. Target Custom Field values and automations attach to the Contact.
Lookups are scoped to your account. Companies are matched by exact name, Contacts are matched by email. A match reuses the existing record, no match creates a new one. The Role you assign applies to both the Company and the Contact created from the same row.
IMPORTANT: The Role on an existing Company or Contact is never changed by this import, even with "Update existing entities" turned on. Updating writes your mapped fields to matched records, but it never overwrites their Role. As with every import, there is no "undo", so always test with a small CSV first.
Review the results and log
How you see results depends on the size of the import. Imports of 200 rows or fewer process immediately and land you on a result page that shows a green check if at least one row imported (or a red mark if none did), a one line summary in the form "We imported X rows from a total of Y rows", a link to the full log detail, and, if any rows failed, a link to download the failed rows as a CSV so you can correct them and re import.

Imports of more than 200 rows are queued and processed in the background. You are taken to the import log area, where your new entry appears at the top with a Pending status that flips to Completed when processing finishes. When it completes, you receive both an in app notification and an email with a link to the log entry.
Target imports share the same Import / Export Log covered in Import Logs below, and are labeled distinctly so you can tell the type at a glance. Open any entry to see a summary block, and, if any rows failed, an errors table listing each failed row beside its specific error message. Every run creates its own separate log entry, so your import history is preserved for auditing.

Tips for Importing
Here are a few things to understand as you prepare for your import.
Assigning by ID Number
If you are assigning Contacts to Follow-up Generators or Email Marketing Audiences during import, you should use the numerical "ID" of these items in your CSV file. The ID numbers of Follow-up Generators and Email Marketing Audiences can easily be found in the "ID" column of the tables in CRM > Follow-ups > Follow-up Generators and Marketing > Audiences respectively. You will need to enter only the numerical ID of the desired Generator and/or List in your CSV, not the Name. Please see the example CSV attached to this post for an example.
Importing very large data sets
Smaller CSV files will be automatically imported and you will see a success message. However, if the file is larger, you will see a message stating that the Import has been queued, and it will take a few minutes to be Imported.
The same applies to CRM Target Import. Files of 200 rows or fewer are processed immediately and you see the result straight away, while larger files are queued and processed in the background, with an in app notification and an email when they finish.
Testing your CSV Import
There is no UNDO mechanism for importing, so it's a good practice to test with only one or two rows of data before making the full Import. By doing this, you can save yourself a great deal of time in the case the Import doesn't work as you expect.
Import Logs: Understanding any errors
You can view the status of any Imports (pending and successful), as well as view specific errors related to problem Imports, by viewing the Import Logs.
Navigate to CRM > Contacts or CRM > Companies and click the 'import' tab in the tope horizontal menu bar to reveal your import options including your Logs.
It will show you the file name, type, data source, how many rows are in that file, how many were successfully imported, the status of the import, and the creation date.
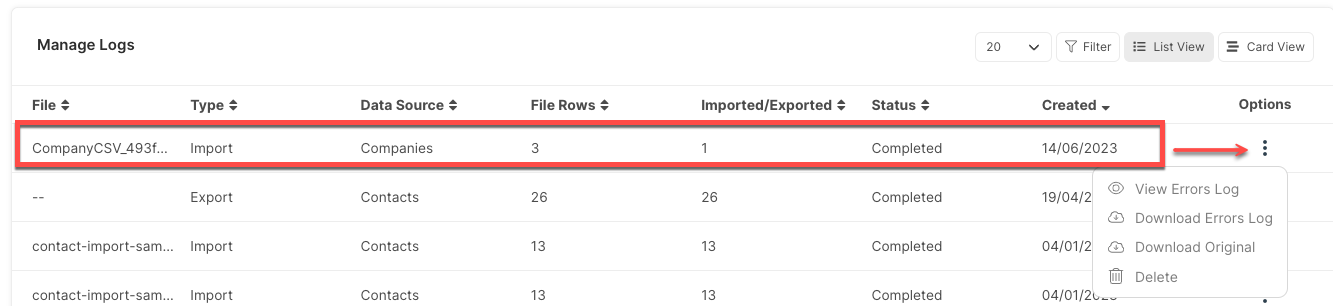
Clicking Options allows you to:
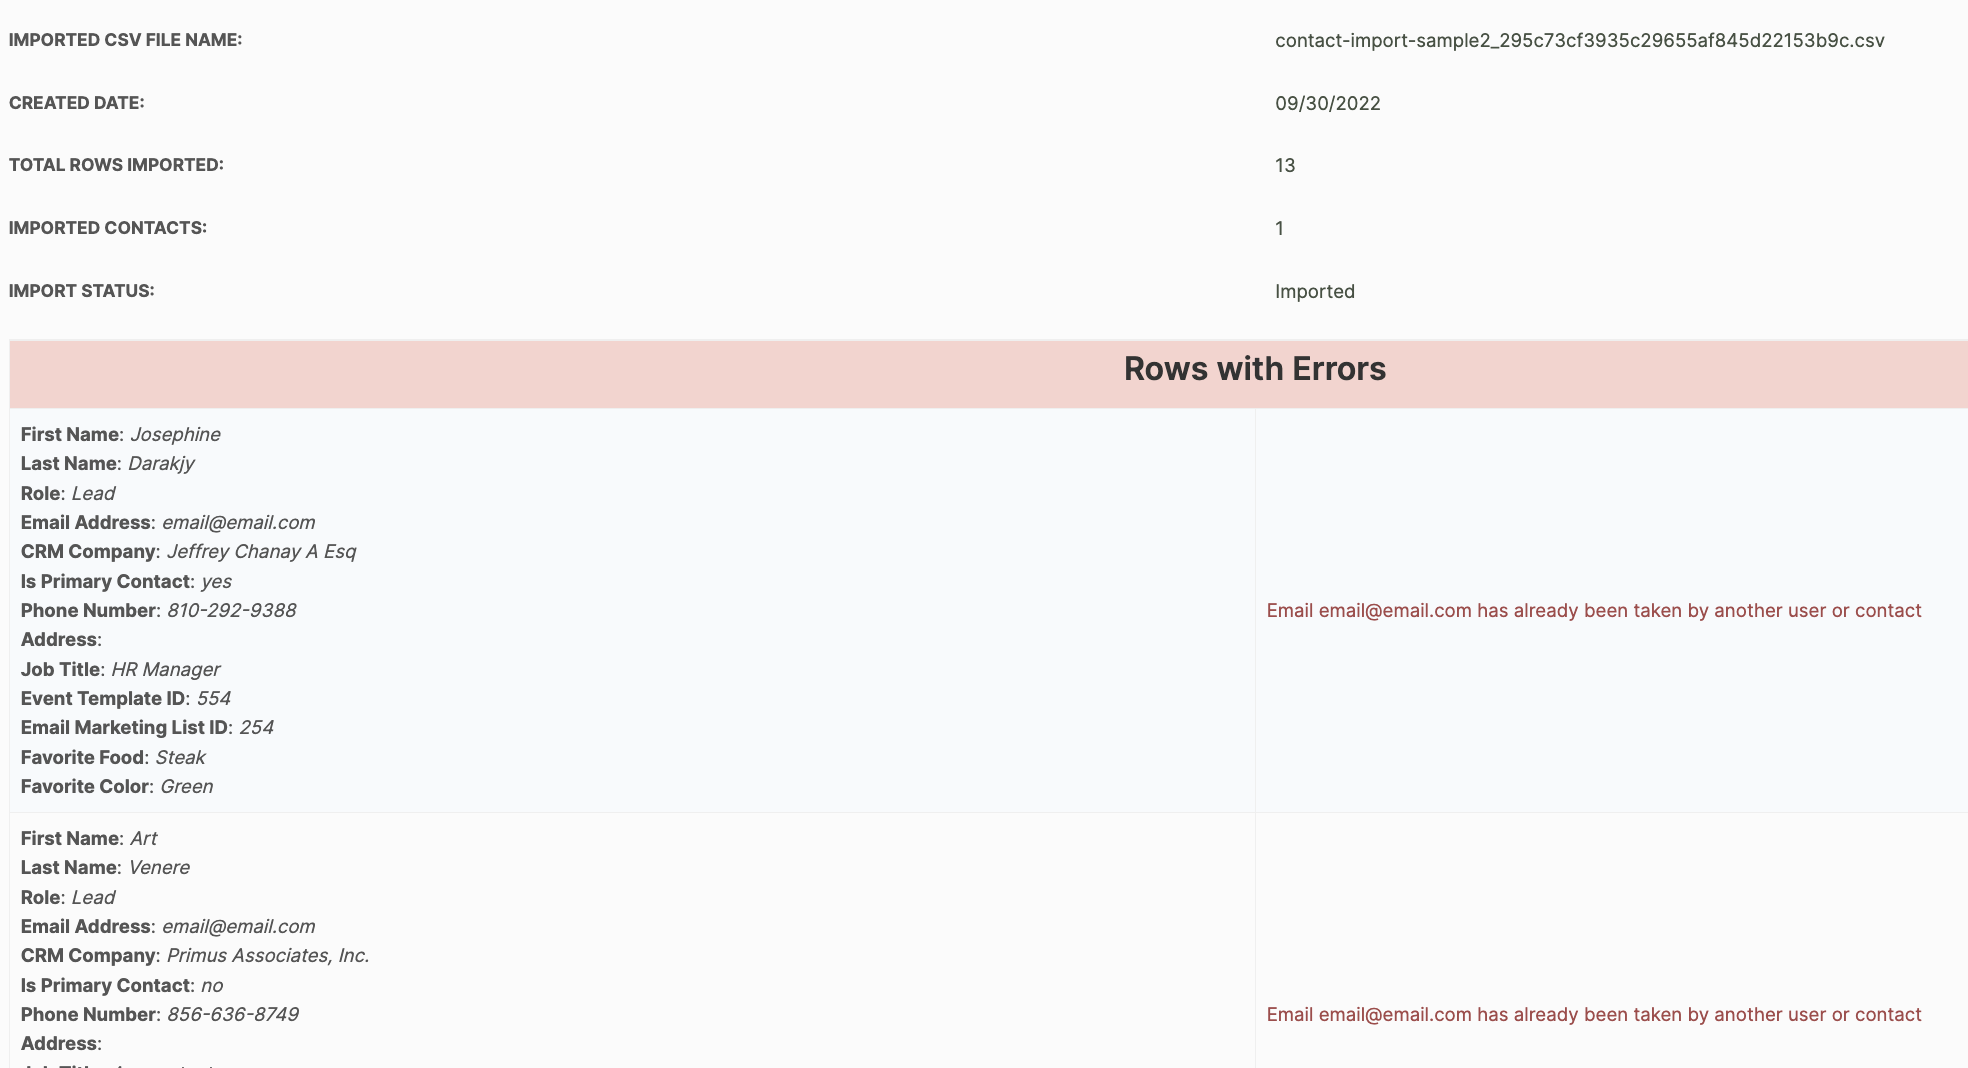
View Errors Log: This shows you the specific rows that caused errors in your import.
Download Errors Log: The original CSV with an extra column to show the errors will download to your device.
Download Original: The original CSV will download to your device.
Delete: This will remove that import from your logs. The system will ask you to confirm before deleting. Please note that this action cannot be undone.
CRM Target Imports appear in this same log, labeled distinctly so you can tell the type at a glance. Opening a Target import shows a summary plus, if any rows failed, an errors table listing each failed row beside its specific error message, and a link to download just the failed rows as a CSV so you can correct them and re import.
Download a Sample CSV
This CSV is not meant to be static, but rather a starting point for you to help understand the concepts. Every scenario is different, so you'll want to modify, add to, rearrange, etc. your CSV before Importing.
This is an example of a Contact Import CSV.
DOWNLOAD: Sample CSV Import File
What is CRM Exports?
The Contact and Company Export function allows you to export all or selected default and custom data for your Contacts. Once an export is initiated, you can download the CSV file.
Company Exports
To export your Companies you will want to navigate to CRM > Companies and then select the "Export" button.

This will open an options window where you can select and arrange the fields you would like included in the export.
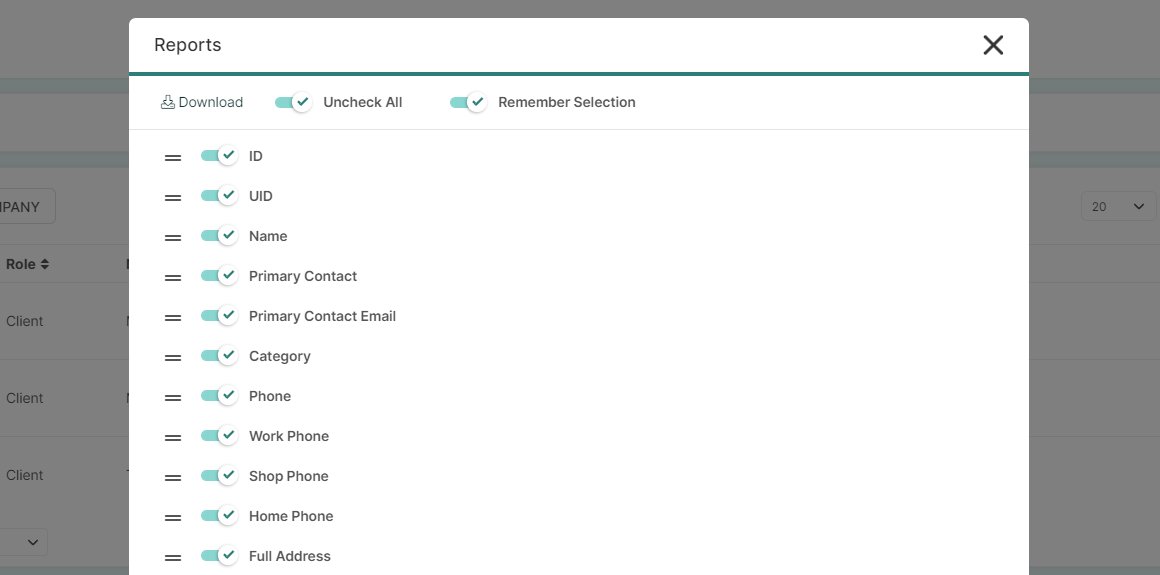
Download: Click this button when you are ready to initiate the export.
Uncheck/Check All: This toggle will update depending on what you have selected. Uncheck All will uncheck/toggle all of the fields below that are currently checked/toggled. Check All will check/toggle all of the fields below.
Remember Selection: Always running the same export? When this option is enabled the options selected will be the default option the next time you go to run an export.
You can use the = icon to click and drag to arrange the fields in the order you would like to see them in the CSV.
Contact Exports
To export your Contacts or Individuals, you will want to navigate to CRM > Contacts and then select the "Export" button.

This will open an options window where you can select and arrange the fields you would like included in the export.
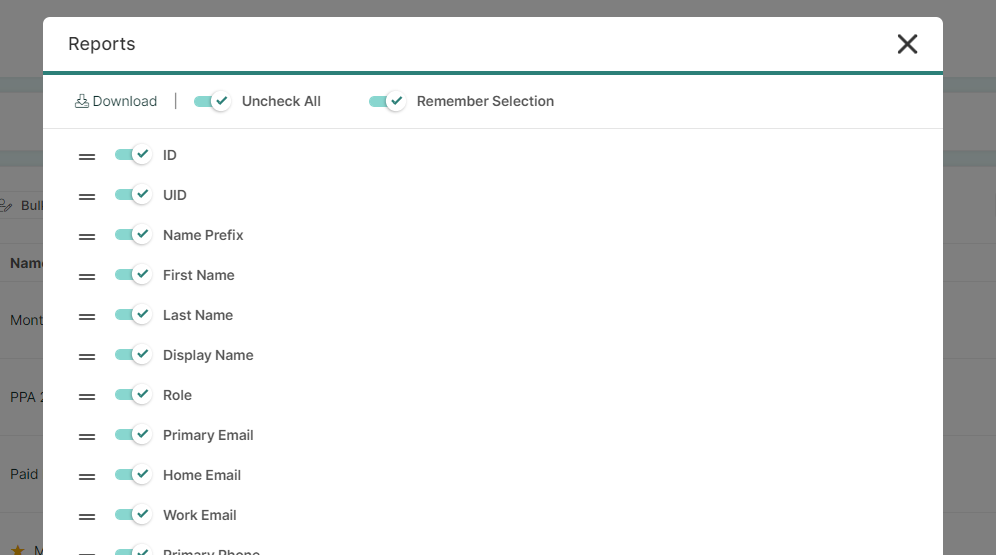
Download: Click this button when you are ready to initiate the export.
Uncheck/Check All: This toggle will update depending on what you have selected. Uncheck All will uncheck/toggle all of the fields below that are currently checked/toggled. Check All will check/toggle all of the fields below.
Remember Selection: Always running the same export? When this option is enabled the options selected will be the default option the next time you go to run an export.
You can use the = icon to click and drag to arrange the fields in the order you would like to see them in the CSV.
What happens after an Export?
After you initiate an export you will be redirected to the Export/Import Logs page. You should see a message at the top of the page indicating that a request has started and you will be notified by email when complete.
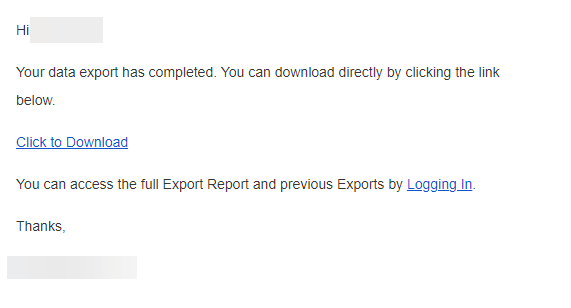
When the export has completed, you will be notified by a system email and you will have the option to download directly from the email or via the Export/Import Logs page.
You will also have access if you navigate to the Export/Import logs page directly.
On this page you will have the options to Download or Delete previous exports.